


Feb . 14, 2025 20:23 Back to list
High quality Mineral Fiber Ceiling Tiles
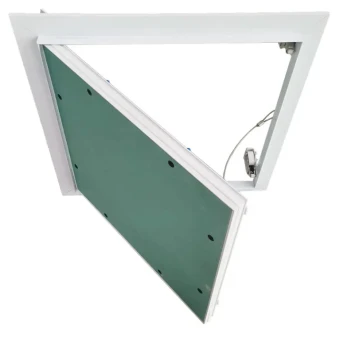
Installing a drywall ceiling hatch offers both functionality and aesthetics to any room, providing easy access to concealed utilities or spaces while maintaining a seamless appearance. Whether you're undertaking a home improvement project or managing commercial property maintenance, understanding the nuances of drywall ceiling hatch installation is crucial to achieving a professional finish.
For an added level of expertise in drywall ceiling hatch installations, integrating soundproofing elements can be highly beneficial, especially in multi-story buildings or office environments. Adding acoustic insulation around the hatch perimeter can significantly reduce noise transmission, creating a quieter and more comfortable environment. Trustworthiness in this installation process derives from adherence to local building codes and professional standards. Consult these regulations when selecting materials and methods to ensure compliance and safety. It may be beneficial to hire or consult with certified professionals, especially for installations in commercial settings or when fire-rated assemblies are required. Regular maintenance of your drywall ceiling hatch is fundamental to its longevity and functionality. Periodically inspect the hatch and frame for any signs of wear or damage, such as cracks or loosened fittings. Addressing these issues promptly will prevent more significant problems and ensure continuous, easy access to the space above. An expert installation can significantly enhance property value and utility. Prospective property owners or lessees frequently look for these practical yet often overlooked features that signal a well-maintained and thoughtfully designed space. In summary, expert execution of a drywall ceiling hatch installation not only meets practical needs but also enhances the overall aesthetic and functional value of a property. From accurate cutting and frame installation to the choice of materials and maintenance, each step plays a vital role in achieving a successful outcome. Adhering to best practices and professional standards will ensure that the hatch remains a useful and unobtrusive element of your ceiling, providing reliable access and peace of mind for years to come.
For an added level of expertise in drywall ceiling hatch installations, integrating soundproofing elements can be highly beneficial, especially in multi-story buildings or office environments. Adding acoustic insulation around the hatch perimeter can significantly reduce noise transmission, creating a quieter and more comfortable environment. Trustworthiness in this installation process derives from adherence to local building codes and professional standards. Consult these regulations when selecting materials and methods to ensure compliance and safety. It may be beneficial to hire or consult with certified professionals, especially for installations in commercial settings or when fire-rated assemblies are required. Regular maintenance of your drywall ceiling hatch is fundamental to its longevity and functionality. Periodically inspect the hatch and frame for any signs of wear or damage, such as cracks or loosened fittings. Addressing these issues promptly will prevent more significant problems and ensure continuous, easy access to the space above. An expert installation can significantly enhance property value and utility. Prospective property owners or lessees frequently look for these practical yet often overlooked features that signal a well-maintained and thoughtfully designed space. In summary, expert execution of a drywall ceiling hatch installation not only meets practical needs but also enhances the overall aesthetic and functional value of a property. From accurate cutting and frame installation to the choice of materials and maintenance, each step plays a vital role in achieving a successful outcome. Adhering to best practices and professional standards will ensure that the hatch remains a useful and unobtrusive element of your ceiling, providing reliable access and peace of mind for years to come.
Latest news
-
Durable Ceiling T Grid Systems | Easy InstallationNewsAug.29,2025
-
PVC Gypsum Ceiling: Durable, Laminated Tiles for Modern SpacesNewsAug.28,2025
-
Pvc Gypsum Ceiling Is DurableNewsAug.21,2025
-
Mineral Fiber Board Is DurableNewsAug.21,2025
-
Ceiling Tile Clip Reusable DesignNewsAug.21,2025
-
Ceiling T Grid Modular DesignNewsAug.21,2025


