Nov . 10, 2024 05:43 Back to list
Guide to Installing an Access Panel in Your Ceiling Efficiently and Effectively
How to Install an Access Panel in a Ceiling
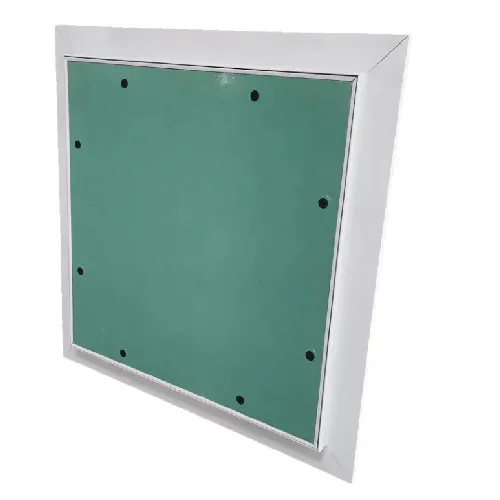
Installing an access panel in a ceiling is a practical DIY project that can provide easy access to plumbing, electrical wiring, or other utilities concealed behind drywall. These panels allow for quick inspections and repairs without the need for extensive demolition. In this guide, we will walk you through the steps necessary to successfully install an access panel in your ceiling.
Materials Needed
Before beginning, gather the following materials and tools - Access panel (the size will depend on your specific needs) - Drywall saw or utility knife - Measuring tape - Level - Screwdriver or drill - Stud finder (optional) - Safety goggles - Dust mask
Step 1 Selecting the Location
Identify the area of the ceiling where you want to install the access panel. Ensure it’s positioned above the utility area you need access to and does not interfere with existing fixtures, such as light fixtures or ceiling fans. It’s also important to check if there are any electrical wires or plumbing lines running through that area.
Step 2 Measuring and Marking
Once you have chosen the location, use a measuring tape to determine where to cut. The support structure behind your drywall usually consists of studs, so try to find a spot between two studs for easier installation. If needed, use a stud finder to locate the studs.
Using a pencil, mark out the dimensions of your access panel on the ceiling. Remember to leave a few inches around the perimeter of the access panel for necessary framing.
Step 3 Cutting the Opening
Before cutting, put on safety goggles and a dust mask to protect yourself from debris. Use a drywall saw or a utility knife to carefully cut along the marked lines. If you encounter any obstacles such as wires or pipes, stop and reassess the situation, moving the panel if necessary.
how to install access panel in ceiling

Step 4 Installing the Frame
Most access panels come with a frame that needs to be secured within the opening. Insert the frame into the cutout and use a level to ensure it is straight. Using screws, secure the frame to the existing ceiling structure. Make sure it’s anchored firmly so that it can support the panel when closed.
Step 5 Inserting the Access Panel
After the frame is securely in place, take the access panel and fit it into the frame. Most panels are designed to either snap into place or be screwed in. Make sure it sits flush with the ceiling to provide a neat finish. If the panel has locks or latches, ensure they function properly.
Step 6 Finishing Touches
To create a seamless look, you may want to paint or texture the access panel and surrounding area to match the ceiling. Use a ceiling paint to provide an even coat, making the access point less noticeable.
Step 7 Testing the Access
Once the paint has dried, test the access panel by opening and closing it a few times. Verify that it operates smoothly and that the frame is secure. If it feels loose or wobbly, consider adding additional screws or adjusting the frame.
Conclusion
Installing an access panel in your ceiling is a straightforward process that can enhance the functionality of your home while preserving its aesthetic. By following these steps, you will create an efficient access point for maintenance or repairs. Always remember to work safely, and don’t hesitate to reach out to a professional if you encounter any complicated issues during your installation. Happy DIY-ing!
-
Quality Ceiling Trap Doors & Access Panels | Easy & Secure AccessNewsAug.30,2025
-
Durable Ceiling T Grid Systems | Easy InstallationNewsAug.29,2025
-
PVC Gypsum Ceiling: Durable, Laminated Tiles for Modern SpacesNewsAug.28,2025
-
Pvc Gypsum Ceiling Is DurableNewsAug.21,2025
-
Mineral Fiber Board Is DurableNewsAug.21,2025
-
Ceiling Tile Clip Reusable DesignNewsAug.21,2025


