Dec . 14, 2024 21:08 Back to list
Steps to Install an Access Panel in a Drywall Ceiling
How to Install an Access Panel in a Drywall Ceiling
Installing an access panel in a drywall ceiling is a practical solution for accessing plumbing, electrical wiring, or HVAC components concealed within your ceiling. This task can be accomplished with basic tools and some DIY skills, making it a manageable project for many homeowners. Here's a step-by-step guide on how to install an access panel in a drywall ceiling.
Tools and Materials Needed
Before starting your installation, gather the following tools and materials
Tools - Utility knife - Measuring tape - Straight edge (cutting guide) - Stud finder - Drill with bits - Screwdriver - Level - Safety goggles - Dust mask
Materials - Access panel (choose a size that fits your needs) - Drywall screws (if needed) - Joint compound (for finishing edges) - Sandpaper (fine grit)
Step 1 Choose the Right Location
Identify the area where you want to install the access panel. Consider the following
- Ensure that the location is free from obstructions, such as beams or ducts. - Utilize a stud finder to locate any joists in the ceiling; this will help you position the panel correctly. - Make sure the selected area allows easy access to the components you need to reach.
Step 2 Measure and Mark
Once you have chosen the location, use a measuring tape to determine the dimensions of the access panel. Mark the exact area on the ceiling where the panel will be installed. Use a straight edge to draw clean lines that outline the shape of the panel.
Step 3 Cut the Opening
With your utility knife, carefully cut along the marked lines. Start by making a shallow cut to establish your line, then deepen the cut to go all the way through the drywall. Be cautious to avoid cutting any electrical wires or plumbing that may be hidden behind the wall.
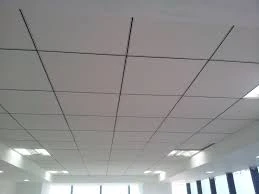
how to install access panel in drywall ceiling

After cutting, gently remove the drywall piece. This will create the opening for your access panel.
Step 4 Prepare the Frame
In some cases, a metal or plastic frame for the access panel may be needed for support. Refer to the manufacturer’s instructions specific to your access panel type. If required, secure the frame into place with screws, ensuring it is level and flush with the surrounding drywall.
Step 5 Install the Access Panel
Now, take the access panel and place it into the opening you've created. Push it gently until it fits snugly against the frame or drywall. Depending on the model, you may need to secure it using hinges, clips, or screws as outlined in the panel instructions. Ensure that it operates smoothly and is easy to open and close.
Step 6 Finishing Touches
To enhance the appearance of your access panel, you can apply joint compound around the outside edges. This helps blend the panel into the ceiling and gives it a professional finish. Once applied, allow the compound to dry fully.
After drying, sand the area lightly with fine-grit sandpaper until it’s smooth and blends seamlessly with the surrounding ceiling. If desired, you can paint the access panel to match the existing ceiling color.
Step 7 Clean Up
Once the installation and finishing work are complete, clean up the area. Dispose of any drywall scraps and dust and store your tools. Take a moment to admire your work!
Conclusion
Installing an access panel in a drywall ceiling doesn't have to be intimidating. By carefully selecting the location, measuring accurately, and following these steps, you can create a functional entry point for maintenance and repairs. This addition not only enhances accessibility but also improves the efficiency of managing plumbing, wiring, or HVAC systems hidden behind drywall. Whether you're a seasoned DIYer or new to home improvement projects, this task can be completed in a few hours and add value to your home. Happy DIYing!
-
Quality Ceiling Trap Doors & Access Panels | Easy & Secure AccessNewsAug.30,2025
-
Durable Ceiling T Grid Systems | Easy InstallationNewsAug.29,2025
-
PVC Gypsum Ceiling: Durable, Laminated Tiles for Modern SpacesNewsAug.28,2025
-
Pvc Gypsum Ceiling Is DurableNewsAug.21,2025
-
Mineral Fiber Board Is DurableNewsAug.21,2025
-
Ceiling Tile Clip Reusable DesignNewsAug.21,2025


