Dec . 27, 2024 13:40 Back to list
how to install a ceiling access panel
How to Install a Ceiling Access Panel
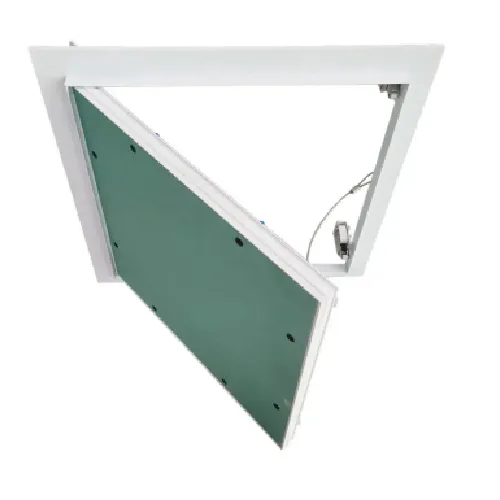
If you're considering installing a ceiling access panel, whether for maintenance purposes or to access plumbing and electrical systems, this guide will provide you with a step-by-step process to ensure a smooth installation. An access panel simplifies access to hidden fixtures and can help in maintaining your home or workspace efficiently and effectively.
What You'll Need
Before you start the installation, gather the necessary materials and tools
- Ceiling access panel kit (available at most hardware stores) - Measuring tape - Drywall saw or utility knife - Level - Screwdriver - Stud finder - Safety goggles - Dust mask
Step 1 Choose the Right Location
The first step is to select an appropriate location for your access panel. Ensure that it provides sufficient access to the plumbing, electrical, or HVAC systems you wish to reach. Avoid placing the panel in areas that may obstruct beams, crossbars, or insulation.
Step 2 Measure and Mark
Use your measuring tape to determine the dimensions of the access panel. Most panels are either 14x14 inches or 16x16 inches, but size may vary depending on the model. Once you have the dimensions, mark a square or rectangular area on the ceiling with a pencil. Use a level to ensure your lines are straight.
Step 3 Check for Obstructions
Before cutting into the ceiling, use a stud finder to check for any beams, wires, or plumbing lines within your marked area. This step is crucial as it helps avoid damage to existing structures and ensures your panel can be installed without complications.
Step 4 Cut the Opening
how to install a ceiling access panel

Now it’s time to cut the ceiling. Use a drywall saw or a utility knife to carefully cut along the marked lines. Start from one corner and follow the lines precisely to ensure that the opening fits the access panel snugly. Once you’ve cut out the square or rectangle, remove the excess drywall and clear any debris.
Step 5 Prepare the Access Panel
If your access panel comes with a frame or mounting brackets, attach them according to the manufacturer’s instructions. This might involve screwing the framing to the ceiling around the cut-out area. Make sure it is secure and level, as an uneven frame can cause the panel to fit poorly.
Step 6 Install the Access Panel
Position the access panel into the opening you've cut. Press it firmly against the mounting frame, ensuring that it aligns properly. Many access panels simply snap into place, while others may require screws to secure them. If your model requires screws, use the screwdriver to fasten the panel as per the instructions.
Step 7 Clean Up
After the panel is securely installed, clean the surrounding area. Sweep away any dust and debris, and dispose of any leftover materials. It’s also a good idea to paint or touch up the ceiling around the access panel if necessary, ensuring a seamless appearance.
Step 8 Test the Access Panel
Once installed, open and close the access panel several times to ensure it operates smoothly. Check that it’s easy to access and that the fit is snug. This is also a good time to confirm that it doesn’t block any lights or air vents.
Conclusion
Installing a ceiling access panel can be a straightforward DIY project that significantly benefits your home or workspace. Whether you need to access plumbing, electrical work, or HVAC systems, an access panel makes maintenance easy and efficient. By following the above steps, you will ensure a professional-looking installation that enhances both functionality and aesthetic appeal. Remember, safety comes first, so always wear appropriate protective gear and take necessary precautions during installation. Happy DIYing!
-
Quality Ceiling Trap Doors & Access Panels | Easy & Secure AccessNewsAug.30,2025
-
Durable Ceiling T Grid Systems | Easy InstallationNewsAug.29,2025
-
PVC Gypsum Ceiling: Durable, Laminated Tiles for Modern SpacesNewsAug.28,2025
-
Pvc Gypsum Ceiling Is DurableNewsAug.21,2025
-
Mineral Fiber Board Is DurableNewsAug.21,2025
-
Ceiling Tile Clip Reusable DesignNewsAug.21,2025


