Dec . 12, 2024 10:45 Back to list
how to install an access panel in the ceiling
How to Install an Access Panel in the Ceiling
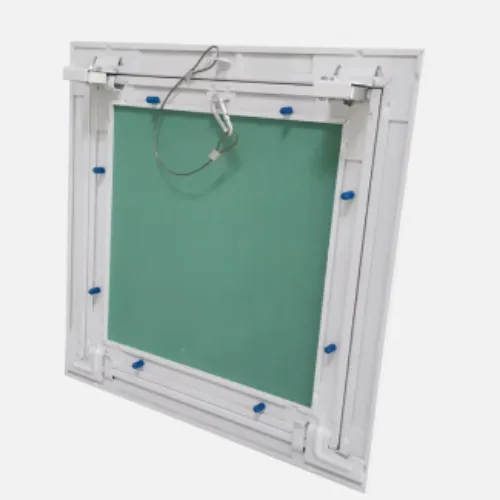
Installing an access panel in your ceiling is a practical and efficient solution for gaining easy access to plumbing, electrical systems, or ductwork that’s concealed behind walls or ceilings. Whether you're making upgrades, repairs, or simply need to check on your systems, having an access panel can save you time and prevent damage to your walls and ceilings. In this guide, we’ll walk you through the step-by-step process of installing an access panel in the ceiling effectively and safely.
Materials Needed
Before you begin, ensure you have all the necessary materials and tools. You will need
- Access panel (choose a size appropriate for your needs) - Drywall saw or utility knife - Measuring tape - Screwdriver - Level - Stud finder - Safety goggles - Dust mask
Step-by-Step Guide
1. Determine Location The first step is choosing the best location for your access panel. Consider what systems you need to access, like plumbing pipes, electrical wiring, or HVAC ducts. Make sure the location is unobstructed and easily reachable.
2. Measure and Mark Once you’ve chosen a location, use a stud finder to locate the ceiling joists. It’s important to avoid cutting through any joists as this can compromise the structural integrity of your ceiling. Measure the dimensions of the access panel and mark the outline on the ceiling with a pencil.
how to install an access panel in the ceiling

3. Cut the Opening Using a drywall saw or utility knife, carefully cut along the marked outline. Make sure to wear safety goggles and a dust mask to protect yourself from debris. Once the opening is cut, gently remove any excess debris and ensure the edges are smooth.
4. Install the Access Panel Depending on the type of access panel you have, installation can vary. Most panels come with a frame that fits snugly into the opening. Place the frame into the cutout, ensuring it is level. Most access panels will have clips or screws to secure them. If your panel has mounting flanges, you can screw them directly into the surrounding ceiling.
5. Secure the Panel Follow the manufacturer’s instructions to secure the panel firmly in place. This may involve using screws through the mounting flanges into the ceiling. Be careful not to overtighten, as this could damage the panel or the drywall.
6. Finishing Touches Once the panel is secured, you can choose to paint it to match the ceiling. Use ceiling paint to ensure a uniform look. If your access panel is textured, you may also want to replicate this texture around the edges for a seamless appearance.
7. Final Inspection After installation, check to ensure that the panel opens and closes smoothly. Make sure there are no gaps between the panel and the ceiling surface. This will help to maintain a clean look and prevent dust or pests from entering the crawl space or attic.
Conclusion
Installing an access panel in your ceiling is a straightforward home improvement project that can offer significant benefits. By following these steps, you can ensure that your access panel is secure, functional, and visually appealing. As with any DIY project, take your time and don’t hesitate to consult professionals if you encounter issues beyond your skill level. With a little effort, you’ll have an easily accessible opening that makes it simpler to maintain and check on essential systems in your home. Happy DIYing!
-
Quality Ceiling Trap Doors & Access Panels | Easy & Secure AccessNewsAug.30,2025
-
Durable Ceiling T Grid Systems | Easy InstallationNewsAug.29,2025
-
PVC Gypsum Ceiling: Durable, Laminated Tiles for Modern SpacesNewsAug.28,2025
-
Pvc Gypsum Ceiling Is DurableNewsAug.21,2025
-
Mineral Fiber Board Is DurableNewsAug.21,2025
-
Ceiling Tile Clip Reusable DesignNewsAug.21,2025


