Dec . 21, 2024 05:11 Back to list
Guide to Installing a Ceiling Access Panel Efficiently and Effectively
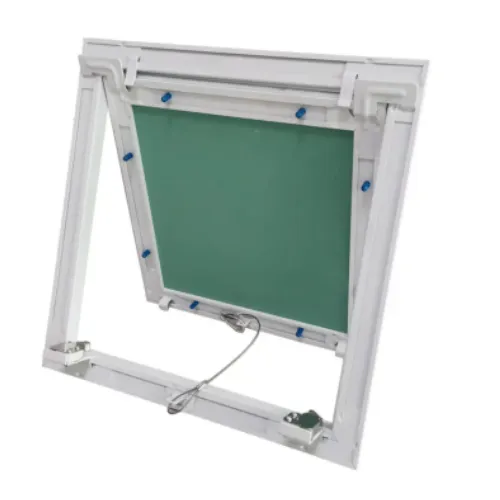
How to Install an Access Panel in the Ceiling
Installing an access panel in the ceiling can be a straightforward task if approached with the right tools and techniques. Access panels provide a practical solution for gaining entry to areas behind ceilings, such as ductwork, plumbing, or electrical systems, without causing damage to the surrounding structure. This guide will walk you through the necessary steps to install an access panel effectively.
Tools and Materials Needed
Before beginning the installation, gather the following tools and materials
Tools - Tape measure - Level - Utility knife or drywall saw - Screwdriver or cordless drill - Stud finder - Safety glasses - Dust mask
Materials - Access panel (size according to your needs) - Drywall screws (if required) - Joint compound (for finishing) - Drywall tape (if needed) - Paint (to match the ceiling)
Step 1 Choose the Location
Selecting the appropriate location for the access panel is crucial. Identify the area you need to access, ensuring it is not obstructed by joists or electrical wiring. Use a stud finder to locate any joists or beams in the ceiling. Ideally, the access panel should be placed where it is easily reachable, yet unobtrusive.
Step 2 Mark the Cut-Out
Once you've determined the location, hold the access panel against the ceiling to mark its outline. Use a pencil to trace around the panel, ensuring it is level. Double-check your measurements to avoid cutting too large or misaligned.
Step 3 Cut the Drywall
Using a utility knife or drywall saw, carefully cut along the marked lines. If you encounter any resistance, ensure that you are not cutting through any wires or plumbing. For a neat finish, cut out the drywall in a square shape that corresponds to the access panel.
how to install an access panel in the ceiling

Step 4 Install the Access Panel
Position the access panel into the cut-out you’ve created. Many panels are designed to fit snugly into the hole, with some even featuring clips or hinges that secure them in place. Ensure the panel is flush with the ceiling. If the panel requires screws for mounting, install them now to secure it firmly.
Step 5 Finish the Edges
To enhance the appearance of your new access panel and ensure a seamless look, apply joint compound around the edges of the panel. Use a putty knife to smooth the compound over any gaps between the panel and the ceiling. Once the compound is dry, lightly sand the area to create a smooth finish.
Step 6 Paint and Decorate
After sanding, paint the access panel to match the surrounding ceiling. This step is essential for maintaining a cohesive look throughout the room. Depending on the type of access panel you've installed, you may want to consider decorative options if it will be visible. There are panels available that can be painted or textured to blend in with the ceiling.
Step 7 Test the Access Panel
Once the paint has dried, test the access panel by opening and closing it several times. Make sure it operates smoothly and that any locking mechanisms function correctly. If everything is in order, your access panel installation is complete!
Additional Tips and Considerations
- Safety First Always wear safety glasses and a dust mask while cutting drywall to protect yourself from debris. - Considerations for Insulated Ceilings If you're working in an insulated ceiling area, ensure you carefully manage any insulation materials to avoid creating gaps that can lead to energy loss.
- Consult a Professional If you are unsure about cutting into the ceiling or if you're dealing with electrical or plumbing work close by, consider hiring a professional to ensure safety and compliance with local building codes.
In conclusion, installing an access panel in the ceiling can be a practical solution for maintaining essential structures without extensive renovations. By following the steps outlined above, you can successfully install your access panel and ensure easy access for necessary maintenance and repairs in the future.
-
Quality Ceiling Trap Doors & Access Panels | Easy & Secure AccessNewsAug.30,2025
-
Durable Ceiling T Grid Systems | Easy InstallationNewsAug.29,2025
-
PVC Gypsum Ceiling: Durable, Laminated Tiles for Modern SpacesNewsAug.28,2025
-
Pvc Gypsum Ceiling Is DurableNewsAug.21,2025
-
Mineral Fiber Board Is DurableNewsAug.21,2025
-
Ceiling Tile Clip Reusable DesignNewsAug.21,2025


