Dec . 09, 2024 19:24 Back to list
Installing T-Bar Ceiling Grid in Simple Steps for Your Home Project
How to Install a T-Bar Ceiling Grid
Installing a T-bar ceiling grid, also known as a drop ceiling, is a practical way to improve the acoustics and aesthetics of a room while providing easy access to plumbing and electrical systems above. Whether you're looking to renovate your basement, office, or any other space, this guide will help you understand the steps involved in installing a T-bar ceiling grid.
Materials Needed
To get started, gather the following materials - T-bar grid components (main runners, cross tees, and wall angles) - Ceiling tiles - Suspension wires - Wall clips (if needed) - A measuring tape - A level - A chalk line - A utility knife - Wire cutters - A drill with appropriate bits - Safety goggles and gloves
Step 1 Planning and Measurements
Before you begin installation, it’s crucial to plan where the grid will go. Measure the dimensions of the room to determine how many panels you will need. A standard ceiling tile usually measures 2x2 feet or 2x4 feet. Mark the location of the ceiling grid on the walls using a chalk line at the desired height. Typically, a drop ceiling is placed around 5-7 inches below the existing ceiling, but this can vary based on your needs.
Step 2 Installing the Wall Angle
Begin by installing the wall angle pieces along the marked line around the perimeter of the room. Use a level to ensure that the wall angles are straight. Cut the angles to fit around corners and secure them in place using screws. Be sure to leave openings for any light fixtures or vents you plan to install later.
Step 3 Installing the Main Runners
Next, you will install the main runners. These are the long sections of the grid that will run perpendicular to the walls. Cut the main runner to the required length and hang it from the ceiling using suspension wires. Depending on the design of your ceiling, the spacing between hangers should generally be about 4 feet apart.
To attach the wires, drill small holes into the ceiling and feed the wires through. Use wire cutters to adjust the length, ensuring that the main runner is level. Secure the wires with wire clips or clamps.
how to install t-bar ceiling grid

Step 4 Adding Cross Tees
Once the main runners are securely in place, it’s time to install cross tees. These shorter sections connect between the main runners and support the ceiling tiles. Typically, cross tees should be spaced every 2 feet to support the tiles adequately. Insert the cross tees into the slots on the main runners, ensuring everything is aligned properly.
Step 5 Installing Ceiling Tiles
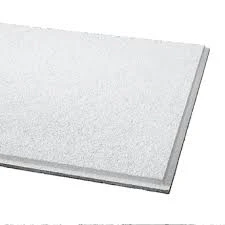
With the grid in place, you can now install the ceiling tiles. If you are using 2x2 tiles, simply lift them into the grid and place them in the openings. Ensure they are flush against the grid. For 2x4 tiles, the same process applies, though you might need to adjust the cross tee spacing accordingly.
Step 6 Finishing Touches
After all the tiles are installed, check for any gaps or misalignment. Make necessary adjustments to ensure a neat and polished look. If you have light fixtures, vents, or other installations, now is the time to install them according to manufacturer instructions.
Step 7 Clean Up
Finally, tidy up the workspace by disposing of any debris, excess materials, and tools. Stand back and admire your new drop ceiling!
Conclusion
Installing a T-bar ceiling grid is a manageable DIY project that can dramatically transform your space. With some basic tools and a little know-how, you can achieve a professional-looking ceiling that enhances any room. Remember to take your time during each step and measure carefully to ensure a successful installation. Happy renovating!
-
Quality Ceiling Trap Doors & Access Panels | Easy & Secure AccessNewsAug.30,2025
-
Durable Ceiling T Grid Systems | Easy InstallationNewsAug.29,2025
-
PVC Gypsum Ceiling: Durable, Laminated Tiles for Modern SpacesNewsAug.28,2025
-
Pvc Gypsum Ceiling Is DurableNewsAug.21,2025
-
Mineral Fiber Board Is DurableNewsAug.21,2025
-
Ceiling Tile Clip Reusable DesignNewsAug.21,2025


