Nov . 19, 2024 23:15 Back to list
how to install t-bar ceiling grid
How to Install a T-Bar Ceiling Grid
Installing a T-bar ceiling grid is a practical way to enhance the aesthetics of a room while also allowing for easy access to wiring and ductwork. This type of ceiling is especially popular in commercial spaces but can also be an excellent choice for home improvement projects. Here’s a step-by-step guide on how to install a T-bar ceiling grid.
Materials and Tools Needed
Before you begin the installation, gather all the necessary materials and tools. You will need
- T-bar ceiling tiles - Main runners (long metal bars) - Cross tees (perpendicular metal bars) - Hanging wires - Ceiling clips or fasteners - A measuring tape - Level - Chalk line - Tin snips (to cut runners) - Ladder
Step 1 Measure the Room
Start by measuring the dimensions of the room where you plan to install the ceiling grid. Determine the layout you want, typically a grid pattern. Use a chalk line to mark where the main runners will be placed. Typically, these should be spaced either 24 or 48 inches apart, depending on your specific grid design and ceiling tile dimensions.
Step 2 Establish the Height
Decide on the height of the new ceiling. This may depend on the existing conditions of the room and any overhead utilities. Once you have determined the height, mark it on the walls with a chalk line. This will serve as a guide for installing the first row of main runners.
Step 3 Install the Main Runners
how to install t-bar ceiling grid

Using the marks as a guide, install the first main runner by attaching it to the ceiling with hanging wires. Space the wires every 4 feet along the length of the runner. Use a level to ensure that the runner is straight and properly aligned. Secure the runner with screws or clips.
Repeat this process for the other main runners, ensuring that they are all at the same height
.Step 4 Add Cross Tees
Once the main runners are securely in place, it’s time to add the cross tees. These are typically installed at right angles to the main runners. Measure and cut the cross tees to the desired length, usually depending on the tile size. Insert the cross tees into the slots provided in the main runners to form a grid.
Step 5 Install the Ceiling Tiles
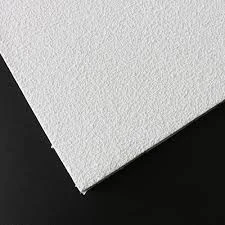
Now that your grid is in place, it’s time to install the ceiling tiles. Simply lift each tile into the ceiling grid and fit it into place. Make sure they are snug and secure within the grid.
Step 6 Final Adjustments and Cleaning
After all tiles are installed, inspect the ceiling for any misalignment or gaps. Make any necessary adjustments by shifting tiles or adjusting the grid components. Finally, clean the area and ensure that everything looks tidy.
Conclusion
Installing a T-bar ceiling grid can significantly improve the look of a room and provide practical benefits for maintenance. While the process requires careful planning and attention to detail, the results are highly rewarding. With patience and the right tools, anyone can accomplish this installation, transforming their space effortlessly. Enjoy your newly installed ceiling!
-
Quality Ceiling Trap Doors & Access Panels | Easy & Secure AccessNewsAug.30,2025
-
Durable Ceiling T Grid Systems | Easy InstallationNewsAug.29,2025
-
PVC Gypsum Ceiling: Durable, Laminated Tiles for Modern SpacesNewsAug.28,2025
-
Pvc Gypsum Ceiling Is DurableNewsAug.21,2025
-
Mineral Fiber Board Is DurableNewsAug.21,2025
-
Ceiling Tile Clip Reusable DesignNewsAug.21,2025


