Dec . 22, 2024 18:13 Back to list
Guide to Installing T-Bar Ceiling Grid System Step by Step
How to Install a T-Bar Ceiling Grid
Installing a T-bar ceiling grid can be an effective way to create a dropped ceiling in your home or office. This type of ceiling not only hides unsightly wires and ducts but also provides an opportunity to enhance sound insulation and improve lighting. In this article, we will guide you through the process of installing a T-bar ceiling grid step by step.
Materials and Tools Needed
Before beginning your project, gather the necessary materials and tools. You will need
- T-bar grid components (main runners, cross tees, and wall angles) - Ceiling tiles - Measuring tape - Level - Chalk line - Hammer or rubber mallet - Drywall screws - Screwdriver or drill - Wire cutters - Safety glasses
Step 1 Planning and Measuring
The first step is to measure the area where you want to install the T-bar ceiling grid. Determine the size of your grid based on the dimensions of the room. Generally, T-bar ceilings are installed in a grid of 2-foot by 2-foot or 2-foot by 4-foot tiles.
Once you have your measurements, use a chalk line to mark the perimeter of the grid on the walls at the desired height. Make sure to account for any light fixtures or ceiling fans that will need to fit within the grid, ensuring that they are positioned correctly.
Step 2 Installing Wall Angles
Using drywall screws, attach the wall angles to the marked line on the walls. Make sure the angles are level, as any slope will affect the overall look of your ceiling. Use a level for accuracy and secure the wall angles at regular intervals, generally every 12 to 16 inches.
Step 3 Installing Main Runners
Next, you will install the main runners, which are the long steel bars that run the length of the room. Typically, main runners should be placed 4 feet apart and should be hung using wire hangers.
how to install t bar ceiling grid

To do this, cut wires into 24-inch lengths and loop them around the main runner at each end. Securely fasten the wires to the ceiling joists or structural supports using drywall screws, ensuring that the main runners are also level.
Step 4 Adding Cross Tees
Once the main runners are in place, it’s time to install the cross tees. These shorter pieces interconnect the main runners to form the grid. Insert the cross tees into the slots in the main runners. The standard spacing for cross tees is typically either 2 feet or 4 feet, depending on the size of your ceiling tiles.
As you insert the cross tees, make sure they are snug and level with the main runners. This is crucial, as any unevenness can create gaps in the ceiling tiles.
Step 5 Installing Ceiling Tiles
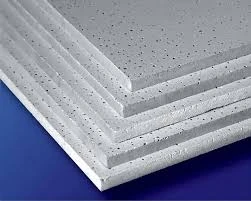
Now that the grid is in place, it’s time to install the ceiling tiles. Start at one corner and gently slide the tiles into the grid, ensuring they fit securely within each section. If you are using acoustic tiles, be mindful of their orientation, as some may have a designated face that should be visible.
Work your way across the room until all tiles are in place. For tiles that need to be cut to fit around fixtures or along the edges, measure accurately and use a utility knife to make clean cuts.
Step 6 Final Adjustments
Once all ceiling tiles have been installed, step back and inspect your work. Check for any tiles that may be misaligned or shifted during installation. Adjust if necessary by tapping them into place with a rubber mallet.
Finally, if you have any light fixtures that need to be installed or any additional finishing touches like crown molding, take care of those at this stage.
Conclusion
Installing a T-bar ceiling grid can be a rewarding DIY project that transforms the look and functionality of a space. With careful planning and execution, you can achieve a professional finish that will enhance your room for years to come. Always remember to prioritize safety and ensure that you have the right tools and materials before starting your project. Happy installing!
-
Quality Ceiling Trap Doors & Access Panels | Easy & Secure AccessNewsAug.30,2025
-
Durable Ceiling T Grid Systems | Easy InstallationNewsAug.29,2025
-
PVC Gypsum Ceiling: Durable, Laminated Tiles for Modern SpacesNewsAug.28,2025
-
Pvc Gypsum Ceiling Is DurableNewsAug.21,2025
-
Mineral Fiber Board Is DurableNewsAug.21,2025
-
Ceiling Tile Clip Reusable DesignNewsAug.21,2025


