Nov . 21, 2024 12:18 Back to list
how to install t bar ceiling grid
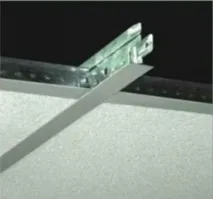
How to Install T-Bar Ceiling Grid A Comprehensive Guide
Installing a T-bar ceiling grid can transform the aesthetics of your space while providing practical benefits such as easier access to plumbing and electrical systems, better insulation, and enhanced acoustics. Whether you're renovating a basement, office, or any other area requiring a dropped ceiling, this step-by-step guide will help you navigate through the installation process effectively.
Tools and Materials Needed
Before you begin, gather the necessary tools and materials
- T-bar ceiling grid system (main runners and cross tees) - Ceiling tiles - Level - Tape measure - Chalk line - Screwdriver or drill - Wire cutters - Safety glasses - Ladder - Optional Power tools for cutting if needed
Step 1 Plan Your Layout
Begin by deciding the room's grid layout. Measure the dimensions of the room accurately. The grid system typically consists of main runners (which run the length of the room) and cross tees (which create the grid).
1. Determine Height Decide on the desired height of the ceiling to maintain enough space for any utilities above. 2. Design Layout Mark the main runner locations on the walls, typically spaced 4 feet apart. Use a chalk line to indicate where your main runners will be installed.
Step 2 Install Wall Angles (Optional)
If using wall angles is part of your design, cut the wall angles to size and install them along the chalk line that represents the height of your grid. Use screws to secure them to the wall. This provides a solid base for the grid system.
Step 3 Hang the Main Runners
1. Attach Hangers Install hanging wires from the ceiling to support the main runners. These should be spaced no more than 4 feet apart. Use a drill to attach the wire to the ceiling joists or beams. Make sure that the wires are level. 2. Insert Main Runners Snap the main runners into the hangers. Adjust them to ensure they are level. You can use a level for accurate positioning.
how to install t bar ceiling grid

Step 4 Insert Cross Tees
1. Measure and Cut Based on the size of your ceiling tiles, measure the distance for the cross tees. Typically, they are installed 2 feet apart but can vary depending on the tile size.
2. Install Cross Tees Slide the cross tees into the main runners, forming a grid pattern. Ensure that they fit securely and are flush with the main runners.
Step 5 Add Ceiling Tiles
Once the grid is in place, it’s time to install the ceiling tiles.
1. Choose Your Tiles Depending on your design preferences, select tiles that complement the room’s aesthetics. Tiles come in various materials and finishes, including acoustic, decorative, and moisture-resistant options. 2. Install the Tiles Carefully lift each tile and place it into the grid. Start from one corner and work your way across the room. Be cautious with fragile tiles, as they can break if handled improperly.
Step 6 Final Adjustments
After installing the tiles, take a step back to assess your work.
1. Check for Gaps Ensure all tiles fit snugly without gaps. Adjust excess tiles if necessary. 2. Clean Up Remove any debris or tools from the area, and inspect for any areas that may need touch-ups.
Conclusion
By following this comprehensive guide, you can install a T-bar ceiling grid with confidence. This cost-effective solution not only enhances the look of your space but also allows for easy access to overhead utilities when necessary. Remember to take your time, measure accurately, and maintain safety throughout the process. With a little effort, you can achieve a professionally installed ceiling that adds both functionality and style to your home or office. Happy installing!
-
Quality Ceiling Trap Doors & Access Panels | Easy & Secure AccessNewsAug.30,2025
-
Durable Ceiling T Grid Systems | Easy InstallationNewsAug.29,2025
-
PVC Gypsum Ceiling: Durable, Laminated Tiles for Modern SpacesNewsAug.28,2025
-
Pvc Gypsum Ceiling Is DurableNewsAug.21,2025
-
Mineral Fiber Board Is DurableNewsAug.21,2025
-
Ceiling Tile Clip Reusable DesignNewsAug.21,2025


