


Feb . 15, 2025 12:49 Back to list
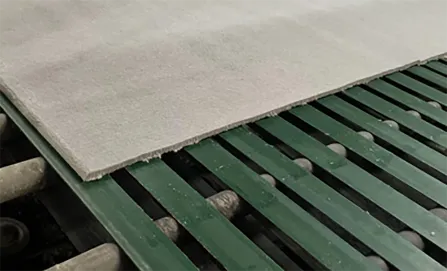
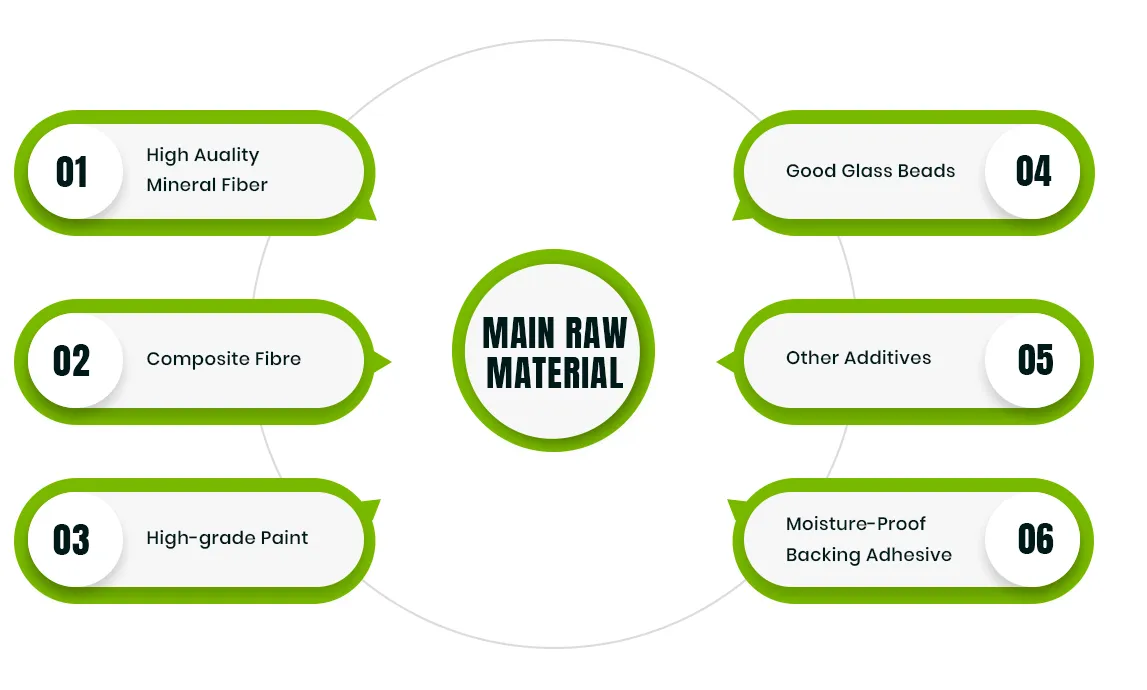
mineral fiber ceiling tiles
Installing an access panel in the ceiling may seem like a daunting task, especially for those unfamiliar with home renovation and improvement projects. However, with the right tools, guidance, and a bit of patience, it can be accomplished efficiently and safely. The goal here is to provide a comprehensive guide that embodies experience, expertise, authoritativeness, and trustworthiness, ensuring every step is clear and actionable.
6. Secure the Access Panel Align the access panel with the hole and secure it in place with the screws provided in the panel kit, using a drill for a firm fit. Ensure it sits flush with the ceiling surface for a neat appearance. A secure fit prevents any future sagging or displacement of the panel. 7. Double-Check Functionality After installation, test the panel by opening and closing it several times. This ensures it functions correctly and that no adjustments are needed. It's also an opportunity to verify that the panel aligns properly and remains esthetically pleasing. 8. Finish with Aesthetic Touches Even though the primary concern with access panels is function, aesthetics matter too. Painting or adding a trim around the panel can help it blend seamlessly with the ceiling. Use a primer and paint that match the ceiling to conceal the installation as much as possible. 9. Regular Maintenance and Inspection Lastly, remember that installation does not end once the panel is in place. Regular inspection to ensure the hinges and locks operate smoothly is recommended. Also, periodic checking that it remains tightly secured to the ceiling will ensure long-term durability and functionality. Choosing the right access panel is important and should not be overlooked. Consider the panel’s material, its fire-rating if applicable, and its resistance to moisture or other environmental factors that may affect the area where it's installed. By following these meticulous steps, installing an access panel in the ceiling becomes not just a task fulfilled, but a testament to thorough planning and execution. Emphasizing safety, precision, and functionality ensures the installed panel is an asset, enhancing both the utility and appearance of the home. Remember, despite the comprehensive nature of this guide, consulting a professional when in doubt is always the safest route, particularly in complex scenarios involving safety or significant structural changes.
6. Secure the Access Panel Align the access panel with the hole and secure it in place with the screws provided in the panel kit, using a drill for a firm fit. Ensure it sits flush with the ceiling surface for a neat appearance. A secure fit prevents any future sagging or displacement of the panel. 7. Double-Check Functionality After installation, test the panel by opening and closing it several times. This ensures it functions correctly and that no adjustments are needed. It's also an opportunity to verify that the panel aligns properly and remains esthetically pleasing. 8. Finish with Aesthetic Touches Even though the primary concern with access panels is function, aesthetics matter too. Painting or adding a trim around the panel can help it blend seamlessly with the ceiling. Use a primer and paint that match the ceiling to conceal the installation as much as possible. 9. Regular Maintenance and Inspection Lastly, remember that installation does not end once the panel is in place. Regular inspection to ensure the hinges and locks operate smoothly is recommended. Also, periodic checking that it remains tightly secured to the ceiling will ensure long-term durability and functionality. Choosing the right access panel is important and should not be overlooked. Consider the panel’s material, its fire-rating if applicable, and its resistance to moisture or other environmental factors that may affect the area where it's installed. By following these meticulous steps, installing an access panel in the ceiling becomes not just a task fulfilled, but a testament to thorough planning and execution. Emphasizing safety, precision, and functionality ensures the installed panel is an asset, enhancing both the utility and appearance of the home. Remember, despite the comprehensive nature of this guide, consulting a professional when in doubt is always the safest route, particularly in complex scenarios involving safety or significant structural changes.
Latest news
-
Quality Ceiling Trap Doors & Access Panels | Easy & Secure AccessNewsAug.30,2025
-
Durable Ceiling T Grid Systems | Easy InstallationNewsAug.29,2025
-
PVC Gypsum Ceiling: Durable, Laminated Tiles for Modern SpacesNewsAug.28,2025
-
Pvc Gypsum Ceiling Is DurableNewsAug.21,2025
-
Mineral Fiber Board Is DurableNewsAug.21,2025
-
Ceiling Tile Clip Reusable DesignNewsAug.21,2025


