Dec . 04, 2024 20:35 Back to list
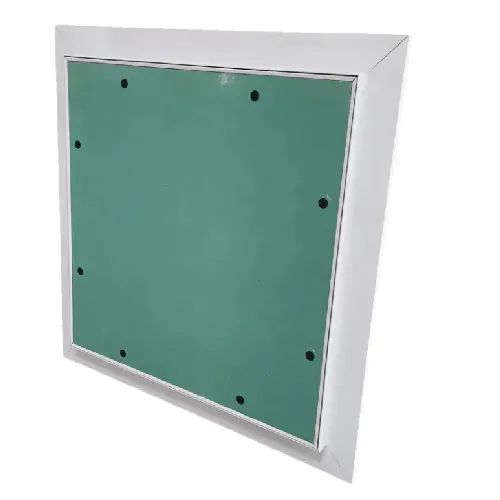
installing ceiling access panel
Installing a Ceiling Access Panel A Comprehensive Guide
Installing a ceiling access panel can be a straightforward and rewarding home improvement project. These panels provide convenient access to plumbing, electrical systems, or any other areas stored above your ceiling, such as insulation. Not only do they enhance functionality, but they also contribute to the overall maintenance and management of your home's systems. In this article, we will guide you through the steps of installing a ceiling access panel, ensuring you have the knowledge and tools required for a successful installation.
Materials and Tools Needed
Before beginning your project, gather the necessary materials and tools. Here’s a typical list of what you’ll need
- Access panel kit Choose the right size and type based on your needs. Panels come in a variety of materials including plastic, metal, and drywall. - Measuring tape For accurate measuring of the installation area. - Utility knife To cut drywall and access the ceiling area. - Screwdriver For securing the panel in place. - Stud finder To locate beams and studs before cutting. - Level To ensure the panel is installed straight. - Safety goggles To protect your eyes during cutting and installation. - Dust mask To avoid inhaling dust particles from drywall.
Step-by-Step Installation Process
Step 1 Determine Location
Identify where you need the access panel. It’s essential to choose a location that will provide access to the necessary systems while considering aesthetics. Use a stud finder to locate any electrical wires or wooden studs to avoid cutting through them. Mark the area with a pencil.
Step 2 Measure and Cut the Opening
Once you have selected the location, measure the dimensions of your access panel. Mark these measurements on the ceiling using a pencil and level. Using a utility knife, cut along the marked lines. Ensure you cut gently to avoid damaging surrounding materials.
Step 3 Prepare the Opening
installing ceiling access panel

After removing the section of the ceiling, confirm that the edges are smooth and any debris is cleared. This will help in installing the access panel securely. If your panel requires framing, install wooden supports within the opening where it will be secured.
Step 4 Install the Access Panel
Now it’s time to install the access panel. Align the panel with the opening and insert it carefully. Many access panels have clips or screws that will hold the panel in place. If necessary, secure the panel using screws or nails, ensuring that it fits tightly within the opening.
Step 5 Paint and Finishing Touches
For a seamless appearance, you may want to paint the panel to match your ceiling. This can be done either prior to installation or after it is secured in place. If you are painting after installation, use painter’s tape to protect the areas surrounding the panel.
Step 6 Test the Panel
Once everything is finished and the paint is dry, test the access panel. Open and close it multiple times to ensure it functions smoothly and securely. Make any adjustments if necessary.
Maintenance and Considerations
After your access panel is installed, keep in mind that regular maintenance is crucial. Periodic checks will help ensure that the panel remains in good condition and functions as intended. Inspect for any signs of wear or damage and replace or repair as necessary.
Conclusion
Installing a ceiling access panel is a practical skill that can save you time and money in the long run. By following these steps and taking the necessary precautions, you can successfully enhance your home’s functionality and accessibility. Remember to always prioritize safety during any home improvement project, and don’t hesitate to consult a professional if you’re uncertain at any stage. With your new access panel in place, managing your home’s systems will be easier than ever!
-
Durable Ceiling T Grid Systems | Easy InstallationNewsAug.29,2025
-
PVC Gypsum Ceiling: Durable, Laminated Tiles for Modern SpacesNewsAug.28,2025
-
Pvc Gypsum Ceiling Is DurableNewsAug.21,2025
-
Mineral Fiber Board Is DurableNewsAug.21,2025
-
Ceiling Tile Clip Reusable DesignNewsAug.21,2025
-
Ceiling T Grid Modular DesignNewsAug.21,2025


