Dec . 12, 2024 10:07 Back to list
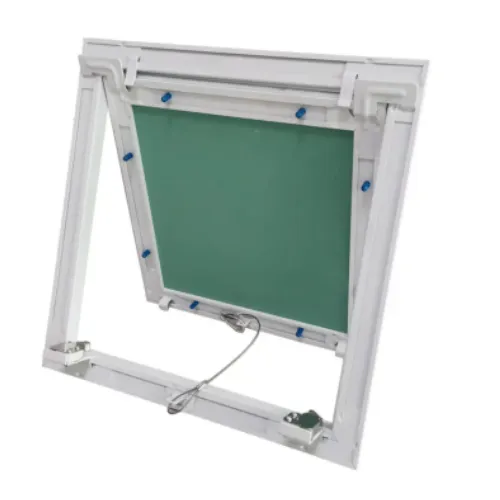
installing ceiling access panel
Installing a Ceiling Access Panel A Step-by-Step Guide
Installing a ceiling access panel is a crucial task that many homeowners undertake for various reasons, such as providing easy access to plumbing, electrical wiring, or other components hidden behind the ceiling. An access panel can simplify maintenance and repairs, making it an invaluable addition to your home. In this article, we’ll guide you through the process of installing a ceiling access panel, ensuring it is done safely and efficiently.
Tools and Materials Needed
Before beginning the installation, gather the necessary tools and materials
- Ceiling access panel kit - Measuring tape - Pencil or chalk - Drywall saw or utility knife - Level - Screwdriver - Stud finder - Safety goggles - Dust mask
Step 1 Choose the Location
Selecting the right location is vital for the functionality of the access panel. Identify a spot in the ceiling that provides easy access to the area you need to reach, such as plumbing or electrical systems. Use a stud finder to ensure that you are not placing the panel directly over wiring or plumbing that could be damaged during installation. Mark the desired location with a pencil or chalk.
Step 2 Measure and Cut the Opening
Once you’ve selected the location, measure the dimensions of the access panel you have purchased. Usually, the panel sizes may vary from 12x12 inches to larger options, so ensure you have the right measurements. Mark the outline of the panel on the ceiling using your previously made marks.
Using a drywall saw or utility knife, carefully cut along the marked lines. Take your time to ensure the cuts are clean to avoid damaging surrounding drywall. If you encounter any resistance, double-check for any hidden wires or pipes before proceeding.
installing ceiling access panel

Step 3 Prepare the Access Panel
Now that you have your opening, it's time to prepare the access panel for installation. Most access panels come pre-assembled, but some may require minor adjustments, such as installation of hinges or securing brackets. Carefully follow the manufacturer’s instructions to ensure that the panel is ready for installation.
Step 4 Install the Access Panel
Position the access panel into the prepared opening. Ensure it fits snugly, aligning it level with the ceiling. Depending on your panel type, you may need to secure it with screws or clips, as directed by the manufacturer. It is crucial to ensure a tight fit to prevent any gaps that may allow dust or pests to enter.
If your panel has a locking mechanism, ensure it is easy to operate while still providing a secure closure. Once installed, check the alignment using a level to ensure that it sits flat against the ceiling surface without any warping.
Step 5 Finishing Touches
After the panel is secured, you can finish the installation by painting or touching up the surrounding area. If your ceiling is textured, you may want to apply a matching texture to blend the panel seamlessly into the ceiling.
Finally, clean up any debris from the installation process. Consider inspecting the access point periodically to ensure it remains clean and functional for future use.
Conclusion
Installing a ceiling access panel is a straightforward project that can enhance the accessibility of crucial areas in your home. Following this step-by-step guide, you can ensure a successful installation while saving time and money on professional services. Remember to prioritize safety during the process and take care when handling tools. With the right approach and materials, your new access panel will serve you well for years to come. Happy DIY-ing!
-
Quality Ceiling Trap Doors & Access Panels | Easy & Secure AccessNewsAug.30,2025
-
Durable Ceiling T Grid Systems | Easy InstallationNewsAug.29,2025
-
PVC Gypsum Ceiling: Durable, Laminated Tiles for Modern SpacesNewsAug.28,2025
-
Pvc Gypsum Ceiling Is DurableNewsAug.21,2025
-
Mineral Fiber Board Is DurableNewsAug.21,2025
-
Ceiling Tile Clip Reusable DesignNewsAug.21,2025


