Nov . 08, 2024 18:49 Back to list
installing ceiling access panel
Installing a Ceiling Access Panel A Comprehensive Guide
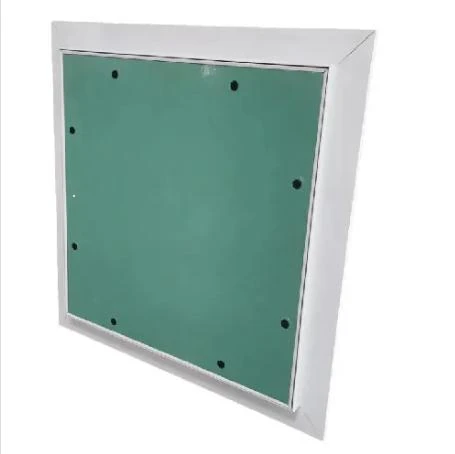
Installing a ceiling access panel may seem like a daunting task, but with proper preparation and guidance, it can be accomplished successfully. Access panels are essential for providing entry to concealed spaces such as plumbing, electrical systems, and HVAC components. This article will provide a systematic approach to selecting, preparing, and installing a ceiling access panel.
Understanding the Need for an Access Panel
Access panels serve multiple purposes in both residential and commercial settings. They allow for quick and easy access to vital systems that require regular maintenance or repair. Instead of tearing down a ceiling, an access panel simplifies the process and can save time and costs associated with repairs. Understanding the specific needs of your space will guide you in selecting the right panel.
Selecting the Right Access Panel
When choosing an access panel, consider the location and purpose. Panels come in various sizes, materials, and designs. Here are a few factors to help you make an informed decision
1. Size Measure the space where you intend to install the panel. Access panels come in standard size options, typically ranging from 12x12 to 24x24, but custom sizes are also available if needed.
2. Material The most common materials for access panels include gypsum (drywall), metal, and plastic. Gypsum panels are ideal for ceiling installations due to their fire-resistant properties. Metal panels are great for high-traffic or high-durability areas, while plastic panels are lightweight and corrosion-resistant.
3. Design Consider whether you need a flush panel that blends seamlessly into the ceiling or a recessed panel for an easy-to-access design. Some panels even come with a lock for added security.
Once you have a clear understanding of your needs, you can proceed to purchase your access panel from a reputable supplier.
Preparing for Installation
Before installation, gather the necessary tools and materials, which typically include
installing ceiling access panel

- Measuring tape - Level - Utility knife or drywall saw - Screwdriver - Stud finder - Safety goggles - Dust mask
Make sure the area around where the panel will be installed is clean and clear of any obstructions. Review the panel manufacturer’s instructions, as they may contain specific details that differ from general guidelines.
Installation Process
1. Mark the Location Use a stud finder to locate any joists or pipes in the ceiling. Once you determine a suitable location, use the measuring tape to mark the area where the panel will be installed.
2. Cut the Opening Carefully cut along the marked lines using a utility knife or drywall saw. Be cautious not to damage any wiring or plumbing that may be hidden behind the ceiling.
3. Install the Frame If you have a frame that comes with your access panel, secure it into the opening you just created. Make sure it is level and flush with the ceiling surface. Use screws to fasten the frame, ensuring it is snug and secure.
4. Insert the Access Panel Place the access panel into the frame you just installed. If your panel has a hinge, ensure it is oriented correctly for functionality. As you push the panel into place, be sure to maintain a level fit with the ceiling.
5. Secure the Panel Some access panels require screws to secure them, while others may use spring clips. Follow the manufacturer’s instructions to ensure the panel is securely fastened.
6. Finishing Touches Once the panel is installed, check for any gaps or misalignment. If needed, you can caulk around the edges for a clean finish. Additionally, consider painting or finishing the panel to match the surrounding ceiling.
Final Thoughts
Installing a ceiling access panel is a practical solution for maintaining and accessing important systems in your home or workplace. With the right tools and a little patience, you can effectively install an access panel that will serve you well for years to come. Whether you are a DIY enthusiast or prefer to hire a professional, understanding the process will help you make informed decisions about your home improvement projects.
-
Quality Ceiling Trap Doors & Access Panels | Easy & Secure AccessNewsAug.30,2025
-
Durable Ceiling T Grid Systems | Easy InstallationNewsAug.29,2025
-
PVC Gypsum Ceiling: Durable, Laminated Tiles for Modern SpacesNewsAug.28,2025
-
Pvc Gypsum Ceiling Is DurableNewsAug.21,2025
-
Mineral Fiber Board Is DurableNewsAug.21,2025
-
Ceiling Tile Clip Reusable DesignNewsAug.21,2025


