Nov . 10, 2024 08:58 Back to list
How to Properly Install a Ceiling Access Panel for Easy Maintenance Access
Installing a Ceiling Access Panel A Step-by-Step Guide
Installing a ceiling access panel is a practical solution for gaining easy access to concealed spaces, such as ductwork, plumbing, or electrical components. This often-overlooked feature not only facilitates maintenance but also enhances the overall functionality of your home or office. Here, we will guide you through the steps to install a ceiling access panel effectively.
Materials Needed
Before you begin, gather the necessary materials - Ceiling access panel (sized according to your needs) - Measuring tape - Pencil or marker - Level - Drywall saw or utility knife - Screwdriver - Screws (typically included with the panel) - Stud finder (optional) - Paint (optional)
Step 1 Choose the Right Location
The first step in your installation process is identifying the ideal location for the access panel. Consider what you need access to, and ensure you're not obstructing any structural elements, electrical wiring, or plumbing lines. The panel should ideally be installed in a location that's easily reachable but discreet enough to maintain aesthetic appeal.
Step 2 Measure and Mark
Once you’ve selected a location, use the measuring tape to determine the size of the access panel. Most panels come in standard sizes, so ensure the dimensions fit your selected area. Mark the outline of the panel on the ceiling with a pencil or marker. If you're working in a finished ceiling, ensure you are marking straight lines for a neat finish.
Step 3 Cut the Opening
Using a drywall saw or utility knife, carefully cut along the lines you’ve marked. Be mindful not to damage any existing wiring or plumbing that may be hidden within the ceiling. It’s wise to use a stud finder beforehand to check for any obstacles. Take your time with this step, as precision is essential for a snug fit of the access panel.
Step 4 Prepare the Panel
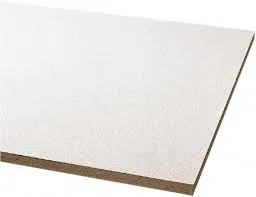
installing ceiling access panel

With the opening cut, you can now prepare the access panel for installation. If the panel requires painting or finishing to match your ceiling, now is the time to do it. A well-matched access panel will be less noticeable, helping maintain the aesthetic continuity of your ceiling.
Step 5 Install the Access Panel
Now it’s time to install the panel. Align the panel with the edges of the cut-out you created. Ensure that it sits level within the opening. Depending on the specific model of the access panel, you may need to screw it into the surrounding drywall or use clips that secure it in place.
If using screws, pre-drill the holes to avoid damaging the drywall. Make sure the screws are tight but be careful not to overtighten, as this can cause damage to the panel or the surrounding area.
Step 6 Finalize the Installation
Once the access panel is securely in place, check that it opens and closes smoothly. If it features a lock or latch, test it to ensure it functions as intended. If the edges of the panel require finishing touches, such as caulking or painting, complete that step now.
Step 7 Clean Up
Finally, tidy up your workspace. Dispose of any debris from the cutting process and ensure your tools are put away safely. This will not only keep your area organized but also ensure no remnants can cause mishaps later.
Conclusion
Installing a ceiling access panel is a straightforward process that can greatly improve access to hidden systems in your home or office. By following these steps, you can ensure a successful installation that provides both functionality and aesthetic appeal. Whether you're a seasoned DIY enthusiast or a beginner, this project can enhance the maintenance and upkeep of your space. Enjoy the newfound convenience that your access panel brings!
-
Quality Ceiling Trap Doors & Access Panels | Easy & Secure AccessNewsAug.30,2025
-
Durable Ceiling T Grid Systems | Easy InstallationNewsAug.29,2025
-
PVC Gypsum Ceiling: Durable, Laminated Tiles for Modern SpacesNewsAug.28,2025
-
Pvc Gypsum Ceiling Is DurableNewsAug.21,2025
-
Mineral Fiber Board Is DurableNewsAug.21,2025
-
Ceiling Tile Clip Reusable DesignNewsAug.21,2025


