Nov . 09, 2024 23:51 Back to list
Access Hatch Installation for Plasterboard Ceilings in Home Renovations and Maintenance
Understanding Plasterboard Ceiling Access Hatches Importance and Installation
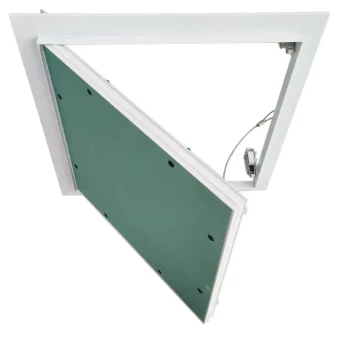
Plasterboard ceilings are a popular choice in many modern homes and commercial buildings due to their versatility and aesthetic appeal. Among the key components that enhance functionality in these ceilings, access hatches play a crucial role. An access hatch in a plasterboard ceiling provides necessary access to the space above, allowing for maintenance and inspections of electrical systems, plumbing, and insulation without the need for extensive demolition work.
Importance of Access Hatches
One of the primary reasons why access hatches are essential in plasterboard ceilings is for maintenance purposes. Buildings today are equipped with various systems that require regular maintenance, including HVAC systems, wiring, and plumbing. Without a designated access point, maintenance personnel would struggle to reach these systems, leading to potential damage and increased repair costs. An access hatch simplifies this process, providing a convenient entry point that minimizes disruption to the ceiling's structure.
Additionally, access hatches contribute to the safety of a building. In cases of emergency, such as a leaking pipe or malfunctioning electrical system, quick access can be crucial. Having a well-placed hatch ensures that professionals can respond rapidly, reducing the risk of extensive damage and ensuring the safety of the occupants.
Types of Access Hatches
There are various types of access hatches designed for plasterboard ceilings. The most common include manual hatches, which can be opened easily by hand, and more advanced options such as lockable hatches for secure environments. Moreover, access hatches come in different sizes and shapes, allowing them to blend seamlessly into the ceiling's design while remaining functional.
When selecting an access hatch, it's essential to consider factors such as the location, size, and intended use. For instance, if the hatch will provide access to electrical panels or plumbing, a larger opening may be necessary. Conversely, for infrequent access or inspection purposes, a smaller hatch could suffice.
Installation Process
plasterboard ceiling access hatch

Installing a plasterboard ceiling access hatch requires careful planning and precision. Here’s a step-by-step guide to ensure a successful installation
1. Location Selection Choose a location for the access hatch that will provide easy access to essential systems. Ensure that there are no electrical wires, plumbing, or structural beams interfering with the installation site.
2. Measuring and Cutting Measure the dimensions of the access hatch. Using a drywall saw, carefully cut an opening in the plasterboard ceiling. Ensure the edges are smooth to prevent injury during installation.
3. Framing Construct a frame using timber or metal studs around the opening. This frame provides support and ensures that the hatch is secure and fits properly.
4. Installing the Hatch Position the access hatch within the framed opening, securing it with screws or hinges as appropriate. Ensure that it opens smoothly and fits snugly within the frame.
5. Finishing Touches Once installed, you can finish the edges around the hatch with tape and joint compound to achieve a seamless look that matches the ceiling. Painting the hatch in the same color as the ceiling can further blend it into the space.
Conclusion
Plasterboard ceiling access hatches are a vital component of any building that prioritizes both functionality and safety. By understanding their importance and proper installation techniques, homeowners and builders can ensure that their ceilings remain not only visually appealing but also highly functional. Whether for maintenance, safety, or future renovations, a well-installed access hatch makes all the difference in managing the systems hidden above the ceiling panels. As such, investing time and resources into proper planning and installation can save money and headaches in the long run.
-
Quality Ceiling Trap Doors & Access Panels | Easy & Secure AccessNewsAug.30,2025
-
Durable Ceiling T Grid Systems | Easy InstallationNewsAug.29,2025
-
PVC Gypsum Ceiling: Durable, Laminated Tiles for Modern SpacesNewsAug.28,2025
-
Pvc Gypsum Ceiling Is DurableNewsAug.21,2025
-
Mineral Fiber Board Is DurableNewsAug.21,2025
-
Ceiling Tile Clip Reusable DesignNewsAug.21,2025


