


- Afrikaans
- Albanian
- Amharic
- Arabic
- Armenian
- Azerbaijani
- Basque
- Belarusian
- Bengali
- Bosnian
- Bulgarian
- Catalan
- Cebuano
- Corsican
- Croatian
- Czech
- Danish
- Dutch
- English
- Esperanto
- Estonian
- French
- German
- Greek
- Hindi
- Indonesian
- irish
- Italian
- Japanese
- Korean
- Lao
- Malay
- Myanmar
- Norwegian
- Norwegian
- Polish
- Portuguese
- Romanian
- Russian
- Serbian
- Spanish
- Swedish
- Thai
- Turkish
- Ukrainian
- Uzbek
- Vietnamese
Ліст . 28, 2024 23:49 Back to list
Installation Techniques for Ceiling Tile Grid Hangers in Commercial Spaces
Understanding Ceiling Tile Grid Hangers A Comprehensive Guide
Ceiling tile grid hangers are essential components in the installation of suspended ceiling systems, commonly found in commercial and residential buildings. These hangers provide the necessary structural support for the grid framework that holds the ceiling tiles in place, ensuring a clean and aesthetically pleasing ceiling finish. This article will explore the various types of ceiling tile grid hangers, their installation process, and some key considerations when choosing the right hangers for your project.
Types of Ceiling Tile Grid Hangers
1. Wire Hangers Wire hangers are the most commonly used method for supporting ceiling grids. They typically consist of galvanized steel wire that is easy to manipulate and cut to length. These hangers are connected to the building’s structural elements, such as beams or joists, and provide enough strength to hold the grid system. Wire hangers are versatile, affordable, and widely available.
2. Metal Hanger Brackets Metal brackets offer a more robust option compared to wire hangers. These brackets are durable and can distribute weight more evenly across the grid system. They are ideal for heavier ceiling materials or when extra stability is required. Metal brackets can be used in conjunction with wire hangers for added support.
3. J-Hooks J-hooks are another popular choice for ceiling grid support. These hooks are designed to grip the structural elements and hold the grid system in place without the need for additional hardware. J-hooks are particularly useful in installations where ease of access to plumbing or electrical systems is necessary, as they allow for quick adjustments.
4. L-Brackets L-brackets are L-shaped connectors that provide a solid anchor point for the ceiling grid. These brackets can be used to connect the grid system directly to walls or ceilings, providing enhanced stability. They are particularly useful in irregularly shaped rooms or when dealing with customized ceiling designs.
Installation Process
ceiling tile grid hangers
Installing ceiling tile grid hangers is a straightforward process but requires careful planning and assessment of the environment
1. Planning the Layout Start by determining the ceiling height and the area to be covered with ceiling tiles. Use a chalk line to mark the location of the grid system on the walls. Make sure to account for any obstacles like lights, ductwork, or pipes.
2. Selecting the Right Hanger Choose the appropriate type of hanger based on the weight of the ceiling tiles and the configuration of the room. Remember to check local building codes, as they may dictate specific requirements for ceiling installations.
3. Installing the Hangers For wire hangers, attach one end to the overhead structure and secure it with a concrete or wood screw, depending on the building material. The other end should be attached to the grid support. For brackets and hooks, follow the manufacturer's installation instructions to ensure they are properly secured.
4. Adjusting and Checking Levels Once the hangers are in place, it is crucial to ensure that the grid is level. Adjust the hangers as necessary to achieve a consistent height across the entire ceiling.
5. Installing the Ceiling Tiles Finally, once the grid is securely installed, you can insert the ceiling tiles into the framework. Ensure that the tiles fit snugly and make any necessary adjustments to maintain a uniform appearance.
Conclusion
Ceiling tile grid hangers play a vital role in the construction of suspended ceilings. Understanding the different types of hangers available, along with the installation process, can significantly enhance the quality and appearance of your ceiling project. By carefully selecting the right hangers and following proper installation techniques, you can ensure a stable and visually pleasing ceiling that meets your needs. Whether you're a DIY enthusiast or a professional contractor, knowing the ins and outs of ceiling tile grid hangers will help you achieve a successful installation.
-
Transform Interiors with PVC Gypsum Ceiling: A Stylish, Durable, and Moisture-Resistant SolutionNewsMay.19,2025
-
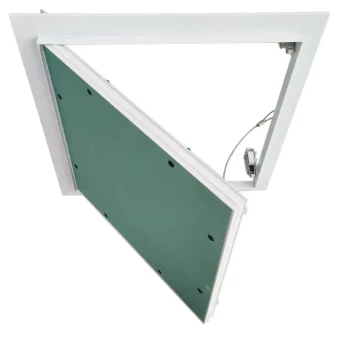
The Smart Interior Upgrade: Discover the Durability and Versatility of Gypsum Ceiling Access Panel SolutionsNewsMay.19,2025
-
The Smart Choice for Interior Design: Discover the Value of PVC Gypsum Ceiling SolutionsNewsMay.19,2025
-
Mineral Fiber Ceiling Tiles: The Smart Blend of Performance and AestheticsNewsMay.19,2025
-
Mineral Fiber Ceiling Tiles: The Superior Choice Over Gypsum for Sound and Fire SafetyNewsMay.19,2025
-
Mineral Fiber Ceiling Tiles: Eco-Friendly Strength and Style for Every CeilingNewsMay.19,2025


