- Afrikaans
- Albanian
- Amharic
- Arabic
- Armenian
- Azerbaijani
- Basque
- Belarusian
- Bengali
- Bosnian
- Bulgarian
- Catalan
- Cebuano
- Corsican
- Croatian
- Czech
- Danish
- Dutch
- English
- Esperanto
- Estonian
- French
- German
- Greek
- Hindi
- Indonesian
- irish
- Italian
- Japanese
- Korean
- Lao
- Malay
- Myanmar
- Norwegian
- Norwegian
- Polish
- Portuguese
- Romanian
- Russian
- Serbian
- Spanish
- Swedish
- Thai
- Turkish
- Ukrainian
- Uzbek
- Vietnamese
নভে. . 06, 2024 07:28 Back to list
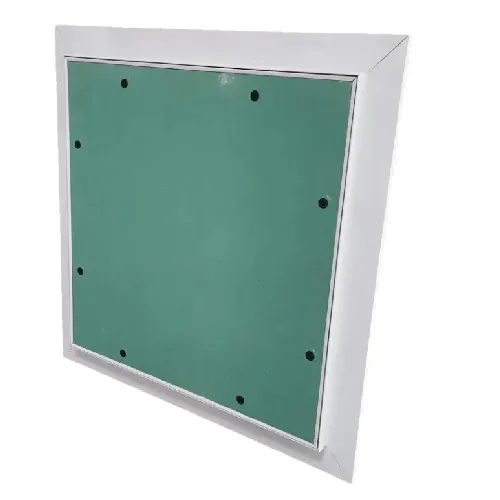
how to make access panel in ceiling
How to Make an Access Panel in Ceiling
Creating an access panel in your ceiling can be a practical solution for a variety of reasons, from providing easier access to plumbing and electrical systems to offering a discreet way to maintain your home’s infrastructure. While it may seem daunting, making an access panel is a manageable DIY project that can save you time and money. Here’s a simple guide to help you through the process.
Materials Needed
Before you begin, gather the necessary materials - Access panel (pre-made or materials to build one) - Utility knife - Measuring tape - Level - Pencil - Screwdriver or drill - Drywall saw or reciprocating saw - Sheetrock screws (if building from scratch) - Paint or touch-up materials (optional)
Step 1 Determine the Location
First, decide where the access panel will be installed. Common locations include above cabinets, inside closets, or any area that requires access to HVAC, plumbing, or wiring. Ensure that the area is free of obstructions and that the panel will not interfere with any structural elements.
Step 2 Measure and Mark
Once you’ve chosen the location, measure the desired dimensions of the access panel. Typical sizes range from 12” x 12” to 24” x 24”, depending on your needs. Use a pencil to clearly mark the outline of the panel on the ceiling, ensuring it is level and straight.
how to make access panel in ceiling

Step 3 Cut the Opening
With a utility knife or a drywall saw, carefully cut along the marked lines. Be cautious not to damage any underlying electrical wiring or plumbing. If you encounter resistance, recheck for any hidden elements before proceeding.
Step 4 Install the Access Panel
If you have purchased a pre-made access panel, follow the manufacturer's instructions for installation. Most panels simply fit into the opening and can be secured with screws or clips. If you are constructing a panel from scratch, frame the opening using additional drywall or plywood, then secure the panel in place with sheetrock screws.
Step 5 Finish the Edges
To create a seamless look, compound the edges with joint compound and smooth them out. Once dry, sand the area and paint to match the ceiling. This step is essential for aesthetics and to blend the panel seamlessly with the surrounding surface.
Conclusion
By following these simple steps, you can successfully create an access panel in your ceiling that is both functional and visually appealing. This DIY enhancement not only improves access to essential services but also adds value to your home. Always remember to prioritize safety by wearing protective gear and double-checking for any hidden utilities before cutting into the ceiling. With a little patience and effort, you can complete this project in no time.
-
Transform Interiors with PVC Gypsum Ceiling: A Stylish, Durable, and Moisture-Resistant SolutionNewsMay.19,2025
-
The Smart Interior Upgrade: Discover the Durability and Versatility of Gypsum Ceiling Access Panel SolutionsNewsMay.19,2025
-
The Smart Choice for Interior Design: Discover the Value of PVC Gypsum Ceiling SolutionsNewsMay.19,2025
-
Mineral Fiber Ceiling Tiles: The Smart Blend of Performance and AestheticsNewsMay.19,2025
-
Mineral Fiber Ceiling Tiles: The Superior Choice Over Gypsum for Sound and Fire SafetyNewsMay.19,2025
-
Mineral Fiber Ceiling Tiles: Eco-Friendly Strength and Style for Every CeilingNewsMay.19,2025


