- Afrikaans
- Albanian
- Amharic
- Arabic
- Armenian
- Azerbaijani
- Basque
- Belarusian
- Bengali
- Bosnian
- Bulgarian
- Catalan
- Cebuano
- Corsican
- Croatian
- Czech
- Danish
- Dutch
- English
- Esperanto
- Estonian
- French
- German
- Greek
- Hindi
- Indonesian
- irish
- Italian
- Japanese
- Korean
- Lao
- Malay
- Myanmar
- Norwegian
- Norwegian
- Polish
- Portuguese
- Romanian
- Russian
- Serbian
- Spanish
- Swedish
- Thai
- Turkish
- Ukrainian
- Uzbek
- Vietnamese
aug . 30, 2024 18:19 Back to list
how to make ceiling access panel
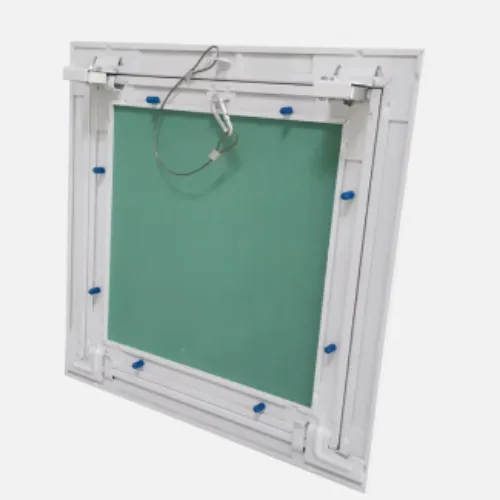
How to Make a Ceiling Access Panel
Creating a ceiling access panel is an excellent way to provide easy access to ducts, plumbing, and electrical wiring hidden in your ceilings. Whether you're renovating a room or performing maintenance on your home, a properly constructed access panel simplifies the job. Here's a step-by-step guide on how to make a ceiling access panel.
Materials Required
1. Plywood or drywall (5/8-inch thick recommended) 2. Framing lumber (2x4s) 3. Hinges (door or piano hinges) 4. Latch or magnetic catch 5. Measuring tape 6. Saw (circular saw or jigsaw) 7. Level 8. Screwdriver and screws 9. Drywall adhesive (if using drywall) 10. Paint or finish (optional)
Step 1 Determine the Location
Start by identifying where you want to install the access panel. Typically, you want it in an area that's easy to reach, yet not visually obtrusive. Ensure it's located between ceiling joists for structural stability. Use a stud finder to confirm the joist locations.
Step 2 Measure and Mark
Using your measuring tape, determine the size of the access panel. A common size is about 14x14 inches, but this can vary depending on your needs. Mark the outline on the ceiling with a pencil. Make sure the panel's edges align with the joists to allow for proper framing support.
Step 3 Cut the Opening
Carefully cut along the marked lines using your saw. Be cautious of any electrical wires or plumbing lines that may be hidden in the ceiling. After cutting, remove the circular piece of drywall or plywood, ensuring not to damage surrounding materials.
Step 4 Build the Frame
how to make ceiling access panel

Using the 2x4s, construct a frame for the access panel. This frame will provide support to keep the panel secure. Cut four pieces to create a rectangular frame that fits snugly into the opening. Secure the frame into the ceiling using screws, ensuring it’s level.
Step 5 Prepare the Panel
Cut your plywood or drywall to fit the frame. If you're using drywall, apply drywall adhesive to the back of your panel. For plywood, simply ensure it fits well within the frame. Once cut, sand the edges to avoid any sharp corners.
Step 6 Attach the Hinges
Affix the hinges to one side of the panel and the corresponding side of the frame. Ensure that the panel opens easily and is flush with the ceiling when closed. If using a piano hinge, be mindful of the entire length to ensure uniform support.
Step 7 Install the Latch
To keep the panel secure while closed, install a latch or magnetic catch on the opposite side of the hinges. This will prevent accidental openings and ensure a tight fit.
Step 8 Finish the Access Panel
Finally, if you used plywood or drywall, you may want to paint or finish the panel to match your ceiling. This step is optional but can enhance aesthetics, making the access panel less noticeable.
Conclusion
With a few materials and some basic tools, you can create a ceiling access panel that allows for easy maintenance access while keeping your home looking tidy. By following these steps, you'll have a functional and discreet opening to service your home’s essential systems.
-
Mineral Fiber Ceiling Tiles Embossed Surface PatternNewsAug.05,2025
-
Mineral Fiber Board Xingyuan Vision for Better SpacesNewsAug.05,2025
-
Drop Down Ceiling Tile Office Use FitNewsAug.05,2025
-
PVC Gypsum Ceiling White Base ColorNewsAug.05,2025
-
Access Panel on Ceiling Xingyuan Integrity EthicNewsAug.05,2025
-
Ceiling Trap Doors Fire Resistant DesignNewsAug.05,2025


