


- Afrikaans
- Albanian
- Amharic
- Arabic
- Armenian
- Azerbaijani
- Basque
- Belarusian
- Bengali
- Bosnian
- Bulgarian
- Catalan
- Cebuano
- Corsican
- Croatian
- Czech
- Danish
- Dutch
- English
- Esperanto
- Estonian
- French
- German
- Greek
- Hindi
- Indonesian
- irish
- Italian
- Japanese
- Korean
- Lao
- Malay
- Myanmar
- Norwegian
- Norwegian
- Polish
- Portuguese
- Romanian
- Russian
- Serbian
- Spanish
- Swedish
- Thai
- Turkish
- Ukrainian
- Uzbek
- Vietnamese
dec . 06, 2024 23:49 Back to list
how to make an access panel in drywall ceiling
How to Make an Access Panel in a Drywall Ceiling
Creating an access panel in your drywall ceiling can be a practical solution for accessing plumbing, electrical wiring, or HVAC systems. This DIY project is straightforward and can save you money on professional installation. In this guide, we will walk you through the steps to create an access panel in your drywall ceiling, ensuring that you have easy access whenever necessary.
Materials and Tools Needed
Before you start, gather the following materials and tools
Materials - Drywall (1/2 inch thickness is standard for ceilings) - Access panel frame or pre-made access panel (optional) - Drywall screws - Joint compound - Drywall tape - Paint or ceiling texture (to match the existing ceiling)
Tools - Measuring tape - Utility knife or drywall saw - Straightedge or T-square - Screwdriver or drill - Sanding block or sponge - Paintbrush or roller
Step 1 Measure and Mark the Location
Identify the location where you want to create the access panel. Ensure that the space behind the ceiling is clear for you to work and access whatever is behind it. Using a measuring tape, determine the size of the access panel you need based on the equipment or infrastructure you want to access. A common size for access panels is 12 inches by 12 inches, but this can be adjusted based on your needs.
Once you have determined the dimensions, use a pencil to mark a square or rectangular area on the ceiling.
Step 2 Cut the Drywall
Using a utility knife or a drywall saw, carefully cut along the marked lines. If you have a helper, they can hold the ceiling up to reduce any vibrations that could cause further damage. After making the initial cuts, gently pull down the drywall rectangle to reveal the space behind it. Be cautious of any electrical wires or pipes you may encounter.
Step 3 Create a Frame for the Access Panel
how to make an access panel in drywall ceiling
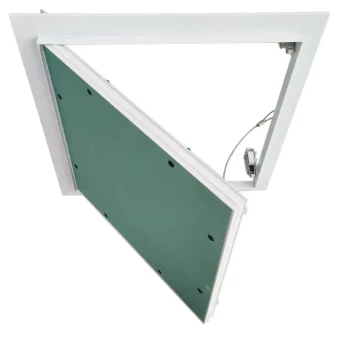
To ensure the access panel is stable and easy to open, you can create a small frame using 1x2 or 1x3 boards. Cut the boards to match the dimensions of your opening and secure them to the edges of the cutout using drywall screws. This will give you a sturdy frame to which you can later attach the access panel door.
Step 4 Install the Access Panel
If you purchased a pre-made access panel, follow the manufacturer's instructions for installation. Generally, the panel will fit into the frame you created and attach using screws or the locking mechanism provided with the panel. If you’re making a door from drywall, cut another piece to size, attach it to the frame with hinges, and ensure it swings open smoothly.
Step 5 Tape and Mud the Joints
If you used drywall in your construction, it’s essential to tape and mud the joints around the access panel. Apply drywall tape over the seams, then cover it with a layer of joint compound using a putty knife. Allow this to dry according to the manufacturer's instructions, typically 24 hours. Once dry, sand the area until smooth.
Step 6 Finish the Access Panel
After sanding, you can apply an additional layer of joint compound if necessary. Once you're satisfied with the smoothness, prime and paint the access panel to match your ceiling. If your ceiling has texture, you may need to replicate that to blend the panel seamlessly into your existing ceiling.
Step 7 Final Inspection and Clean-Up
Once everything is painted and dry, check the access panel to ensure it opens and closes easily. Clean up any debris from your work area and replace any items you may have removed during the process.
Conclusion
Creating an access panel in your drywall ceiling can enhance the functionality of your space, allowing for quick access to essential systems. With careful measurement, precise cutting, and a bit of finishing work, you can complete this project successfully. Not only does it offer utility, but it also empowers you with the knowledge and skills to tackle future home repairs or renovations. Enjoy your newly created access panel!
-
Transform Interiors with PVC Gypsum Ceiling: A Stylish, Durable, and Moisture-Resistant SolutionNewsMay.19,2025
-
The Smart Interior Upgrade: Discover the Durability and Versatility of Gypsum Ceiling Access Panel SolutionsNewsMay.19,2025
-
The Smart Choice for Interior Design: Discover the Value of PVC Gypsum Ceiling SolutionsNewsMay.19,2025
-
Mineral Fiber Ceiling Tiles: The Smart Blend of Performance and AestheticsNewsMay.19,2025
-
Mineral Fiber Ceiling Tiles: The Superior Choice Over Gypsum for Sound and Fire SafetyNewsMay.19,2025
-
Mineral Fiber Ceiling Tiles: Eco-Friendly Strength and Style for Every CeilingNewsMay.19,2025


