grid ceiling frame
-
...
...
...
...
Links
The design of eco sportswear is also evolving. Brands are focusing on creating durable and versatile pieces that can withstand rigorous use while maintaining a stylish aesthetic. This shift not only caters to the functional needs of athletes but also promotes a buy less, choose wisely mentality. By investing in high-quality apparel that lasts longer, consumers can make sustainable choices that also save them money in the long run. Additionally, many eco sportswear brands are committed to fair labor practices, ensuring that workers are compensated fairly and work in safe, humane conditions. This ethical dimension adds another layer to the appeal of eco sportswear, allowing consumers to feel good about their purchases on multiple levels.
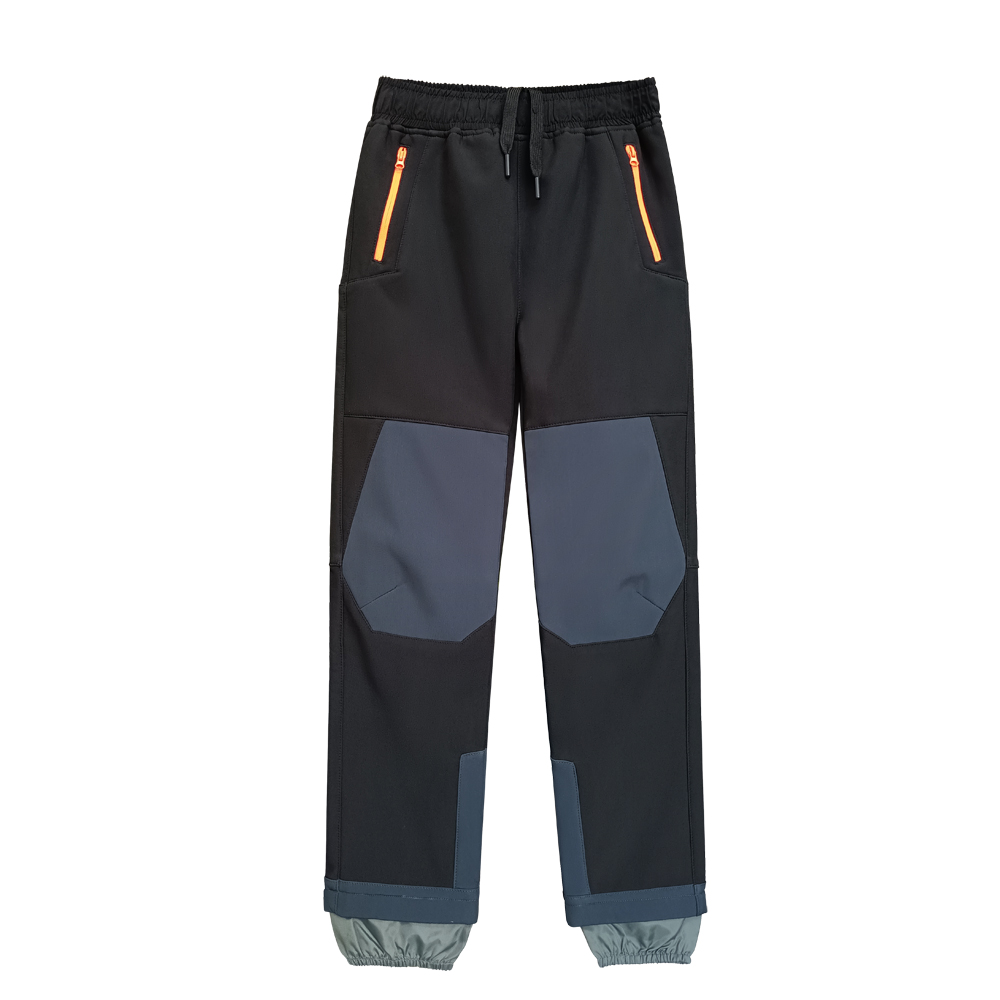
The Comfort and Style of Sweatpants for Kids
To elevate the jacket for a more polished appearance, consider layering it over a collared shirt and pairing it with tailored chinos or dark denim. This combination strikes a balance between casual and sophisticated, making it suitable for casual Fridays at the office or dinner dates. Accessories such as a stylish wristwatch or a pair of loafers can further enhance this look.
Conclusion
In conclusion, the incorporation of sports wear attire in pageantry is a reflection of the evolving landscape of beauty standards and societal values. It champions empowerment, inclusivity, and health, allowing contestants to express their individuality while promoting a positive message. As pageants continue to adapt to contemporary trends, sports wear is poised to play an integral role in shaping the future of beauty competitions, encouraging participants to embrace their strength and inspire others along the way. With this evolution, pageantry not only celebrates outer beauty but also champions the beauty of being strong, confident, and healthy.
Conclusion
Consider also the added functionality of pockets. Many contemporary designs incorporate spacious pockets, making them perfect for storing essentials like your phone, keys, or wallet. This utility is especially useful when you're on the move and need quick access to your belongings.
Moreover, the sustainable practices currently employed in the production of Egyptian cotton play a crucial role in its allure. Many producers prioritize environmentally friendly farming and manufacturing techniques, contributing to a more sustainable fashion industry. By choosing Egyptian cotton shirts, consumers can make a positive impact on the environment while indulging in luxurious fashion.
2. Breathability A critical feature of any good softshell jacket is its breathability. It allows moisture to escape while providing a barrier against external elements. This is particularly important for military operations, where physical exertion can lead to overheating.
Please note that normal business operations will resume on October 7, 2023. We encourage you to plan your requests and inquiries accordingly and rest assured they will be attended to immediately upon return.
Styling Tips
5. Practicality and Versatility
The secret to creating a jacket that is both thin and warm lies in advanced insulation technologies. Traditional insulation materials, such as down feathers, have long been beloved for their warmth-to-weight ratio. However, modern innovations have introduced synthetic alternatives that rival down's performance without the bulk. Brands now utilize high-tech materials like PrimaLoft and Thinsulate, which offer exceptional thermal efficiency while maintaining a slim profile. These materials trap heat effectively, ensuring that wearers stay cozy even in the coldest conditions without the excess weight and bulk of traditional jackets.
3. Raincoats For drizzly days, a durable raincoat is a must-have. Look for waterproof materials and sealed seams to ensure your child stays dry. Bright colors or fun patterns can also make for an exciting rainy-day outfit.
In conclusion, military softshell jackets represent the pinnacle of functional outerwear. Their blend of durability, comfort, and style makes them suitable for an array of environments, from harsh battlefield conditions to casual weekend outings. As the demand for versatile clothing continues to grow, the popularity of military softshell jackets is unlikely to diminish. For anyone looking for reliable and stylish outerwear that can withstand the test of time and circumstances, a military softshell jacket proves to be an excellent investment. Whether for tactical purposes, outdoor adventures, or everyday use, these jackets truly embody the essence of practicality and style.
One of the most iconic designs of the Russian military jacket is the M65 field jacket, a model known internationally for its durability and comfort. Made from high-quality cotton or polyester blends, the M65 features multiple pockets, allowing troops to carry essential items efficiently. Its functional design has made it a favorite not only among military personnel but also among civilians who seek robust and stylish outerwear. Indeed, the M65 has transcended its military origin, becoming a staple in fashion circles around the world.
Accessories also play a significant role in embodying the workwear aesthetic. Leather boots, which often prioritize comfort and support, pair seamlessly with workwear staples. Hats and beanies are also commonly worn, providing both style and practicality, further enhancing the classic workwear look.
Social media has played a pivotal role in the ascendance of these cult brands. Platforms like Instagram and TikTok have given rise to influencer culture, where everyday users and celebrities alike showcase their sportswear in a myriad of contexts—at the gym, on the streets, or even at social gatherings. This visibility fosters a community of fans who are eager to emulate the looks and lifestyles of their favorite influencers. As a result, sportswear has transitioned from the realm of fitness enthusiasts to a significant component of mainstream fashion.

At the heart of Carbon Sportswear’s philosophy is the belief that performance and sustainability can go hand in hand. The brand has developed a unique line of sportswear that utilizes recycled materials, minimizing waste and reducing the carbon footprint associated with production. For instance, their fabrics are often made from post-consumer plastic bottles, which not only diverts waste from landfills but also transforms it into high-quality, durable athletic wear. This circular approach not only reduces reliance on virgin resources but also sets a new standard for the industry.
Quality and durability should not be overlooked, especially if you have more than one child and the coat is likely to be passed down. Choose coats from reputable brands known for their durability and performance. Check the seams, zippers, and fastenings for sturdiness, as these are often the first areas to show wear and tear.
Fashion giants and luxury brands have recognized the potential of athleisure, incorporating sporty elements into their collections. High-fashion designers are now collaborating with athletic brands, resulting in exclusive lines that boast both aesthetic appeal and technical performance. This crossover has propelled sportswear into the spotlight, solidifying its place in contemporary fashion.
Moreover, trench rain jackets come in various styles, colors, and lengths, allowing individuals to express their personal style. Classic beige or khaki shades provide a sophisticated look, while brighter colors and unique patterns can add a fun twist to your outfit. Belts and tailored cuts accentuate the waist, creating a flattering silhouette that complements any body type. Fashion icons, from Audrey Hepburn to Kate Moss, have helped establish the trench as a wardrobe essential, proving its timeless appeal.

Moreover, the aesthetic aspects of sportswear have expanded dramatically. Bold colors, unique patterns, and stylish silhouettes have made their way into gym wear, transforming it into a fashion statement. Color-blocking, graphic designs, and unexpected cut-outs are just a few examples of how contemporary sportswear is capturing the eyes of fashion-forward consumers.
Conclusion
Sustainable Choices
- Footwear Matters Shoes can make or break an outfit. A pair of stylish yet comfortable shoes, such as loafers or ankle boots, can enhance your look while ensuring you stay comfortable throughout the day. It’s essential to invest in shoes equipped for long hours of wear without sacrificing style.

Hunter clothing for men encapsulates the essence of outdoor adventure, blending functionality, style, and sustainability. From waterproof jackets and versatile layering options to durable footwear, Hunter provides everything needed for a successful outdoor experience. Embrace the elements with confidence, knowing you are dressed in well-crafted clothing that stands the test of time. With Hunter, you're not just wearing outdoor apparel; you're embodying a lifestyle that celebrates exploration, adventure, and the great outdoors.
Sustainability in Mind
Cotton, being a naturally breathable material, is an ideal choice for the Harrington jacket. Unlike heavier fabrics, cotton allows for enhanced airflow, making it suitable for various climates and seasons. This breathability is particularly advantageous during spring and early fall when temperatures can fluctuate dramatically. A cotton Harrington jacket can keep you comfortable without overheating, making it a versatile wardrobe essential.
The Versatility of the Rain Poncho A Must-Have for Every Adventure
Craftsmanship Meets Innovation
When children engage in play, their activities can vary widely—from running and jumping to climbing and rolling around on the ground. Therefore, the first consideration when selecting play clothing is comfort. Fabrics that are soft, breathable, and flexible ensure that children can move freely without restrictions. Materials such as cotton, jersey, or blends designed for active wear are excellent choices. These fabrics wick moisture away, keeping kids dry during energetic activities, and reduce the risk of skin irritations that rough or synthetic materials might cause.
Waxed cotton has a rich history, dating back to the 19th century when it was first used by sailors for its waterproof properties. The fabric is made from cotton that is treated with a wax coating, giving it an attractive sheen and making it resistant to water and wind. As motorcycling became popular in the early 20th century, enthusiasts adopted this material for jackets, recognizing its rugged qualities and ability to withstand the elements.
Conclusion
The infusion of sportswear into everyday fashion has also been significantly influenced by street culture. Influencers, athletes, and celebrities are often seen donning athleisure outfits, blurring the lines between sportswear and casual wear. This cultural phenomenon has propelled urban sportswear into the fashion mainstream, leading to the emergence of high-end collaborations—think of the partnerships between designers and sports brands that have taken fashion shows by storm. These collaborations reflect a synergy that allows for both performance and high style, appealing to a broad demographic that values both principles.
Comfort and Practicality
In a world where children's fashion often takes a backseat to practicality, Mayhem Kidswear emerges as a vibrant brand dedicated to shaking things up. Targeting the dynamic needs of modern families, Mayhem Kidswear masterfully blends style, comfort, and durability in its clothing line, ensuring that kids can express their personalities while remaining comfortable throughout their adventures.
In recent years, the fashion landscape has witnessed a remarkable transformation, with sportswear taking center stage. No longer confined to the gym or the track, trendy sportswear has seeped into everyday life, creating a new wave of fashion that emphasizes both comfort and style. This evolution reflects changing consumer values and the desire for versatile clothing that caters to an active lifestyle while remaining aesthetically pleasing.
The Versatility and Comfort of Plain Cotton T-Shirts for Women
As the lines between functionality and fashion blur, boys' sportswear stands as a testament to the spirit of youth—dynamic, expressive, and ever-evolving.
Choosing the right boys' coat for your kids is an important decision that balances style, comfort, and practicality. By considering the various types of coats available, evaluating their functionality, and involving your child in the selection process, you can find a coat that keeps them warm and happy throughout the colder months. Remember, a good coat is an investment in your child’s comfort and well-being. Make sure to shop early in the season to ensure you find the best options before they run out, and don’t hesitate to explore sales and discounts for the best deals. Happy coat hunting!
Choosing the Right Material
Conclusion
In conclusion, the iridescent rain jacket is more than just a protective outer layer; it’s a celebration of style, innovation, and sustainability. As you step out into the rain, wear it with pride, knowing that you are prepared for whatever the weather brings your way. This dazzling piece of apparel not only keeps you dry but also allows you to embrace the beauty of nature and express your individuality. With an iridescent rain jacket in your closet, rainy days may just become your favorite.
Affordable Workwear Balancing Style and Practicality
Another important aspect is the design. Bow hunting requires a range of motion, particularly in the shoulders and arms. Sweatshirts designed specifically for hunters often include features such as raglan sleeves or extra stretching zones to allow for the full range of motion required when drawing a bow. Some models even have reinforced areas to protect against wear and tear from equipment.
Practical Benefits
Health Benefits for Wearers

Denim jackets have long been associated with a sense of rebellion and casual coolness. Their rugged texture and sturdy construction make them suitable for various occasions, from casual outings to more laid-back social gatherings. The classic denim jackets, typically crafted from 100% cotton denim, can sometimes feel stiff or constrain movement. Herein lies the genius of incorporating cotton sleeves. By blending denim with soft, breathable cotton, designers have created a more comfortable and adaptable version of the traditional jacket.