external waterproof access panel
-
...

Popular articles
- 1
1. Accessibility Requirements According to the Americans with Disabilities Act (ADA), all access panels must be accessible and easy to operate. This means that the location of access panels should be determined with consideration for mobility challenges. Additionally, panels should be operable with one hand and not require tight grasping, pinching, or twisting of the wrist.
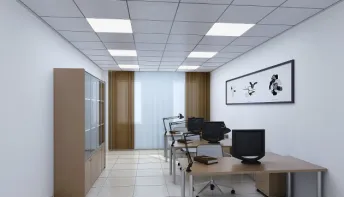
ceiling access panel code requirements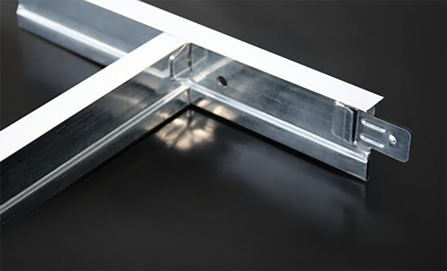
- 2
1. Easier Maintenance and Repairs One of the primary benefits of ceiling inspection panels is the ease with which maintenance can be performed. Regular inspections and repairs are crucial for the longevity of a building's systems. Engineers and technicians can quickly access crucial systems without needing extensive and disruptive dismantling of the ceiling or walls.
- 3
- 4
Maintenance
- 5
Conclusion
- 6
Understanding the pricing dynamics of PVC gypsum ceiling tiles is essential for making informed purchasing decisions. By considering factors such as material quality, design complexity, and the variations in market demand, buyers can identify suitable options that meet their aesthetic and budgetary needs. Whether for a residential renovation or a commercial project, PVC gypsum ceiling tiles offer a blend of style, functionality, and affordability, making them a worthy consideration for any space.
- 7
Installation Process
- 8
Laminated gypsum board, often referred to as drywall or gypsum wallboard, has become a staple in construction and interior design. This innovative building material is manufactured from gypsum plaster that is sandwiched between two layers of paper or fiberglass mat, providing both strength and versatility. With its unique properties and various applications, laminated gypsum board has revolutionized how we build and decorate our spaces.
- 9
Step 2 Measure and Mark
- 10
A ceiling inspection panel is a removable or hinged access panel integrated into the ceiling of a building. They are designed to provide easy access to concealed areas, such as ducts, pipes, and wiring systems, which are integral to a building’s infrastructure. Typically constructed from materials such as aluminum, steel, or plastic, these panels are designed to blend seamlessly with the ceiling, ensuring that aesthetics are maintained while still providing utility.