2x4 grid ceiling tiles
-
The aesthetic versatility of PVC grid false ceilings is remarkable. Available in a wide range of colors, textures, and designs, these ceilings can seamlessly complement various interior styles, from modern to traditional. Whether you prefer a glossy finish that reflects light or a matte appearance for a more subdued look, PVC panels can cater to your design preferences.
pvc grid false ceiling
...
Popular articles
- 1
Installing a T-bar ceiling is a relatively straightforward process that can often be completed in a few days, depending on the size of the area. The installation begins with measuring the space and determining the height of the ceiling. The metal tracks are then anchored to the ceiling, forming the grid, and the ceiling tiles are inserted into the frame.
- 2
1. Thermal Performance As noted, mineral wool boards have commendable R-values, aiding in the creation of energy-efficient buildings. They are particularly effective in climates that experience extreme temperatures, helping to keep homes warmer in the winter and cooler in the summer.
- 3
Fire rated ceiling access panels are constructed from robust materials such as gypsum, steel, or mineral fiber, depending on the desired fire rating and application. Steel panels, for instance, may feature a fire-resistant coating, while gypsum panels can offer excellent insulation properties. Each material brings its own unique advantages, and the choice often depends on factors such as the specific environment, aesthetic considerations, and budget.
- 4
- 5
- 6
Advantages of a 12x12 Access Panel
12x12 ceiling access panel
- 7
What are Sheetrock Ceiling Access Panels?
- 8
In summary, drop down ceiling tiles offer a unique blend of aesthetics, functionality, and practicality. Their ability to enhance acoustic performance, provide easy access to utilities, and contribute to energy efficiency makes them a valuable addition to many spaces. With a variety of styles to choose from, property owners can find the perfect tiles to suit their needs while enjoying the numerous benefits they bring. Whether for a home renovation or a commercial project, drop down ceiling tiles can elevate the quality of any interior environment.
- 9
1. Space Efficiency The compact size of a 600x600 hatch makes it suitable for smaller areas without sacrificing accessibility. Its dimensions make it easy to fit into various ceiling designs, whether in residential, commercial, or industrial settings.
- 10
Mineral fiber ceiling tile is versatile and that can be used in a number of commercial building applications. It is perfect for workplaces, schools, hospitals, and retail spaces where fire safety, sound consumption, and durability are of utmost importance. Additionally it is a choice and its economical which makes it an ideal choice for renovations or new builds.
- 5
Links
- The Protective Role of Rubber Boots An Essential Shield
- But wait, there's more! Not only do these sneakers boast incredible style, but they also prioritize comfort
 So why not take advantage of this opportunity to refresh your shoe collection?
 -
Slip Resistance A Must-Have Feature
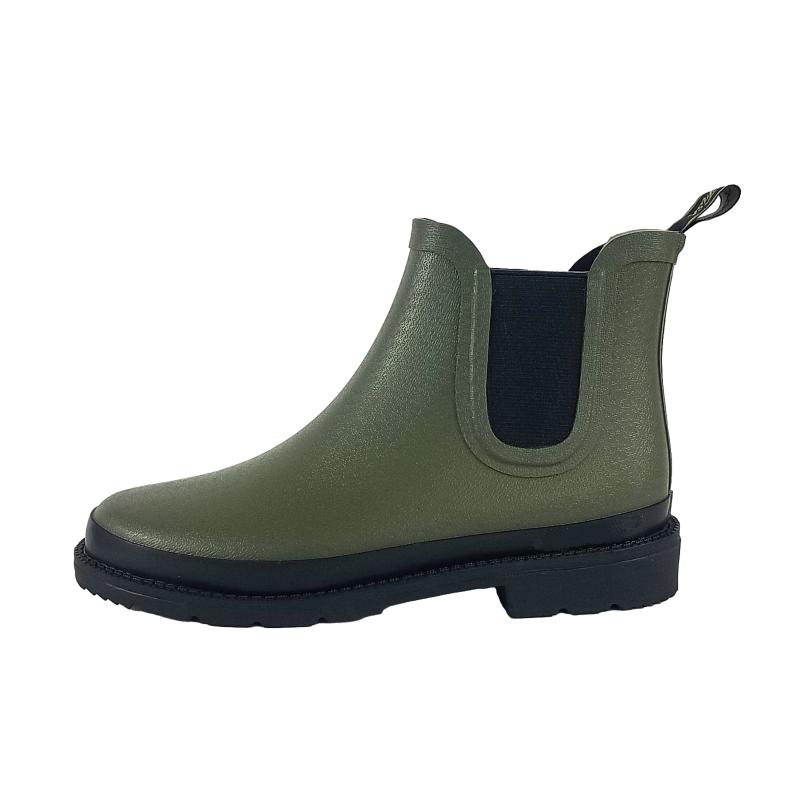
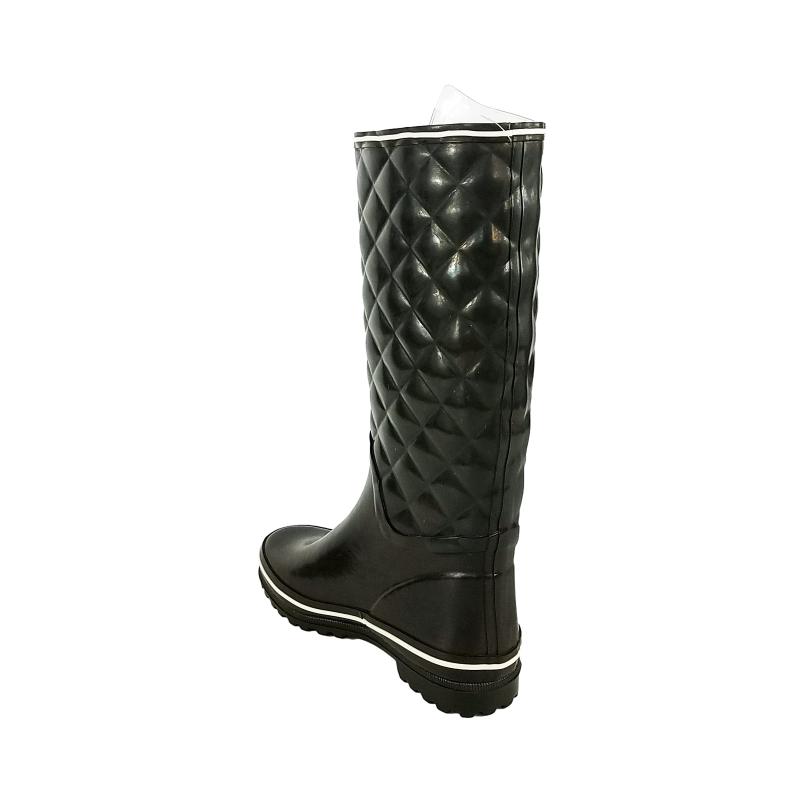
- Not just a practical choice, Chelsea rain boots have become a fashion statement. They effortlessly pair with anything from jeans and leggings to dresses and skirts, transforming even the dreariest of rainy days into a fashionable affair. Their sleek design allows them to transcend seasons, seamlessly blending into both casual and semi-formal outfits.
-
One of the standout features of men's safety Wellington boots is their waterproof design. Constructed from durable rubber or PVC materials, these boots are tailored to keep your feet dry even in the wettest conditions. Whether you're trudging through muddy fields, working in a rainy environment, or dealing with spills in a warehouse, the waterproof nature of these boots will ensure that your feet stay dry, comfortable, and protected.
-
- Choosing the Right Neoprene Fishing Boots:
-
Rubber sole safety boots are designed to withstand the rigors of demanding working conditions. The rubber soles provide excellent resistance to abrasion, oil, and chemicals, making them an ideal choice for industries such as construction, manufacturing, and agriculture. Workers in these fields often face hazardous situations, including exposure to sharp objects, heavy machinery, and slippery surfaces. The sturdy rubber soles of these safety boots help absorb impact and prevent slips and falls, significantly reducing the risk of injuries.
- 4. Comfort Comfort is crucial when it comes to hiking boots, and rubber pack boots are no exception. Soft, padded collars and tongues, as well as cushioned insoles, provide all-day support and reduce friction between your feet and the boots.
-
- In conclusion, wading shoes for waders are an essential piece of equipment for anyone who enjoys spending time in the water. These specialized shoes are designed to provide durability, comfort, and traction for navigating challenging terrain. By choosing the right pair of wading shoes, you can stay safe and comfortable while enjoying your outdoor adventures.
-
- When choosing insulated boots for ice fishing, there are a few key factors to consider
insulated boots for ice fishing. First and foremost, you want to make sure that the boots are warm and insulated enough to keep your feet comfortable in cold temperatures. Look for boots with thick insulation and a high cold rating to ensure that they can handle the coldest of conditions. - One of the great things about blue rubber rain boots is their versatility. They come in various shades of blue, from light sky blue to deep navy, allowing you to choose a color that suits your style. Whether you are running errands in town or going for a hike in the mountains, blue rubber rain boots can be paired with almost any outfit. They look great with jeans, leggings, or even a cute skirt and tights.
-
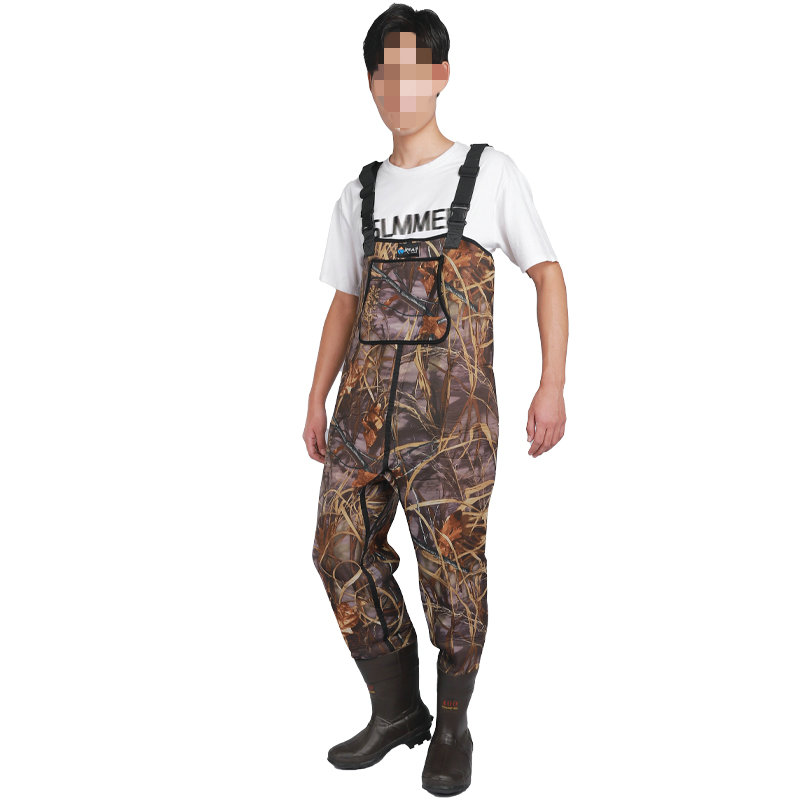
5mm Neoprene Waders:
- Moreover, investing in youth snake proof hunting boots is a smart choice for the future. As young hunters progress in their skills and passion, these boots will serve as a reliable companion, instilling confidence and encouraging them to explore the great outdoors fearlessly. It's an investment in their safety, their love for nature, and their personal growth.
- Construction wellies are specifically designed to withstand the harsh conditions prevalent in the industry. They are typically made from high-quality rubber, providing an excellent barrier against water, mud, and various other environmental hazards. The thick soles, often equipped with steel or composite toe caps, offer protection against heavy objects and sharp edges, while the sturdy grip ensures stability on slippery surfaces, preventing slips, trips, and falls - common incidents in construction sites.
-
When it comes to hunting, having the right gear can make all the difference between a successful outing and a frustrating day in the field. One essential piece of equipment that every serious hunter should invest in is a quality pair of camo hunting boots. These boots not only provide the durability and support needed for trekking through various terrains but also enhance your concealment in the environment. Let's explore the features that make camo hunting boots a must-have for your hunting adventures.
-
Neoprene fishing boots are designed with comfort in mind, featuring cushioned insoles and supportive construction that cradle the feet and provide all-day comfort. The soft and flexible material of neoprene conforms to the contours of the feet, offering a snug and comfortable fit without any uncomfortable pressure points. Whether standing on the deck of a boat, wading through streams, or walking along rocky shores, neoprene boots provide the support and cushioning anglers need to stay comfortable for hours on end.
- Moreover, the rubber used in these boots is not just any material; it's meticulously chosen for its water-resistant properties
- In the world of footwear, there's a unique category that seamlessly combines fashion and practicality - low cut men's rain boots. These boots, designed to sit just below the ankle, offer a stylish alternative to traditional high-top rain boots while still providing the necessary protection against wet and muddy conditions.
-
- Secondly, stability is key. Different types of workouts require different types of shoes. For instance, weightlifting shoes have a flat sole for better grounding and weight distribution, while running shoes have more flexibility and cushioning. If you're into cross-training, consider shoes that offer a balance between support, stability, and flexibility. Make sure the shoes have a sturdy sole that can resist the pressure of lateral movements.
- When it comes to style, winter sneakers don't sacrifice fashion for function

-
Thinsulate is a brand known for its superior insulation technology, and their 1400 gram hunting boots are a top choice for hunters looking to stay warm and comfortable during long days in the field
. The 1400 gram Thinsulate hunting boots are designed to provide maximum warmth and protection in the harshest of conditions, making them the perfect choice for cold weather hunting expeditions.
-
- Waterproof Performance:
- Chelsea women's rain boots are designed with both style and practicality in mind. They feature a sleek silhouette that is easy to slip on and off, making them perfect for those busy mornings when you need to rush out the door. The boots are made from high-quality materials that are waterproof, ensuring that your feet stay dry even in the heaviest downpours.
- One of the key features of insulated welly boots is their lining. Most insulated welly boots are lined with a thick layer of insulating material, such as neoprene or fleece, which helps to trap heat and keep your feet warm in even the coldest of temperatures. This makes them perfect for activities like hiking, camping, or working outdoors in the winter months.
- Whether you are working on a construction site, hiking through rugged terrain, or simply navigating through snow and ice, men's insulated steel toe rubber boots are a reliable and versatile footwear option. Their durable construction and protective features make them a practical choice for anyone who spends time outdoors in challenging environments.
- In conclusion, women's casual winter shoes are a testament to the idea that fashion and function can coexist harmoniously. They not only shield us from the harsh elements but also allow us to express our personal style. So, invest in a pair (or two) that resonate with your fashion sense and cater to your winter needs – because staying warm and looking great should always go hand in hand.
- The Chelsea Rain Boot A Stylish Shield Against Wet Weather
- In the world of footwear, there lies a category that stands tall against the elements and the rigors of everyday work - the short insulated rubber boots. These boots, with their unique blend of functionality, comfort, and durability, have carved a niche for themselves in various industries and outdoor activities.
- In addition to their chemical resistant properties, wellington boots also provide other benefits such as waterproofing and insulation. This makes them ideal for use in wet and cold environments where keeping the feet dry and warm is essential for comfort and safety. The tall design of wellington boots also offers protection to the wearer's lower legs, shielding them from splashes and spills that may occur while working with chemicals.
- Whether you're running errands, walking the dog, or commuting to work, women's quilted rain boots are a practical and fashionable footwear choice for rainy days. Not only do they provide the necessary protection from the elements, but they also add a fun and stylish element to your outfit. With their durability, functionality, and style, quilted rain boots are a timeless wardrobe staple that every woman should own.
-
- Another crucial factor to consider when choosing women's rubber boots is the fit and comfort
target womens rubber boots. Look for boots that have a comfortable insole and lining to ensure that your feet stay cozy and supported throughout the day. It is also important to choose a pair that is the right size for your feet to prevent any discomfort or blisters. - Comfort is also a critical factor when it comes to safety rubber boots. Prolonged standing or walking on hard surfaces can lead to fatigue and discomfort. High-quality safety boots often include cushioned insoles and shock-absorbent midsoles to reduce strain on the feet and legs. Additionally, good traction is essential to prevent slips and falls, and safety rubber boots usually have non-slip soles designed for stability on various terrains.
- Athletic footwear has also become a fashion statement, with many people opting to wear their stylish sneakers for everyday activities. The trend of athleisure wear has blurred the lines between athletic and casual footwear, with many brands offering trendy designs that can be worn both in the gym and on the streets.
- Moreover, black leather sports shoes transcend the boundaries of sportswear
- Low rain boots, also known as ankle rain boots, offer the same level of protection as traditional tall rain boots, but with a more modern and versatile look. They are perfect for running errands around town, taking the dog for a walk, or even going out for a night on the town during a rainy evening.
- Best Winter Fishing Shoes on the Market
-
Thigh waders, also known as thigh-high boots, are a crucial piece of equipment for individuals who engage in outdoor activities that involve water, mud, or various wet environments. Originally designed for fishermen, these waterproof boots have transcended their initial purpose and are now widely used by hunters, waterfowl enthusiasts, conservationists, and even those who enjoy recreational pursuits near lakes and rivers. The utility and versatility of thigh waders make them indispensable for anyone who spends time in aquatic habitats.
- Introduction
- The Indispensable Role of Rubber Sailing Boots in Nautical Adventures
- Firstly, insulation is the key feature that sets hunting insulated boots apart. Materials like Thinsulate or Primaloft offer excellent thermal insulation without adding bulk. They keep your feet warm even in sub-zero temperatures, ensuring you stay comfortable throughout the day.
- The rubber construction of these boots is another defining feature. High-quality rubber provides an impermeable barrier against water, mud, and other elements you might encounter in the great outdoors. Whether you're trudging through damp grasslands or wading through shallow streams, your feet will remain dry and comfortable inside. The durability of rubber also ensures that these boots can withstand the wear and tear of repeated use, maintaining their integrity over time.
-
In conclusion, rubber pack boots are an exceptional footwear choice for individuals who seek durability, comfort, and style during cold and wet seasons. Their robust construction ensures longevity and resistance to moisture, while thoughtful designs prioritize comfort and support. These boots are not just practical tools for outdoor activities but have also become fashionable staples in many wardrobes. Whether you are venturing into the wilderness or braving a rainy day in the city, rubber pack boots offer the perfect blend of function and flair. Investing in a quality pair will undoubtedly elevate your winter experience, ensuring that your feet remain dry, warm, and stylish.
- Rubber boots are an essential piece of footwear for many industries that deal with hazardous chemicals on a daily basis. These boots are designed to provide protection against a wide variety of chemicals that could potentially harm the wearer's feet. Rubber boots that are chemical-resistant are made from materials that are specifically engineered to resist the harmful effects of various chemicals.
- 4. Traction
- 7. Golf Shoes
- Effective Security Solution with Anti-Theft Barbed Wire Mesh for Enhanced Protection
- Manufacturers producing iron wire coil under HS code for global distribution.
- High-Capacity 300 Gallon Stainless Steel Water Storage Solution for Various Needs
- Exploring the Benefits and Applications of Plastic GI Sheets in Modern Construction Projects
- Durable PVC Coated Square Wire Mesh for Various Applications and Enhanced Outdoor Longevity
- High Capacity 1000 Liters Stainless Steel Water Tank for Reliable Storage Solutions
- Durable Hexagonal Wire Netting with PVC Coating for Enhanced Outdoor Protection and Versatility
- Nylon Window Screen Manufacturing Facility for Quality and Durability Solutions in Home Improvement
- Design Considerations for Anchoring Deformed Bars in Construction Applications and Structural Integrity
- Innovative Strategies for Enhancing Efficiency and Performance in Cooling Tower Systems Today