ceiling grid insulation
-
In addition to their visual benefits, metal grid ceiling panels offer numerous functional advantages. One of the primary benefits is their ability to conceal unsightly electrical wiring, plumbing, and HVAC systems, thus providing a cleaner and more streamlined appearance. This feature is particularly beneficial in commercial spaces where presentation and professionalism are paramount.
...

Popular articles
- 1
In conclusion, Sheetrock ceiling access panels are an invaluable addition to any building that requires access to hidden utilities. Their combination of aesthetic appeal, ease of installation, durability, and accessibility makes them a popular choice for various applications. Whether you are considering renovations for your home or looking to enhance a commercial space, incorporating these panels can significantly improve maintenance efficiency while maintaining a clean and professional appearance. As building standards continue to evolve, the demand for discreet and functional solutions like Sheetrock ceiling access panels will undoubtedly grow, cementing their role in modern construction practices.
- 2
3. 16 x 16 inches This size is ideal for moderate access requirements, often suited for utility areas where larger components may need attention.
- 3
(2) The added organic fiber is a processed and recycled product that is used for recycling old newspapers for recycling. It is 100% free of asbestos, formaldehyde and other toxic and harmful substances to the human body. Wastes from processing and old ceilings that complete the product life cycle can be recycled (up to 79% of recycled materials), effectively reducing construction waste and avoiding environmental pollution.
- 4
Understanding Ceiling Grid Hanger Wire Essential for Suspended Ceilings
- 5
Access panels are small, removable sections of drywall, designed to blend seamlessly into the ceiling. They provide entry points to vital systems without the need for extensive demolition or invasive repairs. Whether in residential, commercial, or industrial settings, access panels play a crucial role in simplifying maintenance and enhancing the longevity of building systems.
- 6
1. Ease of Access The most significant advantage of T-bar ceiling access panels is the convenience they offer. In commercial settings, maintenance workers can quickly reach vital systems without disrupting the entire ceiling. This efficiency minimizes downtime and maintenance costs.
t bar ceiling access panel
- 7
3. Corner Brackets Designed specifically for securing T-bars at corners where two walls meet, these brackets ensure that the grid remains stable and aligned.
ceiling t bar bracket
- 8- Paintbrush or roller (if finishing)
- 9
Accessibility and Maintenance
- 10- Saw For cutting the plywood or drywall.
Links
-
Another highlight of ladies' rain ponchos is their eco-friendliness. With many brands opting for sustainable materials like recycled plastics, using a poncho can contribute to reducing environmental impact. Investing in a durable, reusable poncho is a more environmentally responsible choice compared to single-use rain gear.
-
4. Adjustable Features An ideal raincoat should have adjustable collars, cuffs, and hems to provide a snug fit. This prevents wind and rain from entering the jacket, keeping you comfortable and dry.
-
1. Waterproof and Breathable Materials High-quality raincoats are made from waterproof materials like Gore-Tex or similar fabrics that allow sweat to escape while preventing water from getting in. Breathability is essential for comfort, especially on longer rides.
-
2. Health Getting soaked in cold rain can lead to illness. Proper rainwear provides a barrier against the elements, reducing the likelihood of catching a cold or facing other weather-related health issues.
-
-
Some popular materials include Gore-Tex, which is celebrated for its moisture-wicking and breathable properties, and rubberized fabrics that add a chic, glossy finish to the traditional raincoat. Additionally, the rise of eco-conscious fashion means many brands now offer sustainable options made from recycled materials, catering to the environmentally aware consumer.
winter raincoats ladies
-
PVC Rain Wear: Robust Protection for Challenging Environments
-
5. Storage Options Pockets are vital for safety gear, maps, or other essentials. Look for a raincoat that provides waterproof storage options to keep your belongings dry while riding.
-
Sustainability has also become an important consideration in fashion choices today. Many brands are responding to the growing demand for eco-friendly clothing by using recycled materials and sustainable production methods. Investing in a high-quality, well-crafted knee-length raincoat can mean not only staying stylish and dry but also contributing to a more sustainable fashion industry.
-
Shark Umbrella A Unique Blend of Fun and Functionality
-
When it comes to selecting a bushcraft tent, there are several factors to consider. The first is the size and weight of the tent. If you're backpacking, you'll want something lightweight and compact, whereas car campers may opt for larger, more spacious models. Look for tents that can easily fit into your pack without adding unnecessary bulk.
-
In today's fast-paced world, safety and hygiene have become paramount in various industries, from healthcare to food service
. One significant product that has gained prominence is black vinyl disposable gloves. These gloves offer a combination of practicality, comfort, and a professional appearance, making them a preferred choice for many.
-
Today’s yellow rain jackets for men are designed with more than just looks in mind. Many feature waterproof and breathable materials that keep the wearer dry without trapping moisture inside. Advanced fabric technologies such as Gore-Tex and waterproof coatings ensure that you can stay out in the rain longer without feeling clammy or uncomfortable. Additionally, many jackets come equipped with adjustable hoods, cuffs, and hemlines, allowing for a customizable fit that keeps rain out while providing freedom of movement.
yellow rain jacket mens
-
Αδιάβροχα Μπουφάν για Εργασία Υπαίθρου
-
Furthermore, the iconic umbrella also reminds us of the importance of cherishing relationships. The friendship among the characters shines as a beacon of hope and comfort, encouraging viewers to invest time and energy into their connections. Whether through laughter, shared secrets, or simply being there in silence, the friends' unwavering support reinforces the idea that nurturing relationships is essential for personal growth and happiness.
-
Embrace the Elements with Men's Microfiber Raincoats
-
-
The first aspect to consider is the size of the backpack and its compatibility with your laptop. Most backpacks come with specific laptop compartments that can accommodate various sizes, typically ranging from 15 to 17 inches. Make sure to measure your laptop and choose a backpack that offers a snug fit to prevent it from moving around during transport.
-
In conclusion, umbrella printing represents a burgeoning field with countless opportunities for creativity and marketing. Whether as a personal accessory or a promotional tool, customized umbrellas bring together practicality and artistry. As the industry continues to grow, we can expect to see even more innovative designs and sustainable practices, making the ordinary umbrella an extraordinary statement piece.
-
Вақте ки шумо интихоби нави гарданмузҳои боронӣ мекунед, ба фарқиятҳои моддӣ, ранги мӯи ҳалқавии мавод ва қобилияти сладчӣ диққат диҳед. Онҳо дар ҳар шароити обу ҳаво, бо равиши муосир ва арзишҳои нав, барои мардони муосир сохта шудаанд. Тасвири кайфияти новосозӣ ва самти практике вогзода менамуд, ки гарданмузҳои гармии боронӣ комилан мувофиқанд.
-
Patio tentlərin ən əhəmiyyətli üstünlüklərindən biri, sadə quraşdırma prosesidir. Bir çox model, alıcılar tərəfindən asanlıqla quraşdırıla və sökülə bilər. Bu, onlara öz evində sığınacaq şəraiti yaratmaq imkanı verir. Həmçinin, patio tentlər açıq hava tədbirləri, pikniklər və ya xüsusi günlər üçün mükəmməl bir yer təmin edir.
-
या जॅकेटसह तुम्हाला तुमच्या स्टाईलमध्ये एक खास टच मिळेल, जो तुम्हाला विविध प्रसंगांमध्ये आत्मविश्वासाने उभं राहायला मदत करेल. त्यामुळे, गरज असलेल्या प्रत्येक महिला यंत्रणेत एक ग्रे रंगाची रेन जॅकेट असणे अनिवार्य आहे!
-
Sun tents are designed for easy setup and portability, making them an excellent choice for on-the-go adventurers. These lightweight structures are often made from robust yet breathable materials, ensuring that they block harmful UV rays while providing a comfortable environment underneath. Available in various sizes and shapes, there's a sun tent to fit everyone’s needs – from cozy options for solo travelers to larger versions that can accommodate families or groups of friends.
-
Moreover, a classy rain jacket is not simply a seasonal item. With proper care, it can last for years, making it a worthwhile investment. Regularly cleaning and re-treating the fabric helps maintain its waterproof properties and appearance. Choosing a timeless design ensures that it will remain relevant amidst changing fashion trends, while high-quality materials guarantee durability.
-
Comfort is another key feature of the large straw beach mat. Unlike sand or hard surfaces, the soft, woven straw provides a comfortable barrier between your body and the ground. You can lie back, relax, and enjoy the gentle sea breeze without the discomfort that comes from lying directly on the beach sand. Additionally, the straw's texture offers a slight cushioning effect, which is perfect for a quick nap or meditation session under the open sky.
-
Even with the right raincoat and umbrella, there are a few tips for making rainy day walks enjoyable for both you and your dog. Start by choosing the right time for your walks. Early mornings or late afternoons can sometimes offer a break in the storm. Always check the forecast before heading out, and look for safe walking paths with ample drainage to avoid puddles.
-
The allure of camouflage lies in its unique ability to blend into various environments while also standing out in a crowd. This paradox makes camouflage rain jackets incredibly versatile. Whether you’re hiking through a dense forest, attending a music festival, or simply running errands in the city, these jackets can complement a wide range of outfits. They can be paired effortlessly with jeans for a casual look or dressed up with stylish boots and accessories for a more urban vibe.
-
When choosing a men's microfiber raincoat, consider factors such as fit, length, and additional features. A well-fitted raincoat will not only look good but also provide better protection against wind and rain. Look for options that offer adjustable cuffs and hems to customize the fit to your preference. Furthermore, longer styles may offer extra coverage, which is particularly beneficial during heavy downpours.
-
Při výběru deštníku pro vašeho psa je důležité zvážit několik faktorů. V první řadě byste měli zvolit velikost, která odpovídá postavě vašeho psa. Každá značka má jiné velikosti, a proto je dobré se řídit tabulkou velikostí, abyste zajistili, že nový deštník bude psovi dokonale sedět. Oblečení by mělo být dostatečně volné, aby pes mohl snadno běhat a pohybovat se, ale zároveň dostatečně těsné, aby nepřekáželo v jeho aktivitách.
warm raincoat for dogs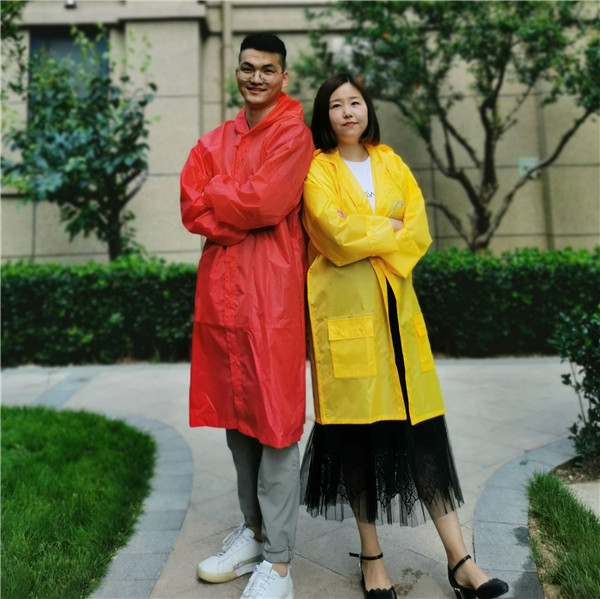
-
In conclusion, women's rain wear has come a long way, merging style and practicality to create garments that empower women to face inclement weather with confidence. With various designs available, anyone can find the perfect rain jacket that fits their lifestyle, ensuring that rainy days don’t dampen their spirits. Whether for daily commutes or spontaneous outings, stylish rain wear allows women to make the most of every storm.
-
In conclusion, a girl's backpack is much more than just a container for her belongings. It is a vital accessory that reflects her identity, aids in her organization, houses cherished memories, and empowers her for the future. The rite of passage associated with choosing and using a backpack marks significant growth in a girl’s life, making it a vital element of her journey into womanhood.
-
For those seeking elegance even in the rain, our fancy raincoat for ladies offers a stylish solution. These raincoats are crafted from premium materials and designed with sophisticated details, ensuring you look your best even on the wettest days. With options like belted waists, tailored fits, and luxurious linings, you can stay chic and dry no matter the occasion.
-
In conclusion, selecting the right large laptop backpack requires careful consideration of your personal needs, the size and protection of your laptop, organizational capabilities, comfort, and durability. With the right backpack, you can blend functionality with style while ensuring your tech stays safe. Take the time to explore your options, and you'll find the perfect companion for all your adventures, whether in the classroom, office, or on the go.
-
-
Moreover, reflective waterproof jackets often come with additional features that enhance functionality. Many of these jackets are lightweight and packable, making them easy to store in a backpack or purse when not in use. Adjustable hoods, cuffs, and hems can also provide a better fit and additional protection against the elements. Ventilation zippers are a handy inclusion that promotes airflow, thus making the jacket suitable for various weather conditions.
- .
-
Et vellykket nødleirsystem krever nøye planlegging. Det må tas hensyn til lokalisering, tilgjengelighet av vann og sanitære forhold, samt nærheten til eksisterende infrastruktur. Humanitære organisasjoner, som FNs høykommissær for flyktninger (UNHCR), har utviklet retningslinjer for hvordan man best kan opprette og drive disse leirene. Kvaliteten på hjelpen kan variere, men målet er alltid å sikre en så human og verdig behandling som mulig for de som rammes.
-
Gone are the days when raincoats were solely utilitarian and lackluster in style. Today’s designs come in a plethora of colors, patterns, and styles, catering to varying tastes and preferences. From sleek and minimalist designs to bold prints and vibrant hues, women can express their personality while staying prepared for unpredictable weather. Whether paired with casual jeans and sneakers or a chic dress and boots, a well-chosen raincoat can enhance any outfit.
women's raincoat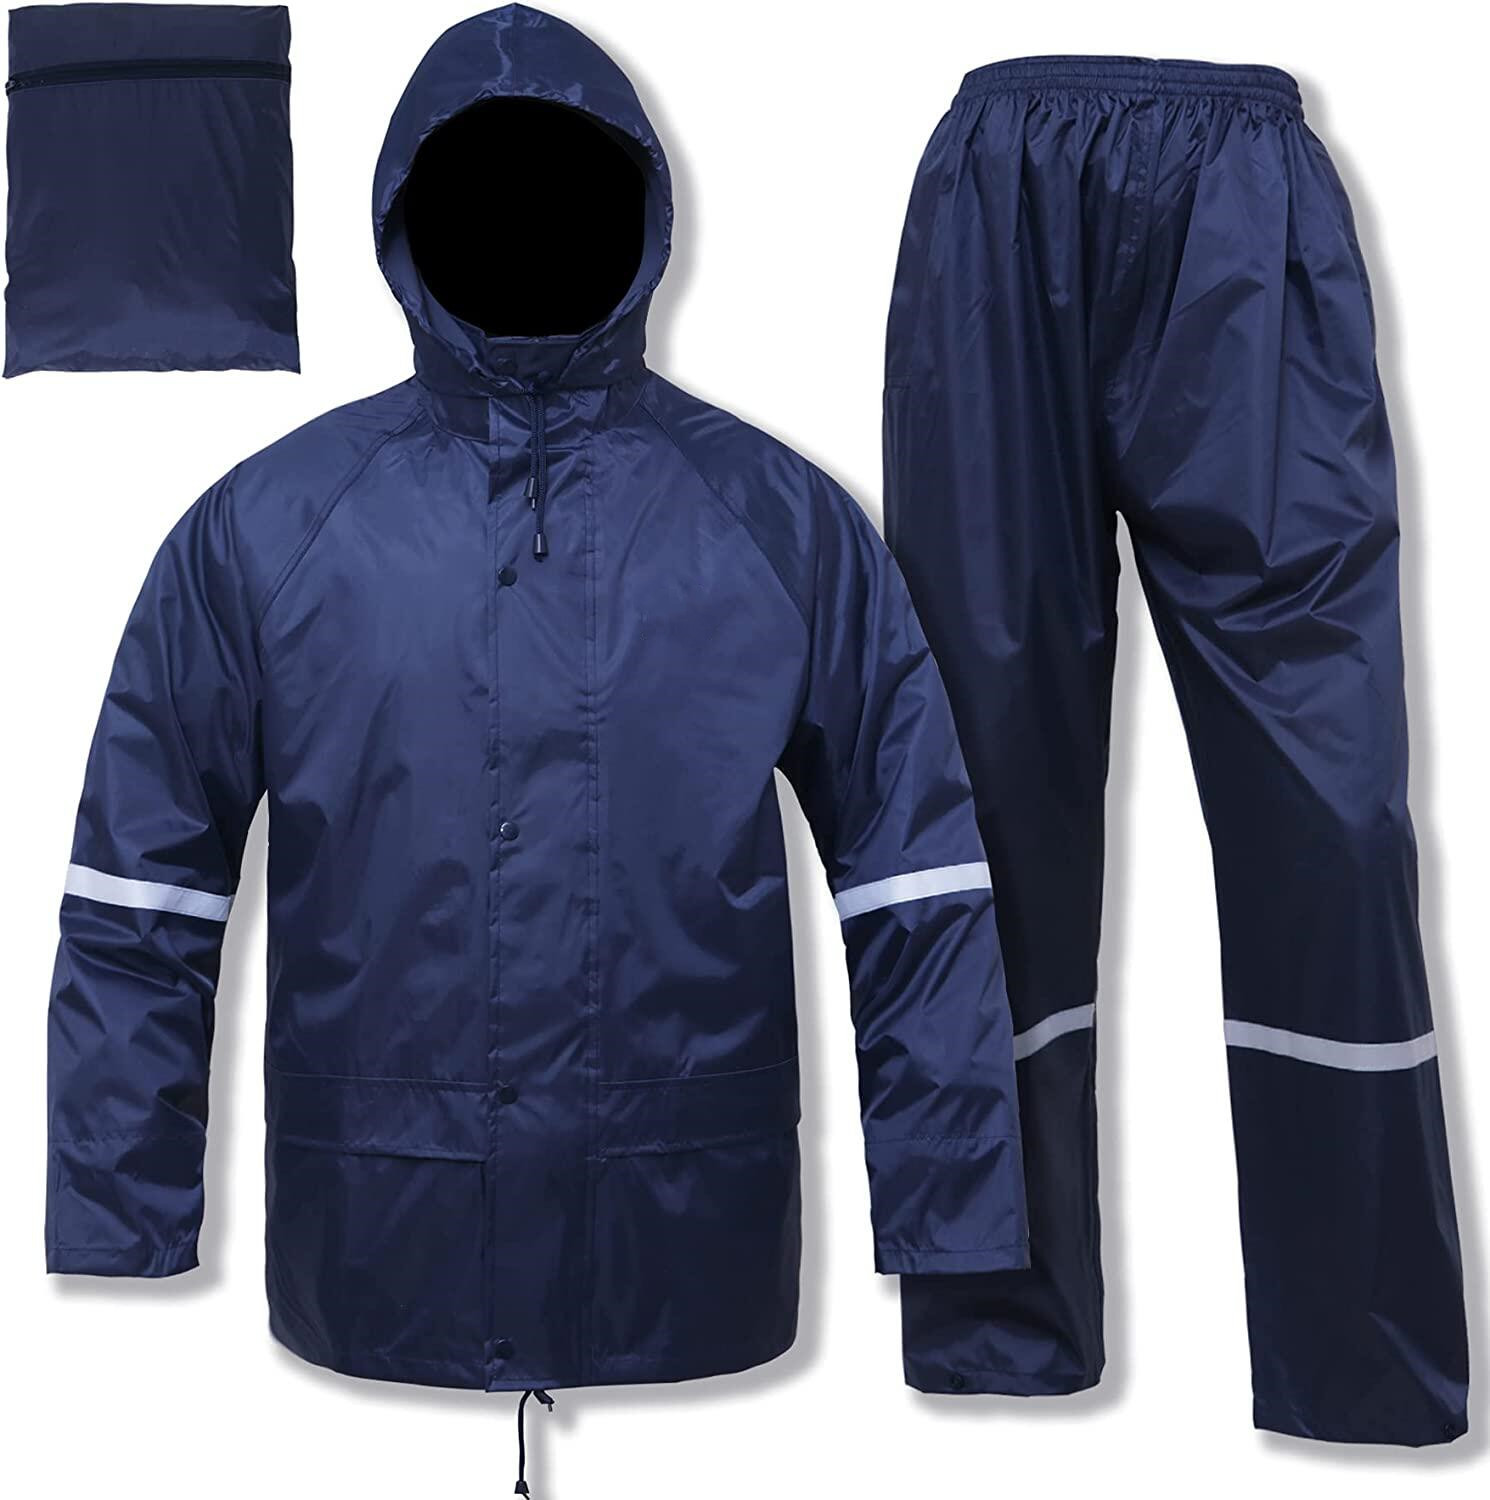
-
A backpack also carries memories and experiences. Each item stored within—be it the pencil from her first day of school, a book that inspired her, or a lunch packed by a loved one—adds layers to her personal narrative. Throughout her educational journey, she will likely accumulate stickers, patches, or charms on her backpack, symbolizing achievements or milestones, which create a timeline of her growth and transformation.
-
軽量レインジャケットの最大の特徴は、持ち運びのしやすさです。多くの製品はコンパクトに折りたたむことができ、カバンやリュックサックに簡単に収まります。また、軽量であるため、長時間着用しても疲れにくく、アクティブなライフスタイルを送る男性にはぴったりのアイテムです。
-
TGC Black Nitrile Disposable Gloves သည် သန့်ရှင်းမှုနှင့် အထူးအခြားကောင်းမွန်မှုကိုပေးစွမ်းနိုင်သော လက်သုံးရက်စွဲဆပ်ပြာများဖြစ်သည်။ ဤ gloves များသည် အထူးသဖြင့် ကျန်းမာေရး၊ အစားအသောက် လုပ်ငန်းဆိုင်ရာ၊ လက်လုပ်ငန်းများတွင် အသုံးပြုရန် သင့်လျော်ပြီး သင်္ချာဆိုင်ရာ လုပ်ငန်းများတွင်လည်း နည်းပညာပိုင်းဆိုင်ရာ အောင်မြင်မှုကို ထောက်ပံ့ပေးနိုင်သည်။
-
Rainy days are often perceived as dreary and uninviting. However, with the right rain wear, women can embrace the weather while staying stylish and comfortable. Women's rain wear has evolved significantly over the years, offering a blend of functionality, fashion, and versatility to suit various tastes and occasions.
- .
-
Moreover, modern camping lanterns often come equipped with additional features that elevate their functionality. Many LED lanterns sport built-in Bluetooth speakers, allowing you to enjoy your favorite tunes while immersed in nature. Others include emergency power capabilities, enabling campers to charge their phones or GPS devices when needed. Some models even have solar charging options, promoting sustainability and reducing your carbon footprint during outdoor adventures.
-
結論として、マキシムブラック使い捨て手袋は、さまざまな場面での衛生管理や安全対策において非常に重要な役割を果たす製品です。業務用だけでなく、家庭での使用にも適しているため、この手袋を導入することで、安心・安全な環境を実現できます。あなたもぜひ、マキシムブラック使い捨て手袋を手に取って、快適さと安心感を体験してみてください。
-
На завершення, килимок для пляжу з спинкою — це не тільки зручність, а й можливість привнести стиль і комфорт у ваш відпочинок. Відкрийте для себе нові горизонти відпочинку, зробивши вибір на користь цього незамінного аксесуара!
-
When the skies turn gray and the rain begins to fall, it can be tough to get outside for a walk—even for our beloved furry friends. For dog owners, keeping their pets dry and comfortable during rainy weather is essential, and this is where dog anoraks and raincoats come into play. These garments not only protect dogs from the wet elements but also ensure that they can enjoy outdoor adventures regardless of the forecast.
-
Selecting the appropriate function wear is crucial for ensuring comfort and protection across different weather conditions. PVC rain wear offers robust durability for harsh environments, duck back rain wear provides a stylish and functional option for everyday use, and tropical rain wear delivers optimal comfort for warm climates. Each type of rainwear is designed to meet specific needs, making it essential to choose the one that best fits your lifestyle and environment.
-
The khaki raincoat has a rich history, often associated with military uniforms and outdoor adventures. Over the decades, however, it has transitioned into a fashionable item embraced by women of all ages. Icons like Audrey Hepburn and Kate Moss are often seen donning elegant versions of the khaki raincoat, further solidifying its place in the fashion world. Today, modern interpretations incorporate trendy elements, such as oversized fits, unique cuts, and bold accessories, ensuring that every woman can find a style that reflects her personality.
-
Esses guarda-chuvas não são apenas funcionais; eles contam uma história. Em algumas culturas, eram usados durante celebrações e festivais, não apenas como proteção do clima, mas também como ornamentação. Imagine um desfile de festividades com centenas de pessoas segurando guarda-chuvas coloridos de pau, transformando as ruas em um mar vibrante de cores. Cada guarda-chuva traz consigo não apenas uma função prática, mas também um elemento de arte e expressão pessoal.
stick umbrella
- Angular Contact Ball Bearings Product Guide and Specifications Overview
- 28580 bearing
- weizi bearing bearing ball deep groove
- Roulements à contact angulaire - Performance et Précision
- weizi bearing bearing pressing machine
- weizi bearing cylindrical roller bearing supplier
- weizi bearing nj 206 bearing
- weizi bearing 23244 bearing
- Similar title to 4T L44649 Bearing can be Replacement Bearing for 4T L44649, High Quality and Durable
- Design and Applications of Single Thrust Ball Bearings in Machinery Systems