waterproof shower access panel

Links
-
The significance of effective water treatment in industrial settings cannot be overstated. As industries expand and water resources become increasingly strained, the need for innovative and efficient water treatment solutions is more critical than ever. Industrial water treatment refers to the processes and technologies used to treat water utilized in manufacturing, cooling, and various industrial operations. This article explores the importance, methods, and benefits of industrial water treatment.
-
In today's fast-paced world, safety and accident prevention are paramount, both in personal and professional settings. One key area that often goes overlooked is floor safety, where slips and falls can lead to serious injuries. Anti-slip products have become essential tools in mitigating these risks, providing a safer environment for everyone. This article delves into the significance of anti-slip products, their various types, and their applications.
-
One of the most critical stages of water treatment is disinfection. This step is vital for killing pathogenic microorganisms that can cause diseases. Common disinfection methods include chlorination, where chlorine or chlorine compounds are added to kill bacteria and viruses, and UV radiation, which uses ultraviolet light to destroy harmful pathogens. The effectiveness of these methods is crucial in ensuring that treated water meets health standards set by regulatory bodies.
-
One of the key advantages of fiber water tanks is their lightweight nature, making them easier to transport and install. The flexibility in design allows for various sizes and shapes, catering to a wide range of applications—from residential use to agricultural storage needs. Furthermore, fiber water tanks are less prone to algae growth and other biological contaminants, ensuring cleaner water storage.
-
In various industries and agricultural practices, the need for reliable water storage solutions cannot be overstated. Large galvanized water tanks have emerged as a popular choice due to their durability, versatility, and cost-effectiveness. These tanks, made from steel coated with a layer of zinc, offer numerous advantages that make them suitable for a wide range of applications.
-
While FRP tanks are low-maintenance, periodic inspections are essential to ensure their integrity. Regular checks for cracks, discolorations, or leaks will help address potential issues before they become significant problems. Cleaning the tank periodically is crucial to prevent biofilm buildup and ensure that the stored water remains clean and safe for use.
-
What is Safe T Deck?
-
Budgeting for Your Project
-
2. Chemical Treatment Systems Chemical treatment involves adding specific chemicals to water to alter its properties. This can include coagulation, flocculation, and disinfection processes. Equipment for this purpose may include chemical dosing systems that accurately dispense necessary substances like chlorine or coagulants to ensure proper water quality.
-
One of the key advantages of molded FRP is its incredible strength-to-weight ratio. This means that it can withstand substantial loads while being significantly lighter than traditional materials like steel and concrete. This characteristic makes molded FRP an ideal choice for industries looking to enhance efficiency without compromising on performance.
-
3. Ultraviolet (UV) Disinfection Systems These systems use UV light to kill bacteria and viruses without the use of chemicals. UV systems are gaining popularity due to their effectiveness and eco-friendliness.
-
Understanding Industrial Reverse Osmosis Water Systems
-
Conclusion
-
Applications of GRP Floor Grating
-
FRP floor grating is used in a plethora of applications across different sectors
-
In industrial applications, stainless steel grating is vital for platforms, walkways, and stair treads. Its ability to withstand heavy loads and resist impacts makes it an ideal choice for factories, warehouses, and other heavy-duty environments. Additionally, it is a popular choice in the marine industry for docks, boat lifts, and walkways due to its resistance to saltwater corrosion.
-
Another area where composite gratings shine is in the development of lasers and optical communication systems. By integrating composite gratings into laser cavities, engineers can achieve more stable and narrow linewidth outputs, enhancing the performance of laser systems. In optical communication, composite gratings are instrumental in dense wavelength division multiplexing (DWDM) technologies, where they help in multiplexing and demultiplexing multiple optical signals with minimal cross-talk and high precision.
composite grating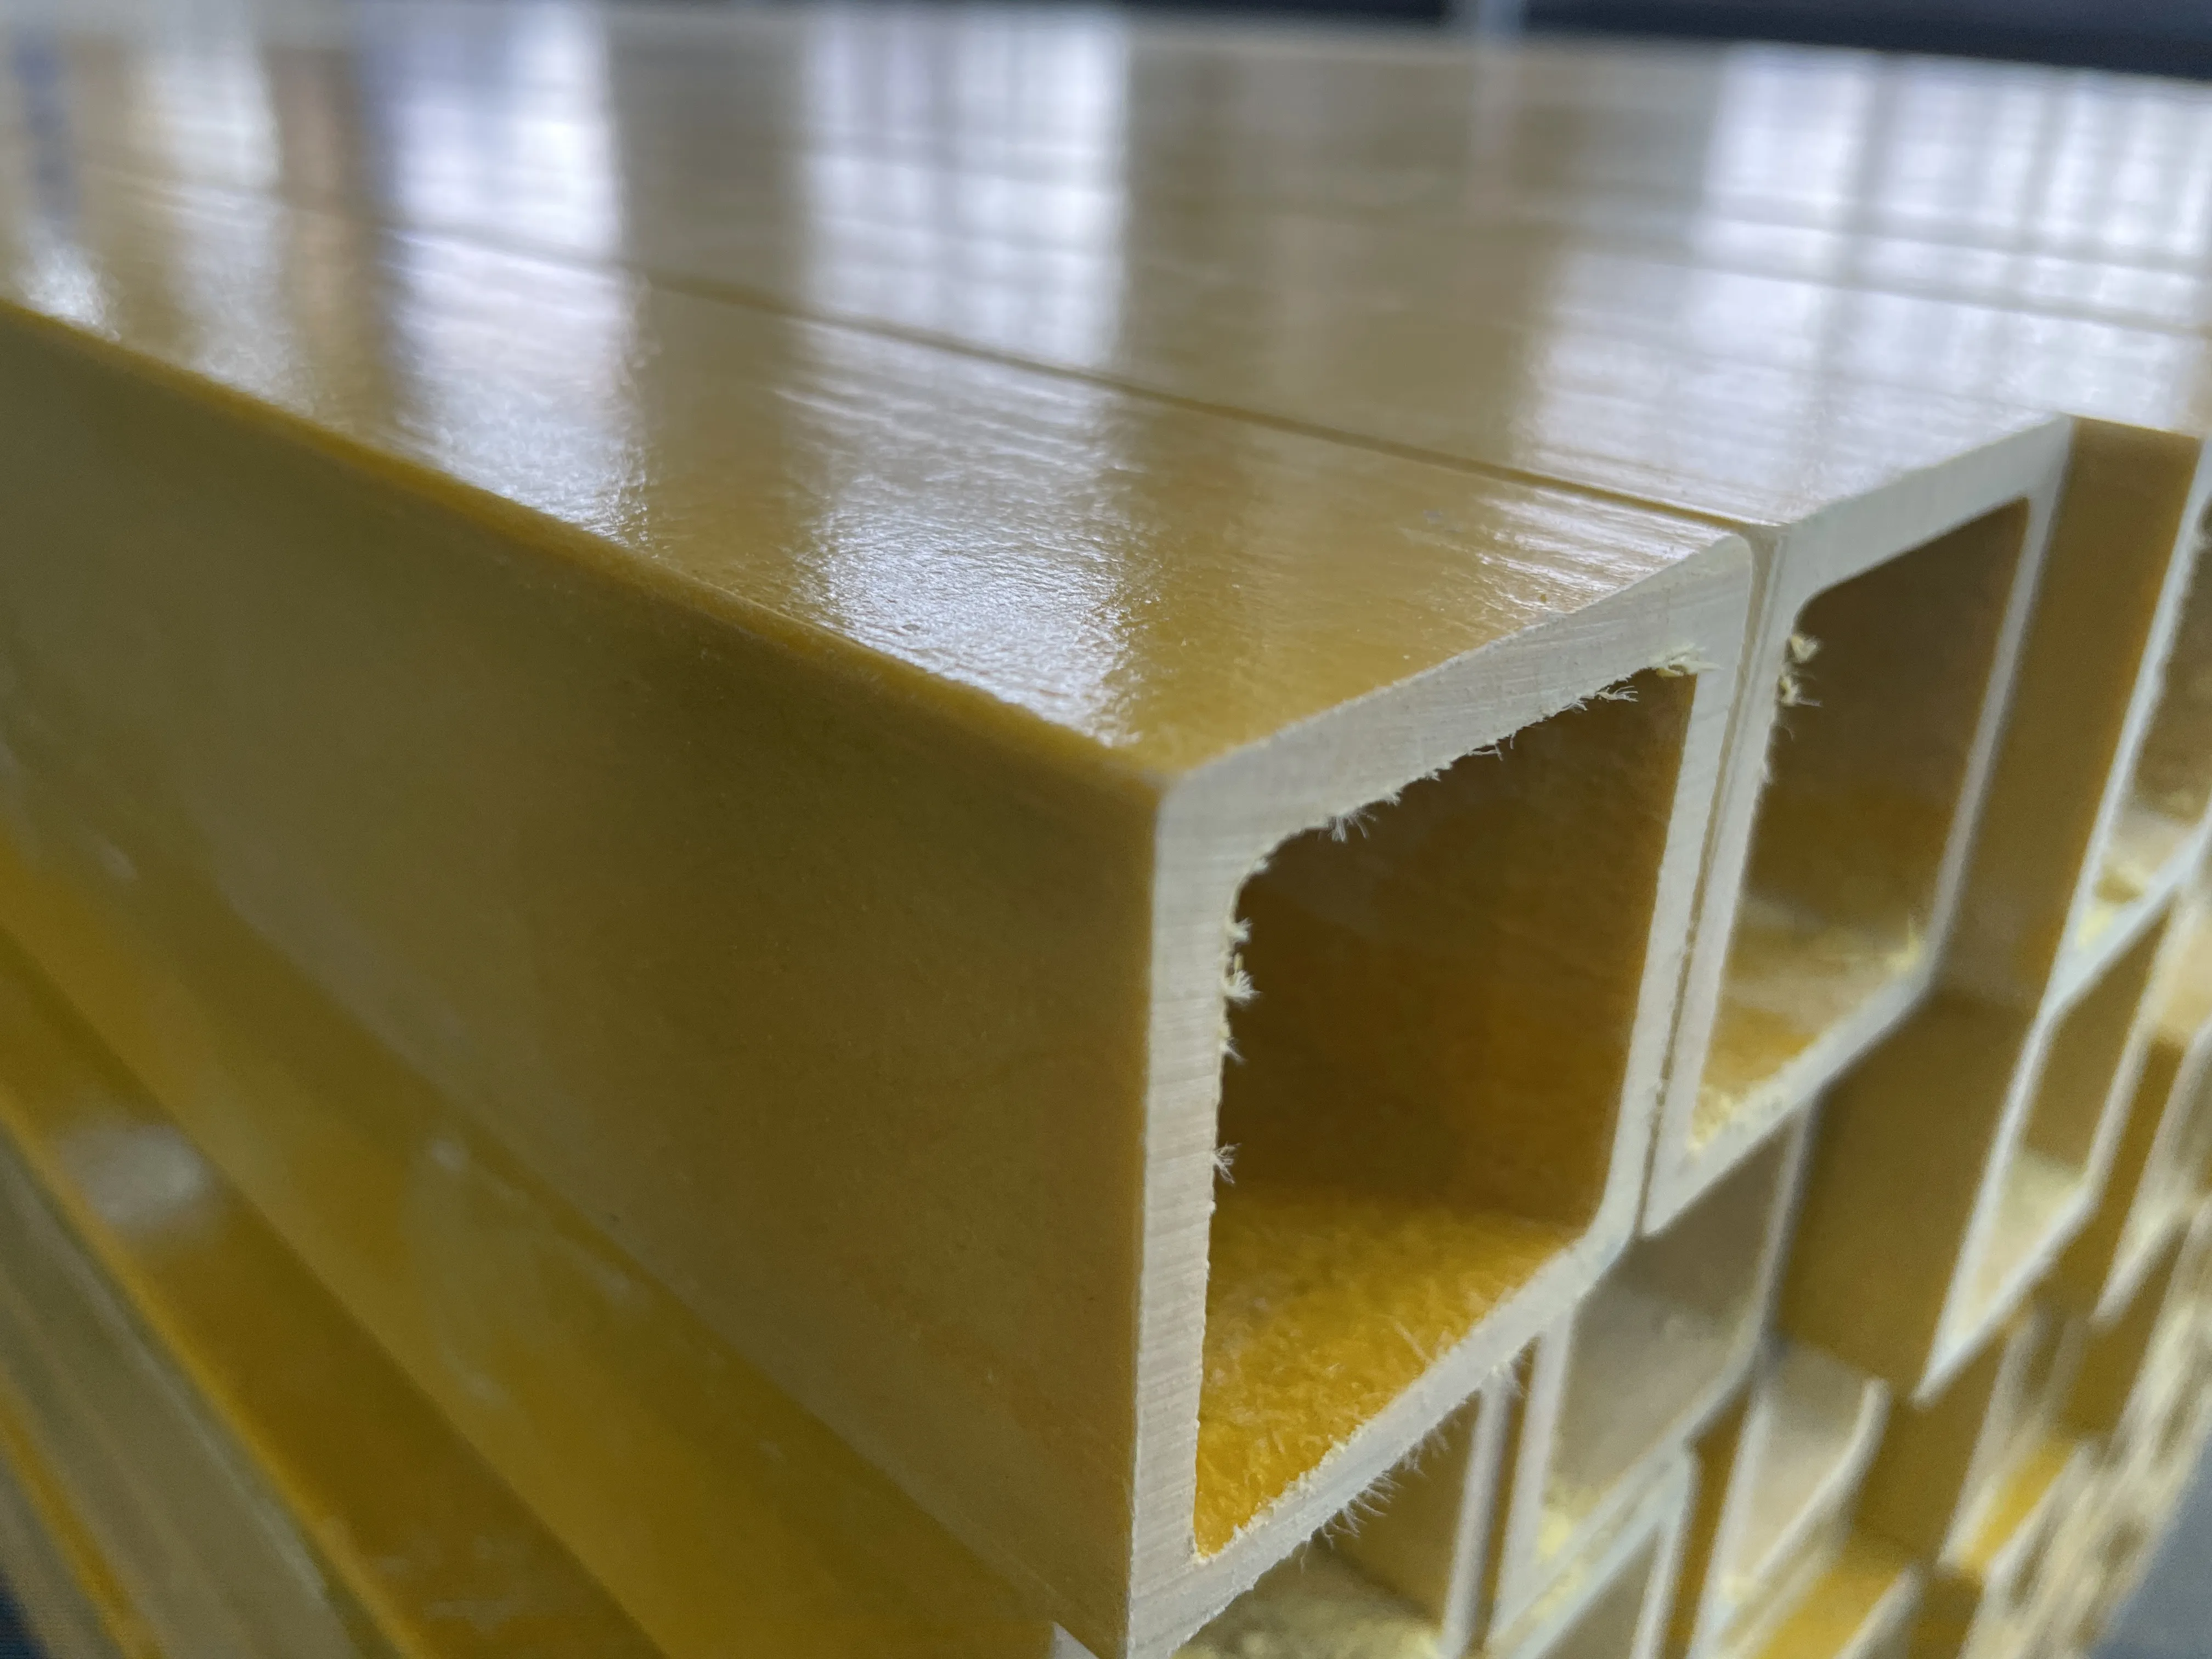
-
4. Ultraviolet Disinfection Systems UV disinfection is an efficient and environmentally friendly way to eliminate microorganisms from water. UV systems work by exposing water to ultraviolet light, effectively inactivating bacteria, viruses, and other pathogens without the use of harmful chemicals. This method is increasingly favored in many industries for its effectiveness and simplicity.
-
Integrating both a water filter and a water softener into a whole house system provides several advantages. Firstly, it ensures the water entering your home is not only free from sediments and impurities but also gentle on your plumbing, appliances, and health. With a combined system, you can enjoy the comfort of knowing that your family is protected from various water-related issues.
whole house water filter and softener
-
The Value Proposition of 1465 FRP Vessels
-
3. High Strength-to-Weight Ratio Despite their lightweight nature, FRP vessels boast a high strength-to-weight ratio. This means they can withstand high pressures and physical stresses, making them suitable for various applications that require robust filtration systems.
frp filter vessel
-
The Role of FRP Pressure Tanks in Modern Engineering
-
In summary, FRP guardrails represent a significant advancement in road safety solutions. Their durability, lightweight nature, low maintenance requirements, aesthetic flexibility, and sustainable attributes make them an ideal choice for various applications. As road safety continues to be a priority across the globe, the adoption of innovative materials like FRP guardrails will play an essential role in safeguarding lives and promoting safe transportation. As cities expand and traffic increases, embracing such technologies becomes imperative for both public safety and environmental sustainability. For these reasons, the importance of investing in reliable and effective safety infrastructure cannot be overstated.
-
- Trench Covers GRP grating can be effectively used as trench covers, providing safe access while allowing for drainage and airflow. Its corrosion resistance is particularly useful in areas exposed to hazardous chemicals.
-
In conclusion, water treatment is vital for ensuring the availability of safe drinking water, protecting public health, and promoting environmental sustainability. With the continual advancements in technology, such as membrane filtration, advanced oxidation processes, and smart monitoring systems, the future of water treatment looks promising. However, addressing the challenges of water pollution will require a collective effort from governments, industries, and individuals to prioritize and invest in effective water treatment solutions. As we move forward, ensuring that every person has access to clean, safe water should be a global priority.
-
The versatility of FRP rods is another significant advantage. They can be molded into various shapes and sizes, allowing for a wide range of applications across different industries. In construction, FRP rods are often used as reinforcement in concrete structures, providing additional tensile strength while reducing weight. In the aerospace and automotive industries, these rods are utilized to improve performance and fuel efficiency without compromising safety. Additionally, FRP rods find applications in telecommunications, where they are used in the construction of lightweight and robust masts and towers.
-
5. Environmentally Friendly By reducing reliance on bottled water, reverse osmosis systems help decrease plastic waste, contributing to environmental conservation.
-
1. Industrial Flooring One of the primary uses for galvanized bar grating is in industrial flooring systems. It provides a safe, slip-resistant surface for workers while allowing spills and debris to fall through, promoting cleanliness and workplace safety.
-
Fiber Reinforced Polymer (FRP) rods have emerged as a transformative material in various engineering applications, from construction to telecommunications. Combining strength, durability, and resistance to environmental stresses, FRP rods offer a multitude of advantages over traditional materials such as steel and concrete. This article delves into the characteristics, benefits, and diverse applications of FRP rods, showcasing why they are becoming a preferred choice in modern industry.
-
Conclusion
-
Where to Buy Galvanized Stock Tanks
-
5. Eco-Friendly Options Many FRP manufacturers are now adopting sustainable practices by using recycled materials in their tanks. This makes FRP a more environmentally friendly choice compared to traditional materials.
-
3. Cost-Effectiveness Compared to other water storage solutions, galvanized sectional water tanks typically offer a lower upfront cost and reduced maintenance expenses over time. Their long lifespan and resistance to harsh environmental conditions result in fewer replacement needs, making them a cost-effective option in the long run.
-
The Composition and Structure of GRP Panel Water Tanks
-
Another significant advantage of stainless steel floor grating is its aesthetic appeal
. With a modern and sleek appearance, it can enhance the visual aspect of a space, making it suitable for various applications, including commercial buildings, restaurants, and shopping centers. The shiny, reflective surface can add a touch of sophistication to otherwise industrial environments.
-
Exploring Sectional Tanks The Efficient Storage Solution
-
Applications of FRP Sectional Water Tanks
frp sectional water tank
-
Additionally, modular handrail systems are known for their safety features. They often meet or exceed local building codes and regulations, providing peace of mind to architects, builders, and occupants alike. The robust materials used in these systems, such as stainless steel, aluminum, and high-grade polymers, ensure longevity and resistance to wear and tear, enhancing the overall security of a structure.
modular handrail system
-
One of the standout qualities of heavy duty bar grating is its load-bearing capacity. This makes it suitable for applications where heavy machinery or foot traffic is common. Depending on the thickness of the bars and the material used, heavy duty grating can support weights ranging from several hundred to several thousand pounds per square foot. This characteristic is essential for ensuring the safety and reliability of industrial operations, where equipment and personnel must traverse the grating regularly.
heavy duty bar grating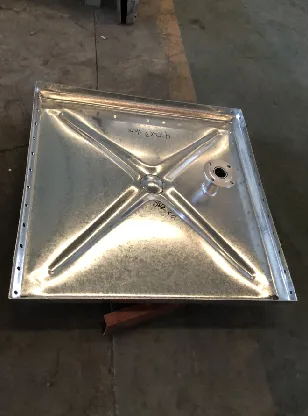
-
Understanding Metal Bar Grating Structure, Applications, and Benefits
-
Advantages of GRP Sectional Water Tanks
-
One of the most compelling characteristics of FRP grating is its lightweight nature, which is significantly lower than that of metal alternatives. This reduction in weight facilitates easier handling and installation, leading to decreased labor costs and simplified transportation. Despite its lightness, FRP grating does not compromise on strength; it is designed to withstand heavy loads and extreme conditions, making it a suitable choice for high-traffic areas.
-
Another important classification is reverse osmosis (RO) filters. RO systems use a semipermeable membrane to separate contaminants from water. This method is particularly effective at removing dissolved solids, heavy metals, and bacteria, making it suitable for areas with significantly polluted water sources. Although RO systems tend to be more expensive and require professional installation, they offer comprehensive purification, making them popular in settings where water quality is a major concern.
water vessel filter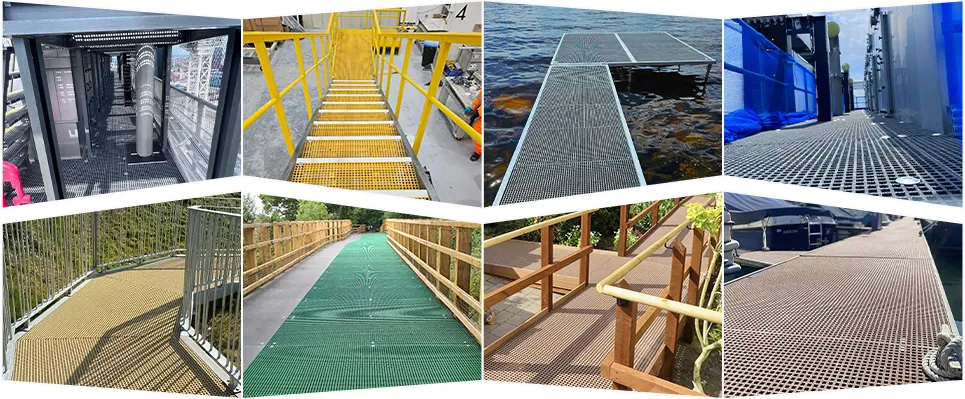
-
Expanded metal floor grating is an innovative construction material that has gained immense popularity across various industries due to its strength, durability, and versatility. Made by taking a solid sheet of metal and expanding it into a mesh-like pattern, this form of grating exhibits numerous advantages, making it an ideal choice for both industrial and commercial applications.
-
Conclusion
-
The significance of wastewater treatment equipment extends beyond environmental protection. Effective wastewater management contributes to public health, improves water quality, and enables the recycling of water resources, thus addressing issues related to water scarcity. Moreover, as regulations surrounding wastewater discharge become more stringent globally, businesses must invest in reliable treatment solutions to ensure compliance and sustainability.
-
FRP grating is also available in various configurations, including molded and pultruded designs. Molded grating is manufactured through a process that combines resin and fiberglass in a single step, offering intricate patterns and a slip-resistant surface. Pultruded grating, on the other hand, is produced by pulling resin-soaked fiberglass strands through a heated die, resulting in a denser and stiffer product, ideal for high-load applications. Both types can be customized in terms of size, color, and load capacity, ensuring that they meet the unique needs of different projects.
-
Safety is a primary concern in any construction project, and modular steel railings provide a secure barrier that helps prevent accidents and injuries. Constructed to comply with building codes and safety regulations, these railings ensure that staircases, balconies, and walkways are adequately protected. The strength of steel coupled with smooth finishes minimizes the risk of injuries, making them suitable for both residential and commercial applications. Additionally, the clear lines of visibility offered by steel railings can enhance safety without compromising the overall aesthetic of the space.
-
The applications for anti-skid grating are vast and varied. In the industrial sector, it is frequently used in manufacturing plants, assembly lines, and loading docks where heavy machinery operates. These environments often pose a risk of accidents due to spills, debris, or oil leaks. Anti-skid grating not only helps prevent injuries but can also improve efficiency by allowing workers to move safely and confidently.
-
Lastly, the flexibility of FRP grating sheets extends to their applications across various sectors. From walkways and platforms in manufacturing plants, to flooring solutions in commercial buildings, to grating systems for wastewater treatment facilities, the adaptability of FRP grating is undeniable. It meets the stringent requirements of industries while offering solutions that prioritize efficiency and safety.
- Angular Contact Ball Bearings Product Guide and Specifications Overview
- 28580 bearing
- weizi bearing bearing ball deep groove
- Roulements à contact angulaire - Performance et Précision
- weizi bearing bearing pressing machine
- weizi bearing cylindrical roller bearing supplier
- weizi bearing nj 206 bearing
- weizi bearing 23244 bearing
- Similar title to 4T L44649 Bearing can be Replacement Bearing for 4T L44649, High Quality and Durable
- Design and Applications of Single Thrust Ball Bearings in Machinery Systems