t runner ceiling
-
Another compelling advantage of mineral fiber planks is their excellent fire resistance. Being made from inorganic materials, they do not combust, thereby providing an additional layer of safety to any structure. This characteristic is especially crucial in commercial buildings and public spaces, where fire codes and regulations are stringent. The ability of mineral fiber planks to withstand high temperatures without contributing to the spread of flames is a significant asset in enhancing the overall safety of a property.
mineral fiber planks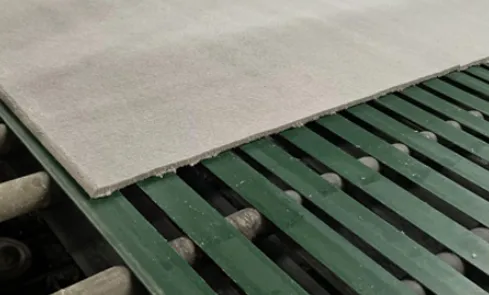
...
Popular articles
- 1
Environmental Sustainability
- 2
What are Access Panel Ceilings?
- 3
2. Cutting the Opening Using a drywall saw, a rectangular opening is cut into the gypsum ceiling based on the panel size.
- 4
Conclusion
- 5
2, also has good thermal insulation properties, mineral fiber board average thermal conductivity is small, easy to keep warm, and the main raw material of mineral fiber board is mineral fiber, melting point up to 1300°C, and has a high fire performance.
- 6
3. Mark the Area Use a pencil to mark the dimensions of the opening on the ceiling. It’s advisable to draw a square or rectangle to ensure a straight cut.
- 7
Installation Considerations
drywall ceiling hatch
- 8
In modern architecture and interior design, suspended ceiling systems have gained immense popularity for both practical and aesthetic reasons. One of the most widely used materials in these systems is mineral fibre, which has earned a reputation for its excellent performance, versatility, and sustainability. This article delves into the features, benefits, and considerations surrounding mineral fibre suspended ceiling tiles.
- 9
In the world of interior design and architecture, the ceiling is often overlooked as a significant element of a space's overall aesthetic. However, the rise of modern design sensibilities has brought attention to ceiling treatments that not only serve functional purposes but also enhance the visual appeal of a room. One such innovative product is the 2x2 reveal edge ceiling tile. These tiles provide a perfect blend of style, functionality, and ease of installation, making them a popular choice among designers and builders alike.
- 10
In summary, OEM mineral fiber ceiling tiles present an appealing solution for those seeking a blend of customization, performance, and aesthetic appeal. Whether you are renovating a workspace, designing a new building, or upgrading an educational institution, the benefits of mineral fiber tiles, coupled with the adaptability of OEM services, offer an array of possibilities. By opting for custom solutions, clients can achieve not only a perfect fit for their needs but also contribute to a more personalized and impactful interior environment. As the construction and design industries continue to evolve, the integration of high-quality materials with innovative manufacturing practices will remain at the forefront of creating functional, sustainable, and beautiful spaces.
 This welding process ensures that the stud is securely attached, capable of withstanding the anticipated loads This welding process ensures that the stud is securely attached, capable of withstanding the anticipated loads