suspended ceiling grids
Popular on the whole site
Creating a ceiling access panel can be an essential task for homeowners and contractors alike. Access panels provide crucial entry points for maintenance or inspection of plumbing, electrical wiring, or HVAC systems that are hidden behind ceilings. In this article, we'll walk you through the steps to make a simple yet functional ceiling access panel.
Aesthetically, drop ceiling cross tees open up a world of design possibilities. Depending on the configuration, they can create unique visual lines and patterns that add depth to a room. Designers can choose from a variety of ceiling tile designs, colors, and textures that complement the overall design theme. For instance, using brightly colored tiles in conjunction with a sleek metal cross tee system can result in a contemporary look that energizes a workspace. In contrast, warmer wood finishes can impart a rustic charm to residential settings.
2. Cut the Opening Mark the dimensions of the access panel on the plasterboard. Use a drywall saw to cut out the marked area carefully. Ensure that you cut within the lines to achieve a neat opening.
ceiling access panel plasterboard
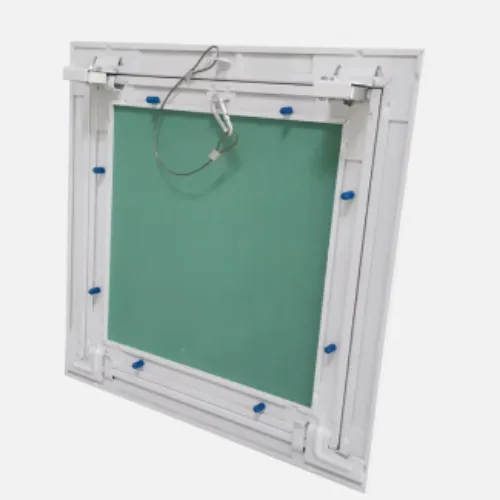
2. Access to Building Systems The space created above the ceiling allows for easy access to plumbing, electrical systems, and HVAC ducts, facilitating maintenance and repairs.
Popular articles
- 1
Conclusion
- 2
Materials and Tools Needed
- 3
In addition to understanding the grid structure, it is equally important to recognize the standard dimensions of ceiling tiles that fit within these grids. The most prevalent sizes for ceiling tiles are 2 feet by 2 feet and 2 feet by 4 feet. These dimensions align perfectly with the T-bar grid system, allowing for easy installation and a seamless appearance.
t bar ceiling grid dimensions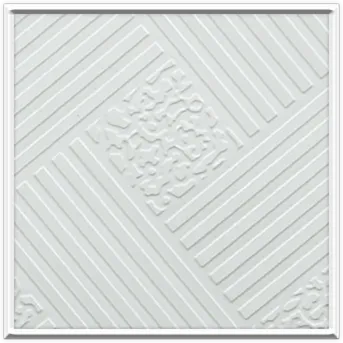
- 4
1. Plastic Grid Covers Lightweight and cost-effective, plastic grid covers are easy to install and available in a range of colors. They are ideal for residential settings or low-traffic commercial spaces.
- 5
In conclusion, acoustic ceiling tile grids are an essential component of modern architecture and design, providing significant benefits in noise management. As spaces grow increasingly multifunctional, the demand for effective acoustic solutions continues to rise. By integrating acoustic ceiling tiles into their designs, architects and designers can enhance the acoustic quality of various environments, contributing to overall comfort, productivity, and satisfaction for occupants. Whether in a bustling office, a lively classroom, or a serene healthcare facility, acoustic ceiling tile grids prove to be indispensable tools for creating harmonious spaces.
- 6
In recent years, innovative materials have been revolutionizing construction and interior design. Among these, fiber-based materials have emerged as a prominent choice for ceiling applications, offering a multitude of benefits that cater to both aesthetic concerns and functional requirements. This article explores the advantages of using fiber for ceilings, delving into its properties, sustainability, and design versatility.
- 7
The term OEM refers to a company that produces products that are sold under another company's brand name. In the context of mineral fiber ceiling tiles, OEM manufacturers can offer significant advantages. They can produce customized solutions that cater specifically to the client's needs, including unique sizes, designs, and performance specifications. This flexibility is essential for projects that require a specific look or functionality that standard products may not provide.
oem mineral fiber ceiling tiles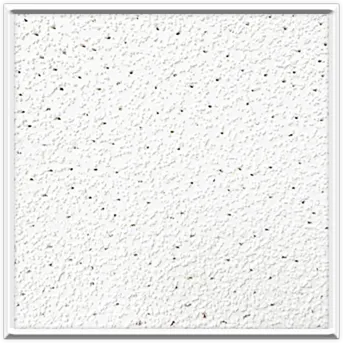
- 8
Furthermore, these doors can serve as elegant solutions for accessing utilities or hidden systems. In contemporary homes, ceiling trap doors can offer easy access to plumbing, wiring, or HVAC systems. For example, a cleverly disguised ceiling trap can lead to a dedicated space for maintenance work, ensuring that functions are carried out with minimal disruption to the living environment. This practical aspect highlights how ceiling trap doors can seamlessly blend functionality with modern interior design trends.
- 9
Benefits of Tee Bar Ceiling Grids
- 10
1. Select the Right Location Before installation, determine the best location for the hatch, considering the areas that require access. Ensure the hatch is positioned in an unobtrusive spot that won’t interfere with the room's design.
Links
- chicken wire 6ft tall
- Creative Support Solutions for Peony Plants to Enhance Growth and Aesthetic Appeal
- 5 Foot Wide Chain Link Fence Gate for Secure and Versatile Access Solutions
- Creative Ways to Use Post Caps for Home and Garden Projects
- 4ft x 4ft chain link gate
- chain link fence gate openers
- Affordable Bulk Tomato Cages Available for Purchase Online
- 12 gauge welded wire mesh
- Durable 1x2 Inch Welded Wire Fencing for Versatile Outdoor Applications
- 900mm Wide Garden Gate for Stylish Outdoor Access and Security Solutions
- Discover Stylish and Durable New Fence Panels for Your Outdoor Space
- big garden gates
- Affordable 6x6 Fence Panels Available for Sale with Quality and Durability Guaranteed
- Durable 6-Foot High Chain Link Fence Solutions for Enhanced Security and Property Protection
- Cost Estimates for Farm Fencing Solutions and Materials
- 6ft rolled fencing
- 65 mm stolpskydd
- Clôture basse pour délimiter les frontières de manière sécurisée et discrète
- Durable 20-foot Chain Link Fence for Secure and Versatile Outdoor Spaces
- 6 foot chicken wire
- 24% Chicken Wire A Guide to Effective Uses and Applications in Your Projects
- ang pamantayang halaga ng chain link fence sa loob ng 12 acre
- 3 ft high chain link fence
- 3-meter wide steel gate with a 5% slope and chain link fencing
- 6-Foot High Fence Roll for Secure and Stylish Outdoor Spaces
- 3-tums staketstolpar med dekorativa lock för hållbarhet och stil
- 48 x 48 chain link fence gate
- Durable 3-foot Welded Wire Fencing for Effective Garden and Livestock Protection
- 4x6 fence post
- 4 fence post caps
- Creating a similar title for 4 wire coil would be Coil with 4 wires for efficient electrical conduct
- 10-Foot T-Post Bulk Purchase for Fencing and Support Structures
- Creative Ideas for Using Garden Cages to Enhance Your Outdoor Space
- Creative Border Fencing Ideas for Enhancing Your Garden Landscape Design
- 14ft Chain Link Driveway Gates for Enhanced Security and Privacy Solutions
- buy fence panels
- chicken wire fence for raised garden
- chicken wire for bottom of fence
- Cost of installing a field fence per foot_
- 16 foot chain link fence gate
- boundary security fencing
- Best Practices for Using Tomato Cages in Your Raised Garden for Maximum Growth
- Choosing the Right Fence Posts for Livestock Management and Protection
- 6 أقدام حديقة كومة
- Creative Ways to Support Tomato Plants Using Innovative Cage Designs
- 1_4 Inch Chicken Wire - Durable & Versatile Garden Fencing Solutions
- Custom Garden Gates - Unique Designs for Your Outdoor Space
- 42% Chain Link Fence Gate Installation Tips and Best Practices for Homeowners
- 30 inch wide garden gate
- Creative Ideas for Square Post and Rail Fence Designs
- Angular Contact Ball Bearings Product Guide and Specifications Overview
- 28580 bearing
- weizi bearing bearing ball deep groove
- Roulements à contact angulaire - Performance et Précision
- weizi bearing bearing pressing machine
- weizi bearing cylindrical roller bearing supplier
- weizi bearing nj 206 bearing
- weizi bearing 23244 bearing
- Similar title to 4T L44649 Bearing can be Replacement Bearing for 4T L44649, High Quality and Durable
- Design and Applications of Single Thrust Ball Bearings in Machinery Systems