drywall access panel ceiling
Popular articles
- 1
3. PVC (Polyvinyl Chloride)
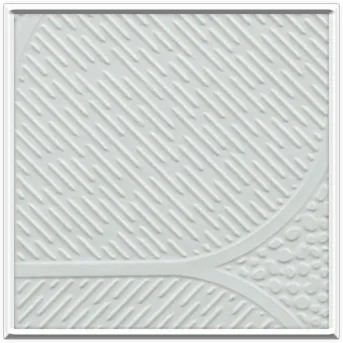
grid ceiling tiles material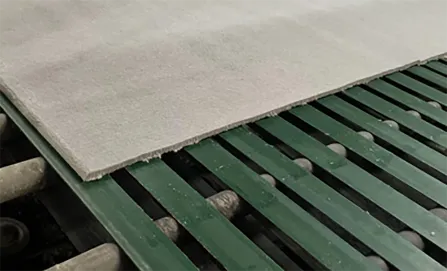
- 2
Applications
- 3
Access Panels for Ceilings A Comprehensive Overview
- 4
- 5
Conclusion
- 6
In conclusion, drop ceiling metal grids are an essential component of modern interior architecture that brings a myriad of benefits. From their ability to conceal unattractive infrastructure and enhance sound control to ease of installation and maintenance, they present a practical solution for various spaces. Furthermore, the design versatility they offer allows for customization that suits any aesthetic preference, making them an invaluable asset in both residential and commercial applications. As we continue to prioritize functionality and style in our buildings, drop ceiling metal grids will undoubtedly remain a popular choice in the years to come.
- 7
Step 5 Create the Panel
- 8
Price Ranges
- 9
Exploring the Importance of Ceiling Access Panels (600x600)
- 10
In addition to commercial applications, acoustical ceiling grids are increasingly being utilized in residential settings. Homeowners seeking to improve their living spaces are recognizing the benefits of sound dampening, especially in high-traffic areas. Whether in home theaters, playrooms, or open concept living spaces, these systems can create a more enjoyable and quieter environment for families.
Links
-
The Benefits of Portable Stomach Heating Pads
-
While electric blankets are generally economical in terms of energy consumption, there are several strategies to minimize costs further
-
Safety Considerations
-
Features and Functionality
-
Safety Features and Considerations
-
1. Enhanced Penetration of Heat Moist heat penetrates deeper into muscles and tissues compared to dry heat. This deeper penetration helps improve circulation, relax muscles, and alleviate stiffness, making it particularly beneficial for chronic back pain sufferers.
-
Additionally, heating pads can be beneficial for women experiencing lower back pain, a frequent issue as the belly grows. The warmth from the heating pad can reduce the intensity of the pain and promote overall comfort, allowing expectant mothers to continue their daily activities without interruption.
-
First and foremost, a good quality electric blanket is designed with safety in mind. Modern electric blankets come equipped with advanced safety features such as automatic shut-off timers and overheat protection. These features help to prevent overheating, reducing the risk of accidents or fire hazards, which can sometimes occur with lower-quality options. When selecting an electric blanket, ensure it is certified by recognized safety standards, such as UL or ETL, which indicate that the product has undergone rigorous testing for safety.
-
The Benefits of a 12V Electric Blanket for Camping
-
A hot compress is a method that involves applying heat to a specific area of the body. This can be achieved using a microwavable heat pack, a warm towel, or a hot water bottle. The heat increases blood flow to the affected area, which can help alleviate pain and stiffness.
-
Safety Considerations
-
As temperatures drop and chilly nights approach, the quest for warmth becomes a priority for many. Whether you're camping under the stars, embarking on a road trip, or simply spending time in your vehicle, a 12-volt electric blanket can be the perfect solution to keep you cozy and comfortable. This innovative product is designed specifically for use with your vehicle's electrical system, making it an essential accessory for outdoor enthusiasts and frequent travelers alike.
-
Heat Pack for Cramps A Simple Solution for Relief
-
The Comfort of Sleeping with a Heated Blanket
-
The Ultimate Heated Blanket Comfort That Won’t Break
-
As the temperatures drop and the chilly evenings set in, many people turn to electric blankets for warmth and comfort. While these cozy bedding accessories are popular for their ability to provide immediate relief from the cold, an important aspect to consider is the cost of running them. Understanding the energy consumption and associated costs of electric blankets can help consumers make informed decisions while keeping their budgets in check.
-
Easy Maintenance
-
Moreover, electric blankets can be a cost-effective way to heat your home. Instead of turning up the thermostat and increasing your energy bill, you can use an electric blanket to warm your body directly. Many models have adjustable heat settings, allowing users to customize the temperature to their liking. This personalization can lead to significant energy savings and a lower carbon footprint.
-
Another option to consider is heated pet beds or pads. These are generally designed with the needs and safety of pets in mind, often controlled with lower outputs than human heated blankets. They provide localized warmth in a way that is safer for cats, reducing the risk of overheating and burns.
-
The Ultimate Guide to Finding the Best Electric Blanket King Sale
-
As the nights grow colder, many people seek solutions to stay warm and comfortable while they sleep. One popular option that has gained traction in recent years is the electric blanket. These cozy bedding accompaniments provide not just warmth but also a range of benefits that make them an ideal choice for all-night use. In this article, we will explore the advantages, safety features, and best practices for using electric blankets throughout the night.
-
Heat therapy works on the principle of increasing blood flow to the affected area, promoting relaxation of the muscles and reducing stiffness. When applied to the back, a hot pack bag can help in several ways. The warmth penetrates deep into the tissues, alleviating pain associated with muscle strain, chronic conditions like arthritis, and even injuries. For many individuals, the soothing warmth of a hot pack can be comforting and can significantly improve their day-to-day comfort level.
-
- Online Retailers Websites like Amazon, Walmart, and Target often have seasonal sales that include electric blankets. Signing up for newsletters can also alert you to flash sales or special promotions.
-
The combination of sophistication and practicality is another reason for the popularity of monogram electric blankets. Made from high-quality materials, these blankets are typically soft, durable, and designed to provide even heat distribution. Most monogram electric blankets come with adjustable heat settings, allowing users to tailor their warmth according to personal preferences. This flexibility makes them perfect for cold winter nights when a little extra heat can make a world of difference.
-
Pet Comfort
-
An electric under blanket, also known as an electric blanket, is a quilted layer that fits snugly over your mattress or under your sheets and is equipped with electrical heating elements. The dual control feature allows two separate zones of temperature setting, which means that you can enjoy personalized warmth tailored to individual preferences. This is especially beneficial for couples, as one partner might prefer a warmer environment while the other enjoys a cooler setting. With this technology, both can have their ideal temperature, ensuring a restful night’s sleep.
-
Cats are known for their independence and adventurous spirits, often roaming outside to explore. However, many cat owners may not consider the effects of low temperatures on their pets. Unlike humans, who can bundle up in layers, outdoor cats need a reliable source of warmth to maintain their health and well-being. Prolonged exposure to cold weather can lead to various health issues, including hypothermia and arthritis. Consequently, providing them with a heated blanket can significantly enhance their outdoor experience.
-
Pain Relief
how does a heating pad help your back
-
Safety is another critical factor when it comes to electric blankets. Modern models are equipped with various safety features, such as automatic shut-off mechanisms and overheat protection. These features ensure that you can enjoy the cozy warmth without anxiety, making it a practical choice for anyone, including those with health concerns. It’s essential to always follow the manufacturer's guidelines and maintenance instructions for optimal safety and longevity of the product.
super king fitted electric blanket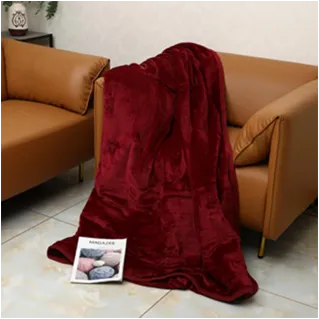
-
Detoxification
-
5. Relief from Chronic Conditions
-
In today's fast-paced world, many individuals suffer from back pain due to various reasons, including poor posture, sedentary lifestyles, and stress. The search for effective pain relief methods has led to the popularity of back therapy pads. These innovative devices offer a range of benefits for those seeking relief from discomfort and a path to improved overall well-being.
-
Therapeutic Benefits
-
Soft heated blankets are designed to provide warmth through built-in heating elements. Unlike traditional blankets, which merely serve as a barrier against the cold, these innovative creations deliver gentle heat that can be adjusted to various levels. This feature makes them perfect for chilly nights or for those who suffer from cold sensitivity. Whether you are curling up on a winter evening, embarking on a movie marathon, or just looking to unwind after a long day, a soft heated blanket envelops you in a cocoon of warmth.
-
Understanding the Basics of Electric Blankets
-
6. Complementary Therapy For those undergoing physical therapy or other treatments, heating pads can serve as an excellent complementary therapy. Using heat before exercising can warm up the muscles, making them more pliable and less prone to injury.
-
5. Safety Tips for Heating Your Mattress
-
Another remarkable aspect of the 12V electric throw blanket is its versatility. Whether you’re lounging on the couch, watching a movie, or reading a book, these blankets can transform into the perfect companion for relaxation. Additionally, they are ideal for individuals who suffer from aches and pains. The soothing heat can help alleviate muscle tension and promote relaxation, making it an excellent choice for those dealing with chronic pain or discomfort.
12v electric throw blanket
-
Moreover, the game offers various modes to keep the excitement alive. For instance, a timed version can make challenges more intense, where teams have to complete a task before the timer runs out. Another variation could involve “mystery challenges” where players write challenges anonymously and place them in a bowl, adding an unexpected twist each time a card is drawn.
-
For those with chronic back pain or underlying conditions such as arthritis or fibromyalgia, it's important to consult with a healthcare professional before starting any new treatment regimen, including the use of a heating pad. While heat therapy can provide significant relief, it may not be suitable for everyone, particularly individuals with certain medical conditions or those experiencing acute injuries.
-
As the chilly seasons approach, many of us search for ways to stay warm and cozy. One of the best solutions is electric throws, which combine comfort and technology to provide instant warmth. With the advent of clearance sales, it’s an ideal time to discover the benefits of these versatile blankets, making them both a practical and budget-friendly addition to your home.
-
For individuals suffering from chronic pain conditions, such as arthritis or fibromyalgia, a soft heat heating pad can serve as a reliable source of relief
. Regular use can help manage symptoms, allowing individuals to move more freely and enjoy their daily activities without the hindrance of pain.
soft heat heating pad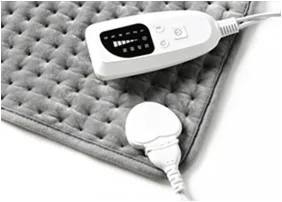
-
The Perfect Gift
-
Choosing the Right Pet Heating Pads for Cats
-
3. Unpredictable Behavior Dogs can move around while sleeping, and an electric blanket may shift under them, leading to uneven heating and potential burns or discomfort.
-
Conclusion
-
5. Size and Portability Consider how you will use the blanket. Electric throws come in various sizes, so ensure you choose one that fits your needs—whether for snuggling on a couch or adding extra warmth on a bed.
-
Furthermore, they are not just for home use. The portable nature of heated throw blankets with sleeves makes them perfect for travel. Whether you’re on a long flight, camping trip, or simply visiting friends, bringing along this cozy accessory can ensure that you remain warm and comfortable wherever you go.
-
The Benefits of Heated Blankets with Low Wattage
-
Heat therapy has long been recognized for its soothing effects on aches and pain. By applying heat to the affected area, blood circulation increases, which promotes healing and alleviates muscle stiffness. Reusable heat pads provide targeted warmth that can penetrate deep into the muscles, offering relief from tension and discomfort. Here are some key benefits
- Angular Contact Ball Bearings Product Guide and Specifications Overview
- 28580 bearing
- weizi bearing bearing ball deep groove
- Roulements à contact angulaire - Performance et Précision
- weizi bearing bearing pressing machine
- weizi bearing cylindrical roller bearing supplier
- weizi bearing nj 206 bearing
- weizi bearing 23244 bearing
- Similar title to 4T L44649 Bearing can be Replacement Bearing for 4T L44649, High Quality and Durable
- Design and Applications of Single Thrust Ball Bearings in Machinery Systems