concealed ceiling tiles
-
Various building codes and standards govern the installation and use of ceiling access panels. The International Building Code (IBC), National Fire Protection Association (NFPA) codes, and local building regulations provide specific guidelines. It is crucial for builders and contractors to familiarize themselves with these codes to ensure compliance.
...
Once all the tiles are in place, step back and inspect your work. Ensure that everything is level and that there are no visible gaps or misalignments. Make any necessary adjustments to assure a professional finish.
Constructing a ceiling access panel is a straightforward DIY project that can enhance the accessibility of important systems in your home. By following the steps outlined above, you can create a panel that not only serves a practical purpose but also maintains the aesthetic integrity of your ceiling. Remember to prioritize safety when working with tools and always double-check for potential hazards like wiring or plumbing before cutting any openings. Enjoy the peace of mind that comes with a well-placed access panel!
Once the markings are in place, the installation of the main tees begins. Main tees are suspended from the ceiling using wire hangers, which are adjusted to ensure that the tees remain level. The main tees are installed first, followed by the shorter cross tees, which snap into place to form a grid. Finally, the ceiling tiles are inserted into the grid, completing the suspended ceiling system.
Popular articles
- 1Most access panels come with a frame that needs to be secured to the drywall. Align the frame with the opening you’ve just created. Ensure it is level and flush against the ceiling. If the panel requires it, use screws to fasten the frame into place. Make sure it’s tightly secured to prevent any gaps.
- 2
Conclusion
- 3- Paint or primer (optional)
- 4
Now that the grid is fully installed, it's time to place the ceiling tiles. Depending on the type of tiles you choose, you may need to either lay them flat or drop them into the grid. Be sure to fit the tiles snugly to avoid any gaps. If customized cutting is necessary, measure the tile and cut it carefully with a utility knife.
- 5
High quality Mineral Fiber Ceiling Tiles
- 6
Once you have identified the location, it's essential to measure the dimensions of the access panel. Standard access panels typically come in sizes ranging from 12x12 inches to 24x24 inches. Use your measuring tape to outline the shape of the panel on the ceiling with a pencil. Ensure that the markings are square and level for a neat fit.
how to make access panel in ceiling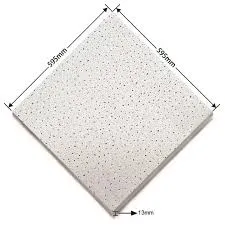
- 7
Ceiling access panels are small door-like structures integrated into ceilings, designed to provide access to the spaces above for maintenance, inspection, or repair work. These panels can be constructed from various materials, including metal, plastic, and gypsum, tailored for specific requirements. The size of the access panel can significantly impact its utility, and the 12x12 size is notably popular among builders and designers.
- 8
One of the most significant advantages of PVC laminated gypsum ceiling boards is their aesthetic versatility. Available in an array of colors, patterns, and finishes, these boards can transform a mundane ceiling into a stunning focal point. Whether you’re aiming for a sleek modern look or a classic design, there is a PVC laminated option to match your vision. The reflective quality of PVC can also enhance lighting, making spaces appear brighter and more spacious.
- 9
Links
- A hydraulic seal tool kit is an essential component for anyone working with hydraulic systems. These kits contain a variety of tools specifically designed to help with the maintenance, repair, and replacement of hydraulic seals in equipment such as hydraulic cylinders, pumps, and valves.
-
In various industrial applications, maintaining the integrity of machinery components is crucial for efficient operation and longevity. One key component that plays a vital role in this regard is the oil seal. Specifically, high temperature oil seals are engineered to withstand extreme temperatures while providing a reliable barrier against oil leakage. This article delves into the characteristics, applications, and benefits of high temperature oil seals in modern industries.
- Understanding and Utilizing a Hydraulic Motor Rebuild Kit
- High-Pressure Rotary Seals A Comprehensive Guide
-
2. Maintain Proper Lubrication Ensure that the axle is appropriately lubricated with the manufacturer-recommended fluid. Insufficient lubrication can lead to overheating and premature seal failure.
- In the realm of environmental protection, dust sealing is crucial for controlling fugitive dust emissions from mining sites, construction areas, and agricultural operations. By implementing proper dust suppression measures, these industries can significantly reduce their environmental impact, minimize soil erosion, and protect local ecosystems.
- When selecting a hydraulic oil seal, it is crucial to consider the operating conditions of your system. Factors such as temperature, pressure, and fluid type can all affect the performance of the seal. For example, high-temperature applications may require a seal made from materials that can withstand heat without degrading or losing their flexibility. Similarly, high-pressure systems may require a seal with a stronger spring to maintain proper contact with the shaft under extreme conditions.
-
Understanding Hydraulic Oil Seal Kits Essential Components for Machinery Efficiency
-
4. Replace Seals and Rings Using the components from the rebuild kit, replace all worn-out seals, O-rings, and rings meticulously. Ensure a snug fit to prevent future leaks.
-
In conclusion, oil seals are indispensable components in many industrial and automotive applications. Oil seal manufacturers play a crucial role in producing these vital parts, ensuring machinery operates efficiently and safely. When selecting a manufacturer, consider their quality assurance practices, customization options, and material expertise to secure the best possible seals for your needs. Investing in high-quality oil seals not only enhances the performance of your machinery but also contributes to overall operational efficiency and safety.
- Backhoe cylinder seal kits are essential components for maintaining the functionality and performance of backhoes. These seal kits are designed to replace worn out or damaged seals in the hydraulic cylinders of backhoes, ensuring smooth operation and preventing leaks.
- There are different types of cylinder gland seals available, including O-rings, lip seals, and mechanical seals
- Seal kits are designed to fit specific bucket cylinders and are made from high-quality materials to withstand the wear and tear of heavy-duty use. Regularly inspecting and replacing the seals in your bucket cylinder can help extend its lifespan and prevent costly repairs down the line.
- Environmental considerations also come into play when discussing oil seals. Leaked oil can contaminate ecosystems, making the prevention of spills paramount not only for machinery health but also for environmental stewardship. The 31x43x10 oil seal, with its robust construction and precise fit, aids in minimizing such risks.
- Front Hub Oil Seal A Crucial Component in Automotive Systems
-
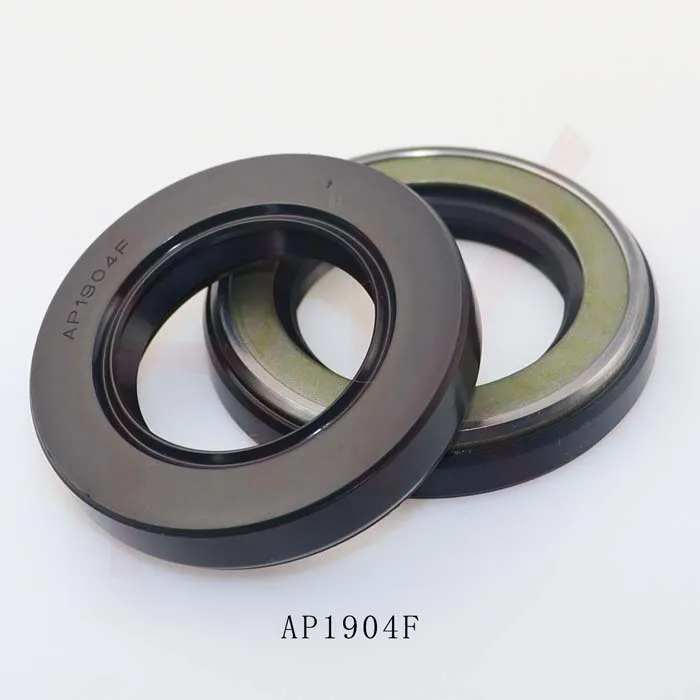
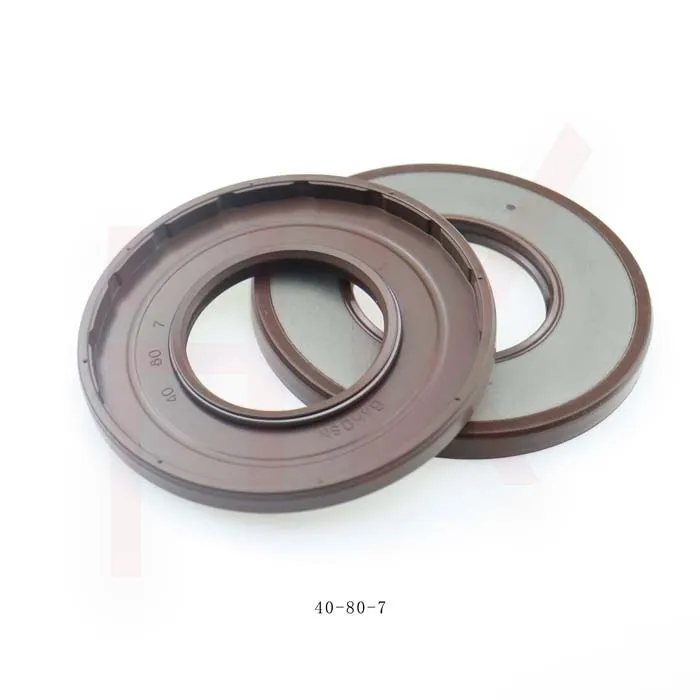
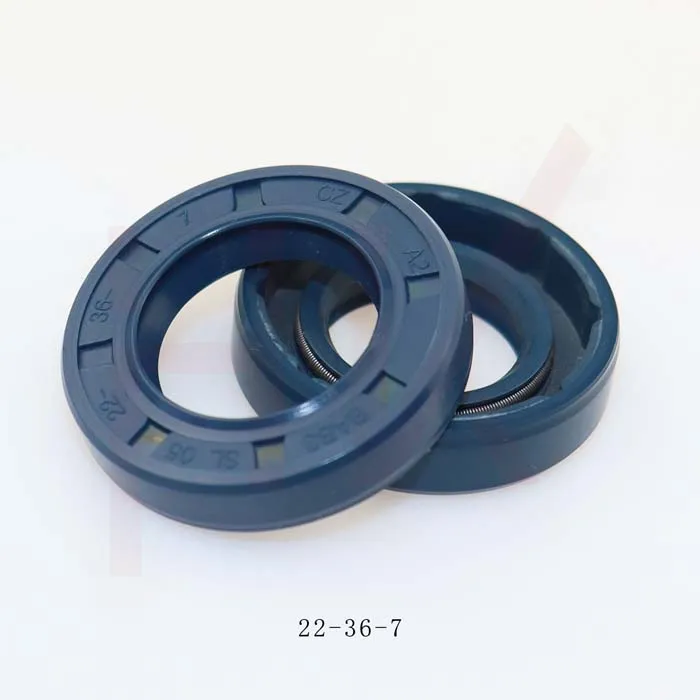
The number 50x65x8 pertains to the specific dimensions of the seal, where the first number (50 mm) indicates the inner diameter, the second number (65 mm) signifies the outer diameter, and the third number (8 mm) represents the thickness of the seal. A seal characterized by these dimensions is robust enough to withstand various operating environments while ensuring effective sealing.
- In conclusion, the seal of 35%, 2052, and 7 is a testament to the power of numbers in shaping our thoughts, actions, and aspirations. It's a reminder of our responsibility, our potential, and our connection to something greater. Each digit tells a story, and when combined, they create a compelling narrative that transcends their individual meanings, inviting us to decode and act upon their collective message.
-
Once you have your seal kit, it is time to start the repair process. Start by lowering the jack all the way down and removing the oil filler plug. Drain out any remaining oil and remove the ram from the jack. Carefully disassemble the jack, taking care to keep track of where each part goes.
3 ton hydraulic jack seal kit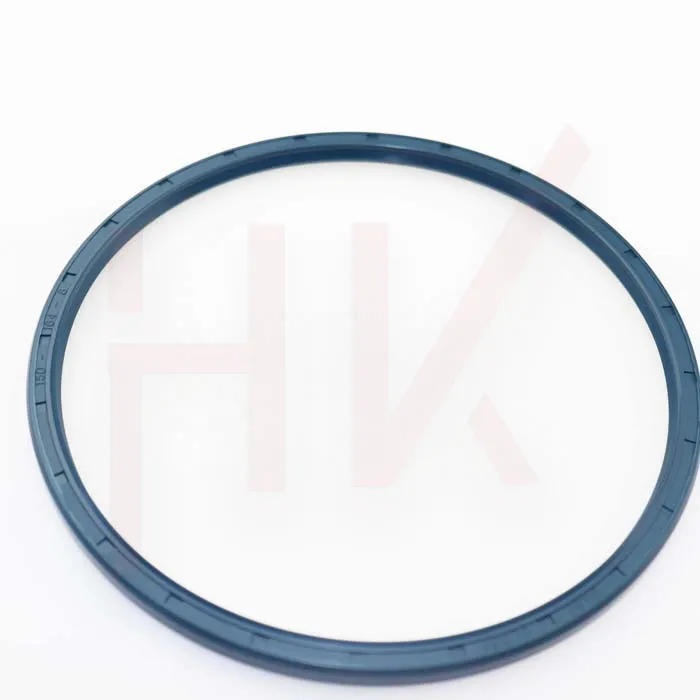
- In conclusion, hydraulic cylinder seal repair is a meticulous task requiring precision, knowledge, and attention to detail. It's not merely a fix but a preventive measure to maintain the overall health of the hydraulic system. Understanding the importance of seals and the process of their repair is integral to ensuring the smooth running of machinery and avoiding costly downtime. Remember, prevention is always better than cure, and timely maintenance can save significant expenses in the long run.
- A hydraulic cylinder kit typically consists of a cylinder barrel, piston, piston rod, seals, and end caps. These parts work harmoniously to generate linear motion, driving machinery with precision and strength. Over time, due to continuous operation or exposure to harsh conditions, these components can become damaged, leading to leaks, reduced efficiency, or complete failure. Thus, timely repair is not just about fixing issues; it's about ensuring optimal performance, safety, and prolonging the lifespan of the equipment.
-
Brand Reputation
- In the automotive industry, TCV seals are an essential component in modern fuel-injected engines. They ensure precise control over the air-fuel mixture, leading to better fuel economy, reduced emissions, and improved overall performance They ensure precise control over the air-fuel mixture, leading to better fuel economy, reduced emissions, and improved overall performance
 They ensure precise control over the air-fuel mixture, leading to better fuel economy, reduced emissions, and improved overall performance They ensure precise control over the air-fuel mixture, leading to better fuel economy, reduced emissions, and improved overall performancetcv seal. In industrial applications, such as pumps, compressors, and hydraulic systems, TCV seals are equally vital, preventing fluid loss and maintaining system stability.
 -
Oil seals, often referred to as shaft seals or rotary seals, play an essential role in various industrial applications. Among the diverse types of oil seals in the market, the oil seal designated as 20% 35% 7% specifically represents a particular sizing and design that can address unique sealing requirements. In this article, we will explore the significance of oil seals, the specific features of the 20% 35% 7% oil seal, and its applications.
- In the intricate world of automotive machinery, the cylinder oil seal stands as a silent guardian, ensuring the smooth operation and longevity of engines. This unsung hero plays a crucial role in maintaining the integrity of the lubrication system, preventing oil leakage, and safeguarding against contaminants that could compromise engine performance. Understanding the significance of these components is paramount for any vehicle owner or mechanic dedicated to preserving the health of their automobiles.
- Hydraulic systems are the backbone of numerous industrial and engineering applications, from heavy machinery to aerospace technology. A critical component in these systems is the hydraulic seal, which ensures efficient operation and prevents fluid leakage. Over time, seals can wear out or become damaged, necessitating replacement. This article delves into the significance of hydraulic seal replacement and the process involved.
- Hydraulic Oil Seal Sizes A Comprehensive Guide
- By using backhoe cylinder seal kits to replace old seals, operators can restore the efficiency and reliability of their backhoes. These seal kits typically include all the necessary seals, o-rings, gaskets, and other components needed for a complete seal replacement. They are designed to fit specific backhoe models and cylinder sizes, ensuring a proper and secure seal.
- Regular maintenance and inspection of oil seals are essential to ensure optimal performance and prevent potential leaks. Oil seals should be checked for wear and tear, cracks, or other signs of damage that could compromise their effectiveness. Replacing oil seals at regular intervals, typically every 10,000 miles or annually, can help prolong the life of equipment and prevent leaks Replacing oil seals at regular intervals, typically every 10,000 miles or annually, can help prolong the life of equipment and prevent leaks
 Replacing oil seals at regular intervals, typically every 10,000 miles or annually, can help prolong the life of equipment and prevent leaks Replacing oil seals at regular intervals, typically every 10,000 miles or annually, can help prolong the life of equipment and prevent leaks70 90 10 oil seal.
 - In addition, custom oil seals can improve the efficiency and reliability of machinery by ensuring that oil is properly contained and distributed to the necessary components. By preventing oil leaks, these seals help to maintain the proper lubrication levels in the system, which is essential for optimal performance and longevity By preventing oil leaks, these seals help to maintain the proper lubrication levels in the system, which is essential for optimal performance and longevity
 By preventing oil leaks, these seals help to maintain the proper lubrication levels in the system, which is essential for optimal performance and longevity By preventing oil leaks, these seals help to maintain the proper lubrication levels in the system, which is essential for optimal performance and longevitycustom oil seals. This can result in improved productivity, higher quality output, and overall better performance of the equipment.
 - One of the primary functions of outer hub oil seals is to protect the wheel bearings from external elements. Wheel bearings are essential for the smooth and efficient rotation of the wheels, but they are also vulnerable to damage from dirt, water, and debris. If these contaminants were to enter the wheel bearings, they could cause them to wear out quickly and lead to costly repairs.
- In addition to their superior sealing capabilities, double lip oil seals are also easy to install and replace
 double lip oil seal. They come in a variety of sizes and materials to suit different applications, making them a versatile sealing solution for a wide range of industries.
 - The significance of the wiper system cannot be overstated
- After cleaning and inspecting, it's time to replace worn or damaged components. All seals should be replaced to ensure the cylinder operates at peak efficiency. Lubrication plays a key role in the reassembly process, reducing friction and extending the lifespan of moving parts.
- Maintenance of hydraulic shaft seals is equally important
- 3. Abrasion Resistance The high molecular weight of PU provides excellent abrasion resistance, ensuring long-lasting performance even in high-stress applications.
- 7. Reassemble the Cylinder Carefully reassemble the cylinder, making sure all components are properly aligned and tightened.
- The rubber hub seal's versatility and durability make it suitable for a variety of applications across different industries. In the automotive industry, it can be used to seal transmission systems, brake systems, and fuel lines, ensuring optimal performance and safety. In the construction industry, it can be employed in hydraulic equipment, such as pumps and valves, to prevent leaks and ensure efficient operation. In the aerospace industry, it can be utilized in aircraft engines and landing gear systems to maintain air pressure and prevent fluid loss.
-
- Routine Inspections Regularly check for signs of wear, leaks, or damage. Early detection of problems can prevent further damage and costly repairs.
- Choosing the right seal kit is equally important. Ensure that the kit is compatible with your specific bottle jack model and made from high-quality materials, such as durable rubber or polyurethane, to withstand the pressures and temperatures involved in hydraulic systems. Regularly checking and replacing worn-out seals is a proactive approach to avoiding potential accidents and unexpected breakdowns.
-
4. Lip Seals Lip seals are suitable for both dynamic and static sealing applications. They feature a lip that runs along the surface of the cylinder, creating a barrier against fluid leakage.
hydraulic ram oil seals
- One of the most significant developments in the evolution of the 40x55x8 oil seal has been the use of synthetic materials such as PTFE (polytetrafluoroethylene) and nitrile rubber. These materials offer superior chemical resistance, heat resistance, and wear resistance compared to traditional rubber or leather seals. As a result, they have become the preferred choice for high-performance applications where durability and reliability are paramount.
-
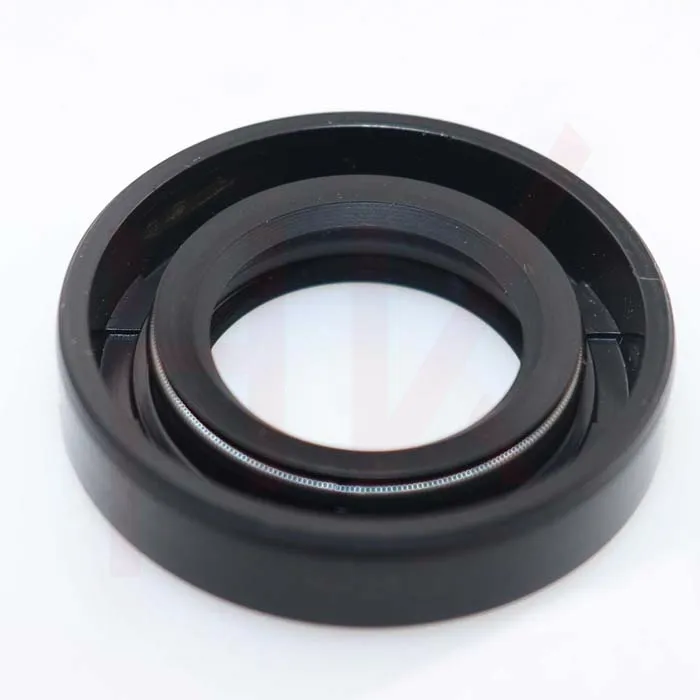
The design of an oil seal can vary, but most consist of a flexible sealing lip that makes contact with the motor shaft or housing. This contact creates a tight seal, preventing leakage. Additional features such as springs may be included to enhance the sealing effect and compensate for any wear that may occur over time.
- Understanding Hydraulic Oil Seal Sizes A Comprehensive Guide
-
Seals for Agriculture
- Combi oil seals find extensive use in a variety of industries, including automotive, aerospace, mining, and power generation
- In conclusion, seals are not just symbols of the ocean's beauty and power; they are also essential partners in maintaining the health of our planet's ecosystems and supporting the agricultural industries that feed us. By understanding and valuing their role in our world, we can work together to protect these incredible creatures and ensure their continued existence for centuries to come.
-
4. Shaft seals These seals prevent fluid from leaking along the shaft of the pump. They play a vital role in protecting the pump from contamination and maintaining the hydraulic fluid’s integrity.
-
1. Seals The primary function of seals is to prevent hydraulic fluid from leaking out of the cylinder. The most common types are O-rings, lip seals, and piston seals. Each type serves different purposes and is made from materials suited for varying pressure and temperature conditions.
- In the automotive industry, for instance, dust wiper seals are crucial in maintaining the cleanliness of hydraulic cylinders, steering systems, and suspension components. They protect these systems from road debris, dust, and moisture, ensuring smooth operation and reducing maintenance needs They protect these systems from road debris, dust, and moisture, ensuring smooth operation and reducing maintenance needs
 They protect these systems from road debris, dust, and moisture, ensuring smooth operation and reducing maintenance needs They protect these systems from road debris, dust, and moisture, ensuring smooth operation and reducing maintenance needsdust wiper seal. In the aerospace sector, they are used in aircraft landing gear, preventing contaminants from entering sensitive hydraulic and pneumatic systems.
 - One of the key functions of a dust seal is to protect the internal components of the hydraulic cylinder from wear and tear. Dust and dirt can cause abrasion and corrosion, which can compromise the integrity of the cylinder and lead to leaks or malfunctions. By providing a barrier between the outside environment and the internal components, dust seals help extend the lifespan of the hydraulic cylinder and maximize its efficiency.
- Angular Contact Ball Bearings Product Guide and Specifications Overview
- 28580 bearing
- weizi bearing bearing ball deep groove
- Roulements à contact angulaire - Performance et Précision
- weizi bearing bearing pressing machine
- weizi bearing cylindrical roller bearing supplier
- weizi bearing nj 206 bearing
- weizi bearing 23244 bearing
- Similar title to 4T L44649 Bearing can be Replacement Bearing for 4T L44649, High Quality and Durable
- Design and Applications of Single Thrust Ball Bearings in Machinery Systems