exposed ceiling grid
-
3. Lightweight and Easy Installation The lightweight nature of PVC makes installation a breeze. The grid framework can be easily mounted, and the panels can be fitted quickly without the need for heavy tools or extensive labor. This not only reduces installation time but also minimizes disruption to the existing space.
pvc grid false ceiling
...
Links
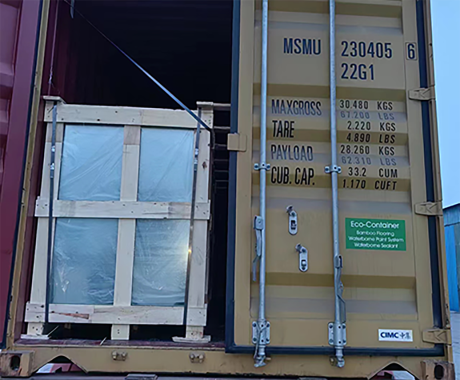
- Finally, the location of the manufacturer and the shipping costs can also have an impact on the price per square foot of tempered glass. Manufacturers located in regions with higher labor and production costs may charge higher prices for their products. Additionally, shipping costs can vary depending on the distance between the manufacturer and the destination, so it's essential to consider these factors when comparing prices.
- Each float glass type offers unique benefits that can be leveraged in various architectural designs. For instance, clear float glass is widely used in curtain walls, where its transparency allows for uninterrupted views and natural light penetration. Low-E glass is preferred in commercial buildings and greenhouses due to its energy-saving properties. Reflective glass is commonly found in high-rise buildings and luxury homes, where light control and privacy are paramount. Textured glass adds depth and character to interior spaces, while tempered glass enhances safety in high-traffic areas and public facilities.
-
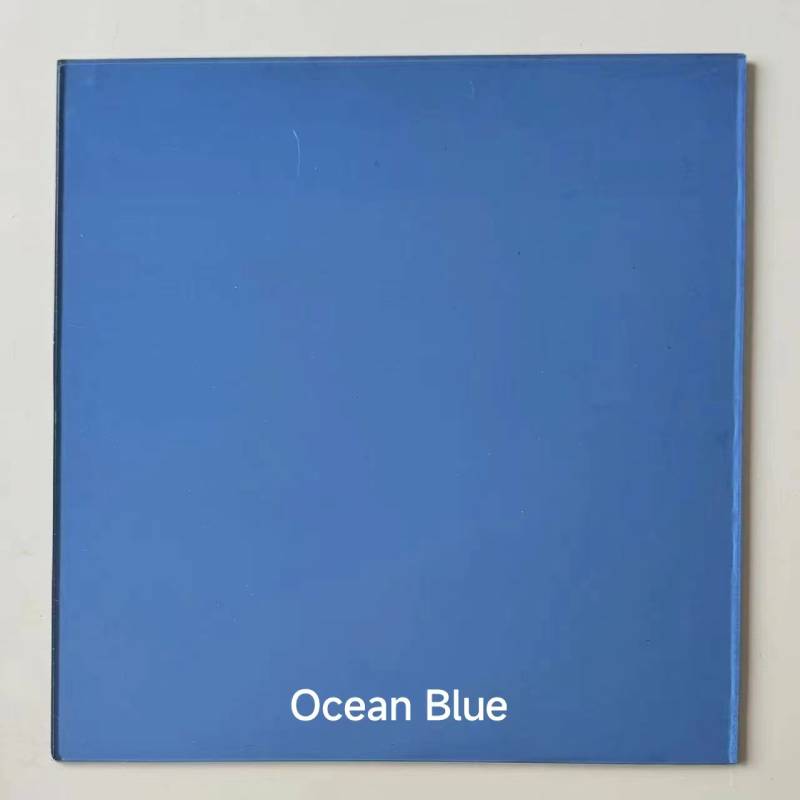
When considering the price of blue reflective glass, it is important to factor in the overall value it can bring to a project. While it may have a higher upfront cost compared to traditional glass options, the aesthetic appeal, energy efficiency, and durability of reflective glass can make it a worthwhile investment in the long run.
- Beyond its practical applications, automatic frosted glass is also environmentally friendly. By regulating the amount of sunlight that enters a space, automatic frosted glass can help reduce heating and cooling costs, making it a sustainable choice for both commercial and residential buildings. The energy-saving properties of automatic frosted glass make it a valuable investment for any eco-conscious consumer.
- Tinted Glass Suppliers A Comprehensive Guide
- Perhaps one of the most significant benefits of aluminum mirror looking trim is its ability to enhance the overall aesthetic of a space. The reflective surface of the trim bounces light around the room, creating a warm and inviting atmosphere. It also helps to make small spaces feel larger by creating the illusion of additional depth and width.
- Bronze frosted glass, a captivating and versatile material, seamlessly combines the rich, timeless appeal of bronze with the subtle sophistication of frosted glass. This unique combination not only adds an aesthetic flair to any space but also offers a practical solution for maintaining privacy without sacrificing style.
- When most people think of mirrors, they think of a simple reflective surface that allows us to check our appearance. However, mirrors are actually complex pieces of technology that involve several layers of materials, including a pane of glass.
- Lastly, there's the 'Triple Silver' Low-E glass, which offers the highest level of energy efficiency. Its three layers of silver coating enable superior insulation, making it perfect for extreme weather conditions.
- In addition to its safety features, tempered glass is also highly resistant to thermal stress, making it suitable for use in applications exposed to high temperatures, such as ovens, stovetops, and fireplace doors
-
There are many different techniques that can be used to create artistic glass and mirror pieces
. One of the most common is etching, which involves using acid or sandblasting to create intricate patterns and designs on the surface of the glass. This can be done to create anything from simple, geometric patterns to elaborate, lifelike images.
- In conclusion, energy-efficient low-e glass represents a critical step forward in the quest for sustainable architecture. Its ability to save energy, enhance comfort, and protect against UV damage makes it an invaluable asset in modern construction projects. As we continue to face challenges related to climate change and resource conservation, investing in energy-efficient materials like low-e glass will undoubtedly play a crucial role in shaping a more sustainable future for our built environment.
- Mirror glass material is also commonly used in interior design and architecture. It can be used to create decorative wall panels, furniture, and other design elements that add a touch of sophistication and elegance to any space. The reflective surface of mirror glass material can make a room appear brighter and more spacious, creating a sense of luxury and glamour.
- Frosted Pink Glass A Timeless Beauty
- Moreover, the floating installation technique used for these glass panels enhances the perception of space
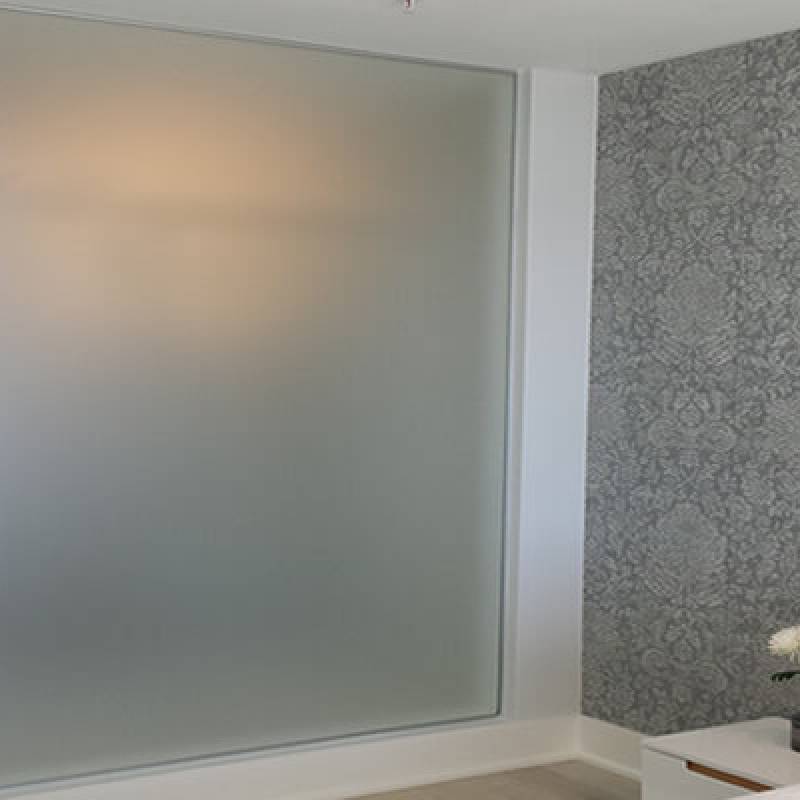
-
While some natural glass does exist in nature, such as black stone and talc, the vast majority of glass is fired by humans at high temperatures. As far as we know, the origin of glass dates back to the Bronze Age of Mesopotamia. About 4,000 years ago, humans began melting silica (sand or crushed stone) and mixing it with small amounts of limestone and soda ash. According to Pliny, the invention of glass was a happy accident: the Roman historian suggested that glass was accidentally acquired by Phoenician sailors in the course of a beach picnic, but since there were no flames at the time capable of reaching temperatures high enough to melt sand, this view is questionable. Contemporary historians believe that glass may have been discovered in the process of making ceramics or working metals. These two processes require higher firing temperatures and longer firing times than baking bread or roasted leg of lamb.
- This method of glass decoration was not only about aesthetics but also about status. Homeowners who could afford such luxurious decorations were seen as individuals of taste and wealth Homeowners who could afford such luxurious decorations were seen as individuals of taste and wealth
 Homeowners who could afford such luxurious decorations were seen as individuals of taste and wealth Homeowners who could afford such luxurious decorations were seen as individuals of taste and wealthvictorian acid etched glass. The very fact that acid-etched glass required considerable time and skill to produce made it a symbol of prestige.
 - As the demand for ultra clear glass increases, it is important to choose a reliable and reputable supplier to ensure the highest quality products

ultra clear glass supplier. A reputable ultra clear glass supplier will use advanced manufacturing processes and cutting-edge technology to produce glass that meets the highest standards of clarity and durability. They will also offer a range of customization options, including different thicknesses, sizes, and finishes to suit the specific requirements of your project. - Types of Tinted Glass Enhancing Aesthetics and Functionality
-
Conclusion
- The silver bamboo mirror is not just a decorative object; it is a cultural artifact that carries centuries of history and tradition. In Chinese culture, the bamboo plant is revered for its resilience and versatility, making it a popular symbol in art and design. The silver bamboo mirror captures the essence of this cultural symbolism, making it a valuable and cherished piece in any collection.
- Beveled low-e glass offers numerous advantages over traditional flat glass
- In conclusion, thick tempered glass is an essential component in our built environment, offering a blend of safety, strength, and style. Whether it's protecting buildings against natural elements, safeguarding passengers in vehicles, or enhancing the beauty of homes and public spaces, this resilient form of glass is a testament to human innovation and engineering prowess.
- When selecting an ultra clear glass supplier, it is essential to consider factors such as the supplier's reputation, experience, and customer service. Look for suppliers who have a proven track record of delivering high-quality products and have a strong understanding of the industry standards and regulations. Additionally, choose a supplier who is responsive to your needs and can provide expert advice and guidance throughout the process.
- For interior designers, frosted glass is a versatile medium that can be wielded to craft partitions, decorative panels, or even artistic installations
- Iguana Units A Novel Approach to Classroom Learning
-
- Clear glass, a material as transparent as water, is a staple in our daily lives. It allows light to pass through unobstructed, creating a sense of openness and connection with the environment around us. However, there are times when we may desire a more subtle and elegant look for our windows or glass surfaces. This is where frosted glass comes into play.
- For interior designers, frosted glass is a versatile medium that can be wielded to craft partitions, decorative panels, or even artistic installations
- Aluminum Wall Mirrors Enhancing Your Home Decor
-
- Automotive Industry Tinted tempered glass is widely used in vehicles, where it enhances passenger comfort by reducing glare and heat absorption.
- As the light danced upon its surface, the burnished silver mirror seemed to come alive, its reflections shifting and changing like the tides of time
- In addition to being cost-effective, 4mm float glass is also versatile and durable. It can be used in a variety of applications, from windows and doors to glass partitions and shelves. Its smooth surface and clarity make it an attractive choice for both residential and commercial projects

4mm float glass price. - In conclusion, tinted glass is an excellent solution for those seeking to enhance privacy and style in their homes and offices. Its ability to provide an added layer of security, coupled with its aesthetic appeal and energy-efficiency, makes it a popular choice among homeowners, businesses, and architects alike. So why not consider investing in tinted glass for your next project?
- Exploring the World of 2mm Float Glass Suppliers
- In today's fast-paced business environment, inventory management plays a crucial role in maintaining operational efficiency and financial stability. One key aspect of effective inventory management is the concept of average replacement cost. This method of accounting for inventory helps businesses to accurately measure the cost of goods sold and make informed decisions regarding their stock levels.
- In conclusion, the humble igu window glass is much more than a transparent panel separating us from the outdoors. It is a dynamic entity that influences our comfort, well-being, and perception of the world around us. As we continue to evolve and adapt to new technologies and environmental challenges, the window glass remains a constant companion, illuminating our spaces and inspiring our minds.
-
Aside from its visual and practical benefits, tinted black glass also possesses symbolic significance. It represents a barrier—a line between the exterior world and personal space. This characteristic can evoke feelings of mystery and intrigue, encouraging a sense of curiosity from those outside looking in. As a reflective surface, black glass can also create an interplay with light, casting dramatic shadows and reflections that enhance the ambiance of a room.
- In conclusion, the silver-lined mirror is more than a simple reflective object; it is an intersection of art and utility, a bearer of both visual and symbolic significance. As light dances along its silver edges, it offers a gentle invitation to pause, reflect, and appreciate the nuances of life that are often overlooked in our hurried routines. In the silver-lined mirror, we find not only our reflection but also a glimpse into the enduring elegance of understated luxury.
- 1. Windows Grey low E glass is commonly used in windows to improve energy efficiency, reduce heat loss in winter and heat gain in summer, and provide privacy.
-
The functionality of antique silver handheld mirrors cannot be overlooked. In the past, these mirrors were essential items for women, used for grooming and self-examination in a time when public and private lives were more distinctly separated. They provided a sense of agency and individuality. Today, while many women may rely on modern bathroom mirrors and handheld compact mirrors made from various materials, the antique silver mirror possesses a special allure that modern counterparts cannot replicate. Using such a mirror can evoke feelings of nostalgia, elegance, and even privilege, as if the user is stepping into a different time and space where grooming was an art form.
-
The US market is estimated at $80.6 billion, while China is expected to grow at a CAGR of 7.2%
-
For collectors, antique silver handheld mirrors represent a journey through history, art, and personal expression. Each acquisition is an adventure, a search for the perfect piece that speaks to the collector's taste and admiration for craftsmanship. Whether one is a seasoned antique collector or a casual admirer, these mirrors invite exploration and appreciation.
- One of the most common uses of tempered glass is in the manufacturing of cell phone screens. The use of tempered glass screens helps protect the fragile electronic components of a phone from damage caused by impact or scratching. Tempered glass screens are also more resistant to shattering, which can help prevent injuries from broken glass.
- Once the measurements are set, specialized glass cutting tools come into play. Diamond-tipped wheels or hydraulic saws are used to score the surface of the glass, creating a controlled line of weakness. The glass is then carefully fractured along this score, either by hand or through a controlled breaking process The glass is then carefully fractured along this score, either by hand or through a controlled breaking process
 The glass is then carefully fractured along this score, either by hand or through a controlled breaking process The glass is then carefully fractured along this score, either by hand or through a controlled breaking process3mm float glass cut to size. The result is a clean, precise cut that maintains the inherent qualities of the float glass.
 - Anti-glare glass sheet is a revolutionary product that has transformed the way we interact with glass surfaces. This innovative technology works by reducing the reflection of light, making it easier to view the display or contents behind the glass. This has a wide range of applications in industries like automotive, architecture, and electronics.
- The Smoked Frosted Glass
- Silver mirror, a term that resonates with elegance and mystique, is an exquisite representation of ancient Chinese craftsmanship. It not only symbolizes the refinement of Chinese artistry but also reflects the rich cultural heritage of China. This article delves into the world of 'Silver Mirror China', a testament to the country's metallurgical prowess and aesthetic sensibilities.
- There are numerous benefits to using Low-E glass in buildings
-
In contemporary life, most of us rely on glass more than we think: glass is not only used in our windshields and Windows, but also in the optical cables beneath our feet, which are of great significance. Now we look at each other through a glass screen, Mauro said in an interview. It made me acutely aware of the fragility of our connection. We spoke via Zoom, a remote online video conferencing software. Mauro continued: Without glass, we would not have tablets, mobile phones, a range of information terminals. All of this is transmitted by light signals using ultra-fine glass wires that we call fiber optics. Without glass, he says, we wouldn't be able to appreciate modern architecture, artificial light, natural light, cars, and most importantly, such a wealth of information.
- Angular Contact Ball Bearings Product Guide and Specifications Overview
- 28580 bearing
- weizi bearing bearing ball deep groove
- Roulements à contact angulaire - Performance et Précision
- weizi bearing bearing pressing machine
- weizi bearing cylindrical roller bearing supplier
- weizi bearing nj 206 bearing
- weizi bearing 23244 bearing
- Similar title to 4T L44649 Bearing can be Replacement Bearing for 4T L44649, High Quality and Durable
- Design and Applications of Single Thrust Ball Bearings in Machinery Systems