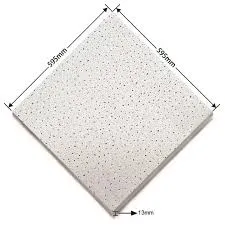
cheap ceiling tiles 600x600
Popular articles

In summary, a 12x12 ceiling access panel is an essential element in the design and maintenance of both residential and commercial buildings. Its practical applications enhance accessibility to critical systems while ensuring minimal disruption to the aesthetics and integrity of the building. As modern buildings continue to evolve, incorporating efficient access solutions like ceiling access panels will remain vital for successful facility management and maintenance. With the right panel in place, property owners and maintenance teams can ensure that accessing vital systems is as hassle-free as possible, ultimately leading to a safer and more efficient environment.
5. Inserting PVC Tiles Finally, insert the PVC tiles into the grid frame. Ensure they fit snugly and make any adjustments as needed.
3. Versatility The 600x600 dimensions make these panels compatible with most standard ceiling grid systems, making them suitable for a wide range of applications, including offices, hospitals, schools, and residential buildings. Their versatility allows architects and builders to incorporate them easily into their designs.
ceiling access panel 600x600
As interior design continues to prioritize sustainability, performance, and style, PVC gypsum tiles emerge as a frontrunner in modern materials. Their combination of aesthetic appeal, durability, and practicality makes them an excellent choice for any interior project. Whether you are a homeowner looking to renovate or a designer seeking innovative materials, incorporating PVC gypsum tiles into your design can lead to stunning and functional results. As the industry evolves, these tiles will likely remain a popular choice, reflecting both modern needs and timeless elegance.
To keep your drywall ceiling hatch in optimal condition, regular inspections are necessary. Check for any signs of wear or damage, ensure hinges operate smoothly, and make sure the hatch opens easily. Keeping the area clear of obstructions will also help maintain accessibility.
6. Install the Panel

 For instance, in deep mines where the drilling depth is significant, high-strength, fatigue-resistant drill rods are preferred to counteract the increased stress and strain For instance, in deep mines where the drilling depth is significant, high-strength, fatigue-resistant drill rods are preferred to counteract the increased stress and strain
 Additionally, the material is resistant to UV rays, ensuring minimal degradation over time when exposed to outdoor elements Additionally, the material is resistant to UV rays, ensuring minimal degradation over time when exposed to outdoor elements
 Modern bits incorporate sophisticated geometries, innovative cutting structures, and advanced coatings to enhance drilling efficiency, reduce wear, and prolong service life Modern bits incorporate sophisticated geometries, innovative cutting structures, and advanced coatings to enhance drilling efficiency, reduce wear, and prolong service life