


- Afrikaans
- Albanian
- Amharic
- Arabic
- Armenian
- Azerbaijani
- Basque
- Belarusian
- Bengali
- Bosnian
- Bulgarian
- Catalan
- Cebuano
- Corsican
- Croatian
- Czech
- Danish
- Dutch
- English
- Esperanto
- Estonian
- French
- German
- Greek
- Hindi
- Indonesian
- irish
- Italian
- Japanese
- Korean
- Lao
- Malay
- Myanmar
- Norwegian
- Norwegian
- Polish
- Portuguese
- Romanian
- Russian
- Serbian
- Spanish
- Swedish
- Thai
- Turkish
- Ukrainian
- Uzbek
- Vietnamese
Nov . 16, 2024 01:41 Back to list
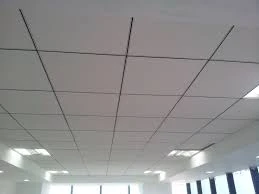
how to install t bar ceiling grid
How to Install T-Bar Ceiling Grid A Step-by-Step Guide
Installing a T-bar ceiling grid can transform any space, providing a clean, modern look and allowing for easy access to electrical and plumbing systems above. Whether you're finishing a basement, renovating an office, or updating a workshop, a suspended ceiling can enhance both aesthetics and functionality. This guide will walk you through the installation process of a T-bar ceiling grid.
Materials Needed
Before you begin, ensure you have all necessary materials and tools on hand
- T-bar ceiling grid components (main tees, cross tees, edge trim) - Ceiling tiles - Suspension wire (usually 12-gauge) - Hangers or anchors - Level - Measuring tape - Chalk line - Safety goggles - Drill - Wire cutters - Hammer
Step 1 Planning the Layout
The first step in any installation project is proper planning. Start by measuring the dimensions of the room where you will be installing the T-bar ceiling grid. Determine the height of the ceiling and decide on the drop height for your suspended ceiling. It’s important to account for any fixtures (like lights or vents) that may require additional space.
Once you have your measurements, sketch a layout of the grid. Generally, the main tees should be spaced every 4 feet and cross tees should be installed every 2 feet, creating a grid that allows for standard ceiling tiles (typically 2x2 or 2x4 feet).
Step 2 Marking the Reference Line
Using a chalk line, mark a reference line around the perimeter of the room where the bottom edge of your T-bar will rest. This line represents the drop point of your ceiling. Be sure it is level, as this will guide your entire installation.
Step 3 Installing the Suspension System
The suspended ceiling grid is supported by a series of wires anchored to the existing ceiling. Install anchor points where needed, either by drilling into a joist, using toggle bolts, or utilizing other secure fastening methods depending on your ceiling type.
how to install t bar ceiling grid
Attach the suspension wires to these anchors and measure down to the reference line marked earlier. Cut the wires to the desired length (don’t forget to leave some slack), and secure them to the anchoring points. Use a level to ensure that everything is straight.
Step 4 Installing Main Tees
Once the suspension system is ready, it’s time to install the main tees. Start at one end of the room and position the first main tee along your reference line, ensuring that it is level. Use the attached wires to secure it in place by twisting the wire around the tee and back to the anchor. Repeat this process along the whole length of the room, making sure each tee is aligned and level.
Step 5 Adding Cross Tees
With the main tees installed, it’s time to insert the cross tees. Place the cross tees into the slots of the main tees, creating a grid. This grid structure should now allow for standard ceiling tile placement. Adjust any cross tees as needed to ensure they fit snugly.
Step 6 Installing Ceiling Tiles
Now comes the fun part—installing the ceiling tiles! Simply lay them into the grid created by the main and cross tees. Ensure that each tile sits uniformly and securely in the grid.
Step 7 Finishing Touches
Finally, inspect the entire ceiling for any adjustments. If you have edge trim pieces, install those to cover the edges and give your ceiling a finished look. Ensure that all tiles are positioned correctly, aligning with the grid beneath for a clean appearance.
Conclusion
Installing a T-bar ceiling grid can seem daunting, but by following the steps outlined above, you can create a beautiful and functional ceiling in no time. With the right materials, tools, and a bit of patience, you’ll enjoy the benefits of a suspended ceiling that not only enhances the aesthetic of your space but also offers practical advantages. Happy installing!
-
PVC Laminated Gypsum Ceiling Board OverviewNewsApr.11,2025
-
Mineral Fiber Ceiling Tiles Price Analysis and ComparisonsNewsApr.11,2025
-
Crafts of Mineral Fiber Ceiling Tile ManufacturingNewsApr.11,2025
-
Difference Between Gypsum and PVC CeilingNewsApr.11,2025
-
An Overview of Mineral Fiber Ceiling TilesNewsApr.11,2025
-
Advantages of PVC Gypsum CeilingNewsApr.08,2025


