


- Afrikaans
- Albanian
- Amharic
- Arabic
- Armenian
- Azerbaijani
- Basque
- Belarusian
- Bengali
- Bosnian
- Bulgarian
- Catalan
- Cebuano
- Corsican
- Croatian
- Czech
- Danish
- Dutch
- English
- Esperanto
- Estonian
- French
- German
- Greek
- Hindi
- Indonesian
- irish
- Italian
- Japanese
- Korean
- Lao
- Malay
- Myanmar
- Norwegian
- Norwegian
- Polish
- Portuguese
- Romanian
- Russian
- Serbian
- Spanish
- Swedish
- Thai
- Turkish
- Ukrainian
- Uzbek
- Vietnamese
दिसम्बर . 18, 2024 08:47 Back to list
how to make access panel in ceiling
How to Make an Access Panel in the Ceiling
Creating an access panel in your ceiling is an essential task for many homeowners and DIY enthusiasts. An access panel provides convenient entry to areas such as plumbing, electrical systems, or HVAC units, making maintenance and repairs much more manageable. In this guide, we will cover the materials needed, the step-by-step process, and some tips to ensure a successful installation.
Materials Needed
Before you start, gather the following materials
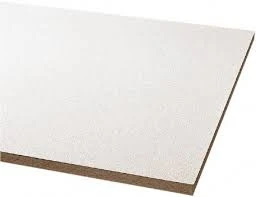
1. Access Panel Kit You can purchase pre-made access panels in various sizes. Choose one that suits your needs. 2. Drywall If you're making your own panel, drywall will be necessary. 3. Wood Framing 2x4 lumber for creating a frame, if required. 4. Screws and Anchors For securing the panel in place. 5. Utility Knife For cutting drywall. 6. T-square or Straight Edge To ensure straight cuts. 7. Stud Finder To locate the joists in the ceiling. 8. Tape Measure To measure your panel size accurately. 9. Level To ensure that the panel is installed evenly. 10. Paint or Finish To match the surrounding ceiling, if desired.
Step-by-Step Process
1. Locate the Area Identify the area where you want to install the access panel. Use a stud finder to ensure that you are not cutting through joists or electrical wiring.
2. Measure the Dimensions Decide on the size of the access panel you'll need based on the space and the equipment you'll need to access. Make sure to leave enough room around the area for easy access.
3. Cut the Opening Using a utility knife, carefully cut the drywall in the desired shape and size. If you’re using existing drywall, ensure you make clean, straight cuts for a proper fit.
how to make access panel in ceiling
4. Create a Frame If necessary, build a frame out of 2x4 lumber around the opening to support the panel. Secure the frame to the ceiling joists to provide stability.
5. Install the Access Panel If you purchased a pre-made access panel, fit it into the opening. If you made your panel from drywall, cut another piece of drywall to the correct size and attach it using screws to the frame. Ensure the edges are flush with the surrounding ceiling.
6. Secure the Panel For a pre-made panel, follow the manufacturer’s instructions for securing it. For the DIY panel, use screws or anchors to hold it in place.
7. Finishing Touches Once the panel is securely in place, you may want to tape and mud the seams if you’ve created a panel from drywall. This will create a seamless look. Sand it down once dry and paint to match the surrounding ceiling.
8. Test the Access Open and close the panel to ensure it functions correctly. It should be easy to navigate and provide ample room for reaching the fixtures or systems behind it.
Additional Tips
- Accessibility When choosing the panel’s location, consider future access needs. Make sure the area remains unobstructed after installation. - Aesthetics If you are painting the ceiling, take your time to paint the access panel the same color to camouflage it against the ceiling. - Maintenance Regularly check the panel for secure fit and make sure it opens and closes without resistance.
Installing an access panel in the ceiling is a relatively straightforward task that can enhance the functionality of your home. With the right materials and careful execution, you can create an efficient access point that will serve you well for years to come. Whether you're tackling this project for maintenance or as part of a renovation, this guide should set you on the right path. Happy DIY-ing!
-
Transform Interiors with PVC Gypsum Ceiling: A Stylish, Durable, and Moisture-Resistant SolutionNewsMay.19,2025
-
The Smart Interior Upgrade: Discover the Durability and Versatility of Gypsum Ceiling Access Panel SolutionsNewsMay.19,2025
-
The Smart Choice for Interior Design: Discover the Value of PVC Gypsum Ceiling SolutionsNewsMay.19,2025
-
Mineral Fiber Ceiling Tiles: The Smart Blend of Performance and AestheticsNewsMay.19,2025
-
Mineral Fiber Ceiling Tiles: The Superior Choice Over Gypsum for Sound and Fire SafetyNewsMay.19,2025
-
Mineral Fiber Ceiling Tiles: Eco-Friendly Strength and Style for Every CeilingNewsMay.19,2025


