- Afrikaans
- Albanian
- Amharic
- Arabic
- Armenian
- Azerbaijani
- Basque
- Belarusian
- Bengali
- Bosnian
- Bulgarian
- Catalan
- Cebuano
- Corsican
- Croatian
- Czech
- Danish
- Dutch
- English
- Esperanto
- Estonian
- French
- German
- Greek
- Hindi
- Indonesian
- irish
- Italian
- Japanese
- Korean
- Lao
- Malay
- Myanmar
- Norwegian
- Norwegian
- Polish
- Portuguese
- Romanian
- Russian
- Serbian
- Spanish
- Swedish
- Thai
- Turkish
- Ukrainian
- Uzbek
- Vietnamese
Դկտ . 26, 2024 00:57 Back to list
Steps to Properly Install an Access Panel in a Drywall Ceiling
How to Install an Access Panel in a Drywall Ceiling
Installing an access panel in a drywall ceiling is a crucial task that can provide easy access to plumbing, electrical wiring, or other essential utilities hidden above your ceiling. This article will guide you through the steps of installing an access panel, ensuring a seamless integration into your ceiling while maintaining a professional appearance.
Tools and Materials Needed
Before you begin, gather the following tools and materials
- Access panel kit (the size will depend on your needs) - Stud finder - Drywall saw or utility knife - Measuring tape - Level - Pencil - Screwdriver or power drill - Drywall screws - Joint compound (optional for a finished look) - Sandpaper (optional for smoothing) - Paint (optional for finishing)
Step 1 Choose the Location
1. Identify Purpose Determine why you need access to the ceiling space. This could be for maintenance of plumbing, electrical components, or simply for inspection. 2. Locate Joists Use a stud finder to locate ceiling joists. It's crucial to avoid cutting through these, as they provide structural support. 3. Mark the Area Once you identify the joists, choose a location that is easily accessible and mark the area with a pencil, noting where you’ll cut.
Step 2 Measure and Cut the Opening
1. Measure the Access Panel Most access panels come with instructions on the size needed for the opening. Make sure to double-check these dimensions.
2. Cut the Drywall Using the drywall saw or utility knife, cut along the lines you marked. Be careful to cut only the drywall and avoid damaging any pipes or electrical wires that may be behind it.
3. Clean the Edges Ensure the edges of the cutout are clean and straight. This will make installation easier and help achieve a finished look.
how to install access panel in drywall ceiling

Step 3 Install the Access Panel
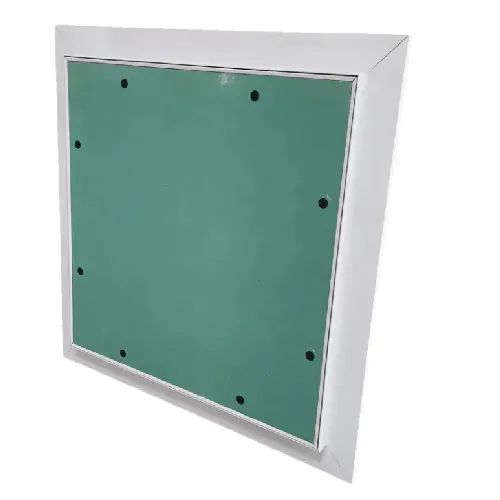
1. Position the Panel With the opening cut, position the access panel into the framed area. Make sure it fits snugly within the cutout.
2. Secure the Panel If your access panel is framed, you might need to attach it to the ceiling using drywall screws. Align the frame flush against the ceiling and insert screws into the pre-drilled holes.
3. Check for Level Use a level to ensure that the panel is straight. Adjust as necessary before tightening the screws completely.
Step 4 Finish the Installation
1. Joint Compound If you want a seamless finish, apply joint compound around the edges of the access panel to fill any gaps between the panel and the drywall. This step is optional, but it can give a more polished look.
2. Sand and Paint Once the joint compound has dried (if used), sand it down smoothly. After sanding, you can paint the area to match the ceiling.
3. Final Inspection Gently open and close the access panel to ensure functionality. Make sure there are no obstructions that could hinder access in the future.
Conclusion
Installing an access panel in a drywall ceiling is a manageable project that can enhance the practicality of your space. By following these steps, you can ensure that the panel is installed correctly and appears professional. Remember to take your time during the measurement and cutting process, as precision is key to a clean installation. With the right tools and careful planning, you’ll achieve a functional and aesthetically pleasing result that allows for easy access to the utilities above your ceiling. Whether for maintenance, inspections, or simple upgrades, an access panel can prove to be a valuable addition to your home.
-
Transform Interiors with PVC Gypsum Ceiling: A Stylish, Durable, and Moisture-Resistant SolutionNewsMay.19,2025
-
The Smart Interior Upgrade: Discover the Durability and Versatility of Gypsum Ceiling Access Panel SolutionsNewsMay.19,2025
-
The Smart Choice for Interior Design: Discover the Value of PVC Gypsum Ceiling SolutionsNewsMay.19,2025
-
Mineral Fiber Ceiling Tiles: The Smart Blend of Performance and AestheticsNewsMay.19,2025
-
Mineral Fiber Ceiling Tiles: The Superior Choice Over Gypsum for Sound and Fire SafetyNewsMay.19,2025
-
Mineral Fiber Ceiling Tiles: Eco-Friendly Strength and Style for Every CeilingNewsMay.19,2025


